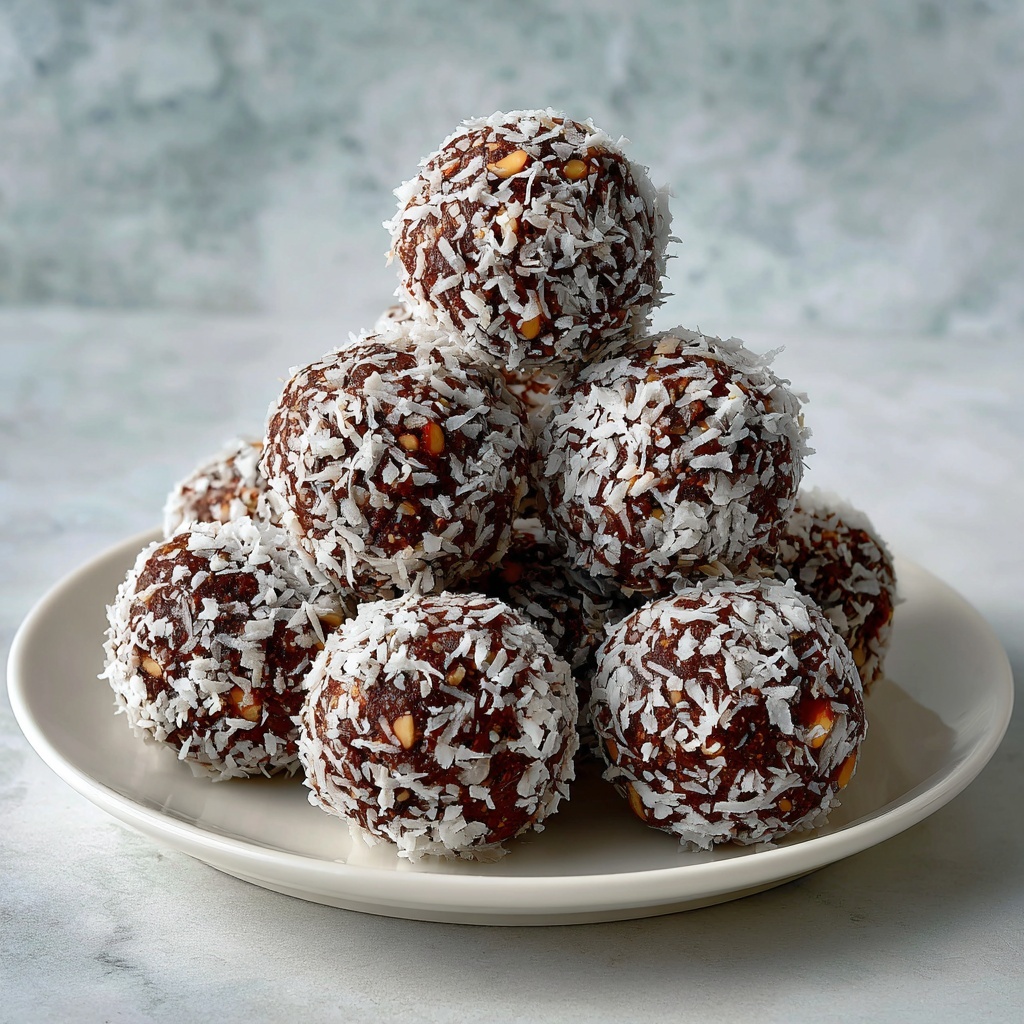
If you’re craving a sweet, wholesome snack that fits perfectly into your plant-based lifestyle, you’re going to love this Vegan Gluten-Free Bliss Balls Recipe. These little gems pack a punch of rich flavors and satisfying textures without any gluten or animal products. With naturally sweet dates, nutty almond flour, and a hint of cocoa, each bite feels like a decadent treat that’s also nourishing and easy to whip up. Perfect for a quick energy boost or a thoughtful gift, these bliss balls have become one of my absolute favorites to share with friends and family who appreciate simplicity and indulgence in one bite.
Ingredients You’ll Need
Every ingredient in this Vegan Gluten-Free Bliss Balls Recipe is simple yet essential, working together to create the perfect balance of taste, texture, and nutrition. From the sticky sweetness of dates to the crunch of chopped nuts, each component adds its own special touch that will make these bliss balls unforgettable.
- 1 cup dates, pitted: Naturally sweet and sticky, perfect for binding the mixture without any added sugar.
- 1 cup almond flour: Adds a gentle nuttiness and provides the gluten-free base to these bliss balls.
- 1/2 cup cocoa powder: Brings a rich chocolate flavor that makes these treats feel indulgent and luxurious.
- 1/4 cup maple syrup: Adds a subtle, natural sweetness and moisture to keep the balls soft and chewy.
- 1/4 cup coconut oil, melted: Enhances the texture by adding a bit of healthy fat and helps everything stick together.
- 1/2 cup shredded coconut: Adds a tropical flair and a delicate chewy texture that complements the other ingredients.
- 1/2 cup chopped nuts: For crunch and a deeper nutty flavor—choose your favorite like walnuts, pecans, or almonds.
How to Make Vegan Gluten-Free Bliss Balls Recipe
Step 1: Blend the Dates
Start by placing the pitted dates in a food processor and blending until you get a smooth, sticky paste. This step is key because the dates act as the natural glue that holds everything together while adding wholesome sweetness.
Step 2: Combine the Dry and Wet Ingredients
Add the almond flour, cocoa powder, maple syrup, and melted coconut oil to the date paste. Blend again until the ingredients come together in a thick, uniform mixture. The almond flour provides the perfect texture, while the cocoa powder transforms these bites into chocolatey treasures.
Step 3: Stir in the Coconut and Nuts
Remove the mixture from the food processor and gently fold in the shredded coconut and chopped nuts. This adds a delightful contrast of chewy and crunchy that makes these bliss balls so enjoyable. Be careful not to over-mix to maintain those lovely textures.
Step 4: Shape into Small Balls
Using your hands, roll the mixture into small, bite-sized balls. This is the most fun part—getting a little hands-on and seeing these little delights come to life. Aim for uniform sizes so they chill evenly.
Step 5: Chill and Set
Place the formed bliss balls on a baking sheet and pop them into the fridge for at least 30 minutes. This chilling step helps them firm up and develop their full flavor. Once set, they’re ready to enjoy or store for later.
How to Serve Vegan Gluten-Free Bliss Balls Recipe
Garnishes
Sprinkle a little extra shredded coconut, cocoa powder dust, or a few chopped nuts on top for a beautiful finishing touch. This not only enhances the look but gives an extra hint of flavor and texture right at first bite.
Side Dishes
These bliss balls are wonderfully versatile. Serve them alongside a hot cup of herbal tea or your favorite plant-based latte. They also pair perfectly with a fresh fruit salad for a balanced, naturally sweet snack experience.
Creative Ways to Present
If you’re offering these as gifts or at a gathering, arrange them in mini cupcake liners or on a decorative platter lined with parchment. You can even roll some in crushed nuts or cacao nibs for a colorful, enticing variation that’ll wow your guests.
Make Ahead and Storage
Storing Leftovers
Keep any leftovers in an airtight container in the refrigerator, where they will stay fresh and firm for up to one week. This makes them a fantastic grab-and-go snack whenever you need a quick energy lift.
Freezing
If you want to keep your bliss balls longer, freeze them in a single layer on a baking sheet first, then transfer to a freezer-safe bag or container. They will keep well for up to three months, so you can enjoy this Vegan Gluten-Free Bliss Balls Recipe anytime the craving strikes.
Reheating
Because these bliss balls are best enjoyed cold or at room temperature, no reheating is necessary. Just let frozen bliss balls thaw for a few minutes on the counter before eating, and they’ll be just right every time.
FAQs
Can I substitute the almond flour for another flour?
Absolutely! You can use other nut flours like cashew or hazelnut flour to maintain that rich nutty flavor. Just keep it gluten-free to preserve the integrity of the recipe.
Are these bliss balls suitable for kids?
Yes! Kids tend to love the naturally sweet and chewy texture—plus, parents appreciate the wholesome ingredients and no refined sugar.
Can I add protein powder to this recipe?
Definitely, adding a scoop of your favorite plant-based protein powder can boost the nutrition and make these an even more satisfying snack.
How long do these bliss balls last at room temperature?
Due to the fresh ingredients and coconut oil, it’s best to enjoy them within a day or two if kept at room temperature. Refrigeration is ideal for longer freshness.
Can I use dried fruits other than dates?
While dates are ideal for their sticky texture, you can try dried figs or apricots, but you might need to adjust the quantity or add a bit more coconut oil for proper binding.
Final Thoughts
Making the Vegan Gluten-Free Bliss Balls Recipe is like discovering a little magic in your kitchen. The ease of blending simple ingredients into tasty, nourishing bites is incredibly satisfying. I truly hope you give this recipe a try—you might just find your new favorite snack that’s perfect for any time of day and sure to bring a smile to your face every single time.
Print
Vegan Gluten-Free Bliss Balls Recipe
- Prep Time: 15 minutes
- Cook Time: 0 minutes
- Total Time: 45 minutes
- Yield: 20 servings
- Category: Snack
- Method: No-Cook
- Cuisine: Vegan, Gluten Free
- Diet: Vegan
Description
These vegan and gluten-free Bliss Balls are irresistibly delicious, combining the natural sweetness of dates with rich cocoa, crunchy nuts, and shredded coconut. Perfect as a healthy snack or dessert, they are easy to make with no baking required and offer a delightful energy boost.
Ingredients
Dry Ingredients
- 1 cup dates, pitted
- 1 cup almond flour
- 1/2 cup cocoa powder
- 1/2 cup shredded coconut
- 1/2 cup chopped nuts
Wet Ingredients
- 1/4 cup maple syrup
- 1/4 cup coconut oil, melted
Instructions
- Blend Dates: In a food processor, blend the pitted dates until they form a smooth paste. This will act as the natural sweetener and binding agent for the bliss balls.
- Combine Ingredients: Add almond flour, cocoa powder, maple syrup, and melted coconut oil to the food processor. Blend until the mixture is well combined and forms a sticky dough.
- Mix in Coconut and Nuts: Remove the mixture from the processor and stir in the shredded coconut and chopped nuts evenly for added texture and flavor.
- Form Balls: Using your hands, shape the mixture into small, bite-sized balls, about 1 inch in diameter.
- Chill: Place the formed balls on a baking sheet or plate and refrigerate for at least 30 minutes. This helps them firm up and hold their shape.
Notes
- You can substitute the nuts with any variety you prefer, such as walnuts, pecans, or cashews.
- For a nut-free version, replace almond flour and nuts with seeds like sunflower or pumpkin seeds.
- If the mixture is too dry, add a teaspoon of water or more maple syrup to help it bind.
- Store bliss balls in an airtight container in the refrigerator for up to one week.
- These bliss balls can also be frozen for longer storage; thaw before serving.


