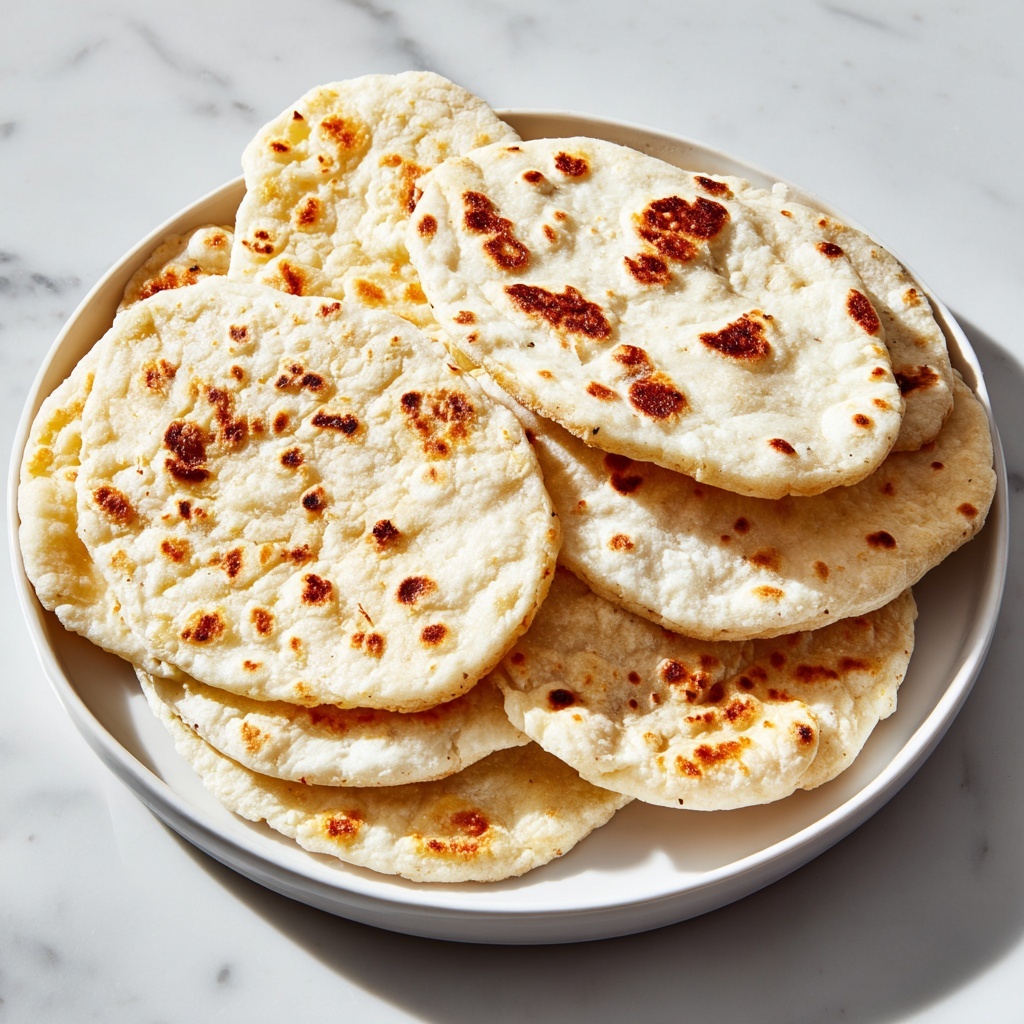
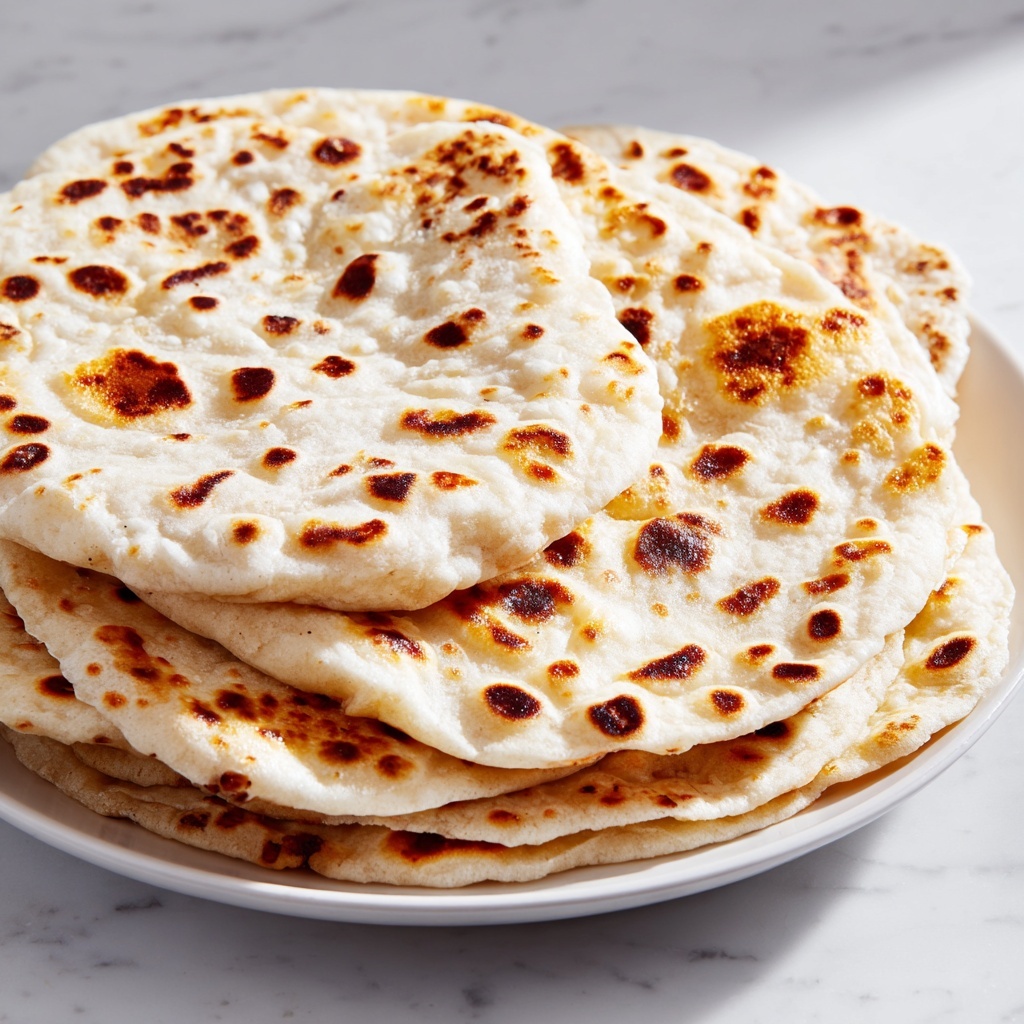
There is something truly magical about making your own Gluten Free Pita Bread: 5 Secrets to Perfect Texture Recipe at home. This recipe delivers fluffy, soft pockets that aren’t just a feast for the eyes but a delight to the palate, all without the gluten. Whether you’re new to gluten free baking or a seasoned pro, these secrets will help you achieve that perfect, pillowy texture that turns simple bread into a comforting staple. Get ready to transform everyday ingredients into something extraordinary!
Ingredients You’ll Need
These ingredients may be simple, but each one plays a critical role in crafting this delightful gluten free pita bread. From the flour that forms the base to the olive oil that adds moisture and flavor, every component is key for achieving that ideal texture and taste.
- 1 cup gluten free all-purpose flour: The foundation of your dough, providing structure and body.
- 1 teaspoon baking powder: The secret leavening agent that helps your pita puff up beautifully.
- 1/2 teaspoon salt: Enhances the bread’s natural flavors and balances the dough.
- 1 tablespoon olive oil: Adds richness and keeps the bread tender inside.
- 1/2 cup warm water: Activates the baking powder and binds ingredients together for a smooth dough.
How to Make Gluten Free Pita Bread: 5 Secrets to Perfect Texture Recipe
Step 1: Preheat Your Oven
Set your oven to 450°F (230°C) so it’s nice and hot, which is crucial for getting that beautiful puff in your gluten free pita bread. A high temperature allows the dough to quickly rise and form those lovely air pockets.
Step 2: Mix Dry Ingredients Thoroughly
Combine the gluten free flour, baking powder, and salt in a bowl. Mixing them well ensures the baking powder is evenly distributed throughout the flour, which helps your bread rise uniformly and attain perfect texture across each pita.
Step 3: Incorporate Olive Oil and Warm Water
Add the olive oil and warm water to your dry mix and stir until a dough starts to form. The warmth of the water is key here—it activates the baking powder gently, setting your dough up for that ideal fluffiness.
Step 4: Knead Until Smooth
Don’t rush this step—kneading the dough for a few minutes allows it to come together with the right elasticity. This builds the texture that will give your gluten free pita bread its signature soft yet sturdy feel.
Step 5: Shape and Bake the Dough
Divide the dough into 4 equal pieces and roll each piece into a circle. Bake these on a sheet for 5 to 7 minutes until they puff up and turn a light golden. That puff is the hallmark of perfectly textured gluten free pita bread!
How to Serve Gluten Free Pita Bread: 5 Secrets to Perfect Texture Recipe

Garnishes
Sprinkle your pitas with fresh herbs like parsley or za’atar for an extra burst of flavor. A drizzle of olive oil or a spread of garlic butter also pairs wonderfully, adding layers to your gluten free pita bread experience.
Side Dishes
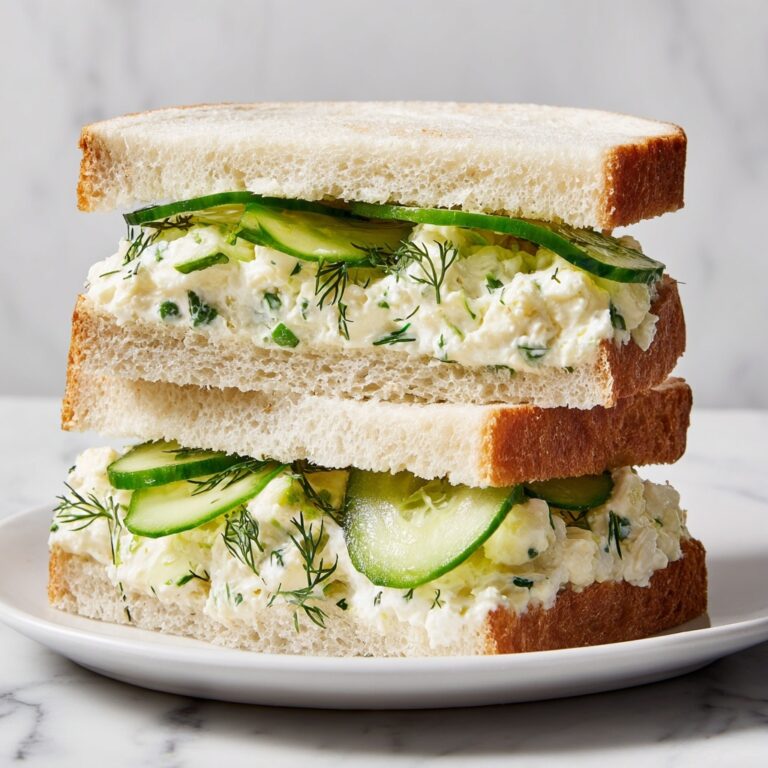
This pita is the perfect partner for dips such as hummus, baba ganoush, or tzatziki. Its tender pockets can scoop up every bit of these creamy delights, enhancing every bite with satisfying texture and taste.
Creative Ways to Present
Try stuffing your pitas with grilled veggies and protein for an easy wrap, or cut them into triangles and lightly toast for delicious gluten free pita chips. These creative options will make your Gluten Free Pita Bread: 5 Secrets to Perfect Texture Recipe a versatile star in your kitchen.
Make Ahead and Storage
Storing Leftovers
Keep leftover pita bread in an airtight container at room temperature for up to 2 days. This will help retain their softness and prevent drying out, so you can enjoy that perfect texture even later.
Freezing
For longer storage, freeze your pita stacked with parchment paper between each piece inside a sealed bag. When you want to enjoy them, simply thaw at room temperature and they’ll be ready to refresh or serve.
Reheating
Reheat your pita bread in a warm oven or on a hot skillet for just a couple of minutes to revive that fresh-baked softness and bring back the delightful texture that makes this recipe so beloved.
FAQs
Can I substitute the gluten free flour with a different blend?
You can, but make sure the blend contains xanthan gum or another binder to help with texture. Not all gluten free flours behave the same, so choose one suited for bread-making to keep that perfect fluffiness.
Why is the baking powder important in this recipe?
Baking powder acts as the leavening agent that causes the pita to puff up and create air pockets. Without it, your bread would be dense and flat, lacking the signature pita texture.
Can I make the dough ahead of time?
Yes! You can prepare the dough and refrigerate it for up to 24 hours. Just bring it back to room temperature before shaping and baking to ensure the best rise and texture.
What’s the best way to achieve the puff in gluten free pita bread?
The secret is a very hot oven and rolling the dough evenly. Puffing happens when moisture inside turns to steam quickly, so the initial heat jump is essential to raise the bread properly.
Are there any toppings to avoid on this pita bread?
Heavy or excessively wet toppings can weigh down the delicate gluten free pita, so it’s best to stick with fresh herbs, olive oil, or light spreads to preserve texture and flavor.
Final Thoughts
Making your own gluten free pita bread is not just rewarding—it’s downright fun once you know these 5 secrets to perfect texture. This recipe invites you to bring something special to your table that looks, tastes, and feels just right. Trust me, give this Gluten Free Pita Bread: 5 Secrets to Perfect Texture Recipe a try, and you’ll have a newfound staple that will brighten any meal!
Print
Gluten Free Pita Bread: 5 Secrets to Perfect Texture Recipe
- Prep Time: 7 minutes
- Cook Time: 7 minutes
- Total Time: 14 minutes
- Yield: 4 pita breads
- Category: Bread
- Method: Baking
- Cuisine: Gluten Free
- Diet: Gluten Free
Description
This Gluten Free Pita Bread recipe yields soft, fluffy pitas with a perfect texture achieved through simple ingredients and baking secrets. Ideal for those avoiding gluten, this quick bread is baked until puffy and lightly golden, making it perfect for sandwiches, dips, or wraps.
Ingredients
Dry Ingredients
- 1 cup gluten free all-purpose flour
- 1 teaspoon baking powder
- 1/2 teaspoon salt
Wet Ingredients
- 1 tablespoon olive oil
- 1/2 cup warm water
Instructions
- Preheat the Oven: Preheat your oven to 450°F (230°C) to ensure it’s hot enough for the pitas to puff up and cook properly.
- Mix Dry Ingredients: In a large bowl, combine the gluten free all-purpose flour, baking powder, and salt, mixing well to evenly distribute the leavening agent and salt.
- Add Wet Ingredients: Pour in the olive oil and warm water, stirring continuously until a loose dough forms.
- Knead the Dough: Transfer the dough to a floured surface and knead it gently for a few minutes until it’s smooth and cohesive, which helps develop a better texture.
- Divide and Roll Out: Divide the dough into 4 equal portions. Roll each piece into a circle about 1/4 inch thick for uniform pita breads.
- Prepare for Baking: Place the rolled dough circles on a baking sheet lined with parchment paper or lightly greased to prevent sticking.
- Bake the Pitas: Bake in the preheated oven for 5-7 minutes or until the pita breads are puffed up and lightly golden on top, indicating they are fully cooked.
- Cool Slightly and Serve: Remove from the oven and let the pitas cool for a few minutes before serving. This resting time helps the bread retain softness.
Notes
- Ensure the water is warm, not hot, to promote proper dough consistency without killing the baking powder’s leavening action.
- You can substitute olive oil with any light-tasting oil if preferred.
- Rolling the dough evenly ensures uniform puffing during baking.
- For best results, use a well-calibrated oven to maintain consistent baking temperature.
- Store leftovers wrapped in a clean cloth to maintain softness or freeze for longer storage.
