If you’re itching to bake something that’s equal parts fun and flavorful, you have to try the Spooktacular Vampire Bread: Bake Fun and Flavor at Home Recipe. This dazzling loaf brings together rich, tender bread with striking swirls of red and black dough, making every slice a festive delight that’s perfect for Halloween or any haunted gathering. Not only does it taste incredible, but it’s also a playful project that will have your kitchen smelling amazing and your friends asking for seconds.
Ingredients You’ll Need
The beauty of this Spooktacular Vampire Bread: Bake Fun and Flavor at Home Recipe lies in its simplicity. Each ingredient plays a vital role – from the flour that creates a soft, pillowy texture to the yeast that gives the bread its perfect rise. Plus, the food coloring brings that charming and spooky visual magic that makes this bread a showstopper.
- 4 cups All-Purpose Flour: The foundation for fluffy, delicious bread that holds it all together beautifully.
- 2 tablespoons Yeast: The magic ingredient that breathes life into the dough and makes it rise gloriously.
- 2 tablespoons Sugar: Essential for activating the yeast and adding just a touch of sweetness.
- 1 teaspoon Salt: Enhances all the flavors, ensuring the bread doesn’t taste flat.
- 1.5 cups Warm Water (about 110°F): Perfect temperature to wake up the yeast and help the dough come alive.
- 2 tablespoons Butter (or Oil): Adds a lovely richness that keeps the bread moist and tender.
- 2 tablespoons Food Coloring (Red and Black): The secret to transforming a simple loaf into a spooktacular work of art.
How to Make Spooktacular Vampire Bread: Bake Fun and Flavor at Home Recipe
Step 1: Mix and Knead Your Dough
Start by combining your flour, sugar, yeast, and salt in a large bowl. Gradually add the warm water, mixing as you go until a soft dough forms. Then, get your hands in and knead the dough on a floured surface for about 8 to 10 minutes. This is the fun part – kneading develops the gluten, giving your bread that perfect chewy texture you’ll love.
Step 2: Let the Dough Rise
Once your dough is smooth and elastic, cover the bowl with a clean kitchen towel. You want to find a warm, cozy spot to let it rise. Patience here really pays off – give it 1 to 2 hours to double in size. Watching it puff up is like seeing your hard work coming alive.
Step 3: Divide and Color the Dough
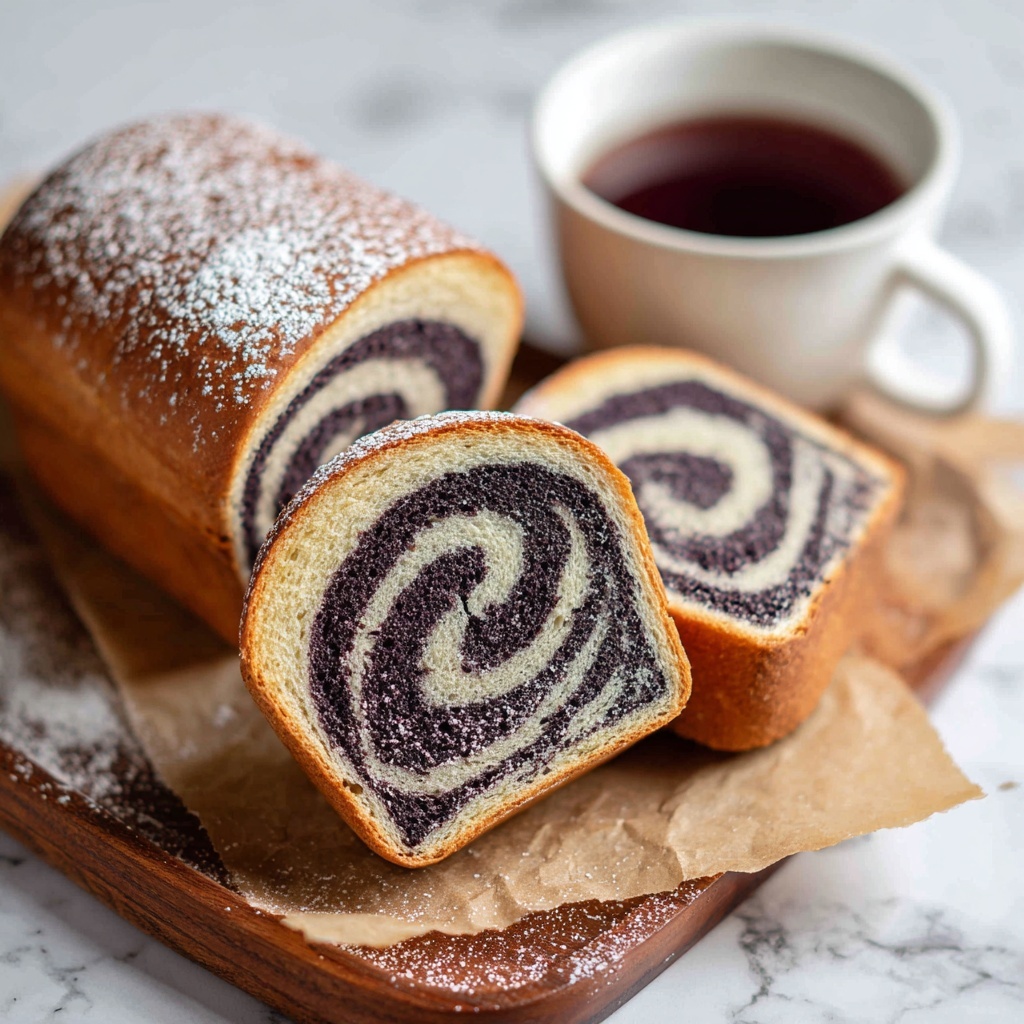
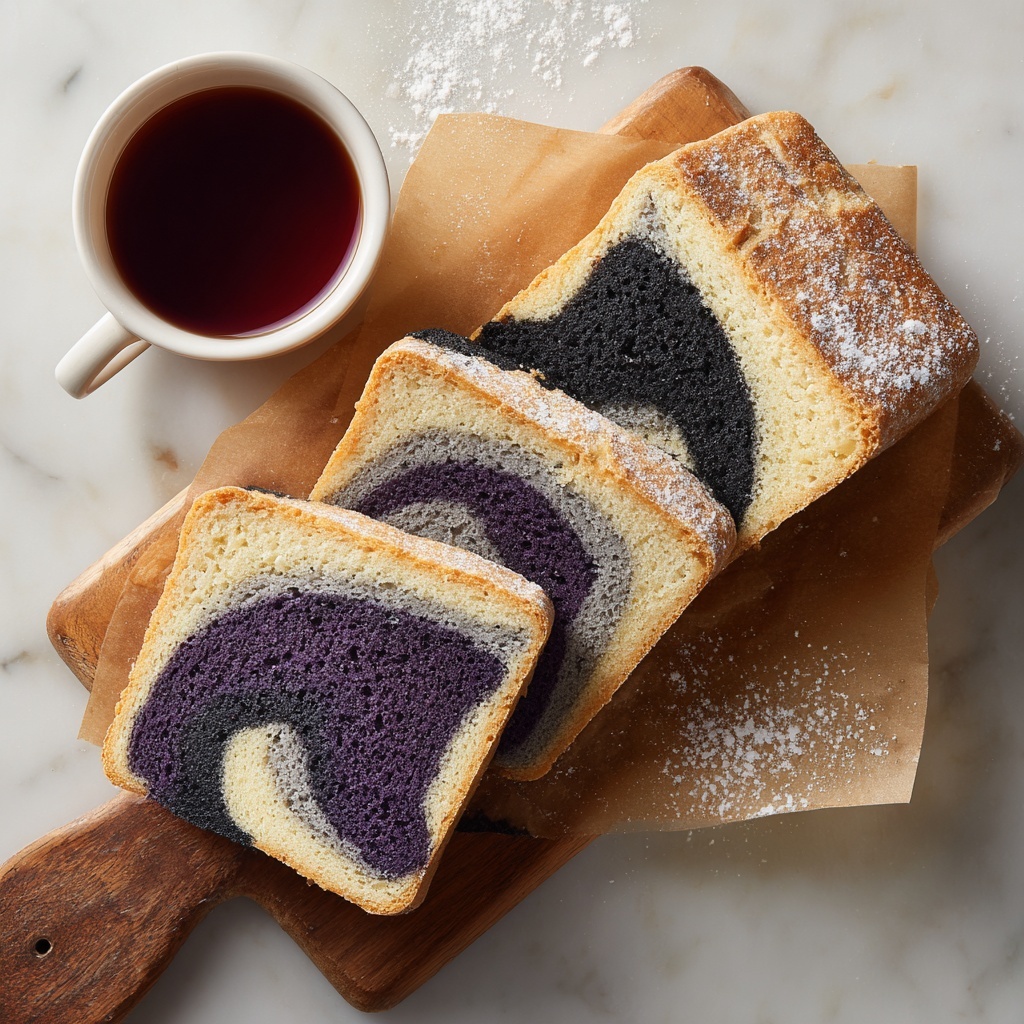
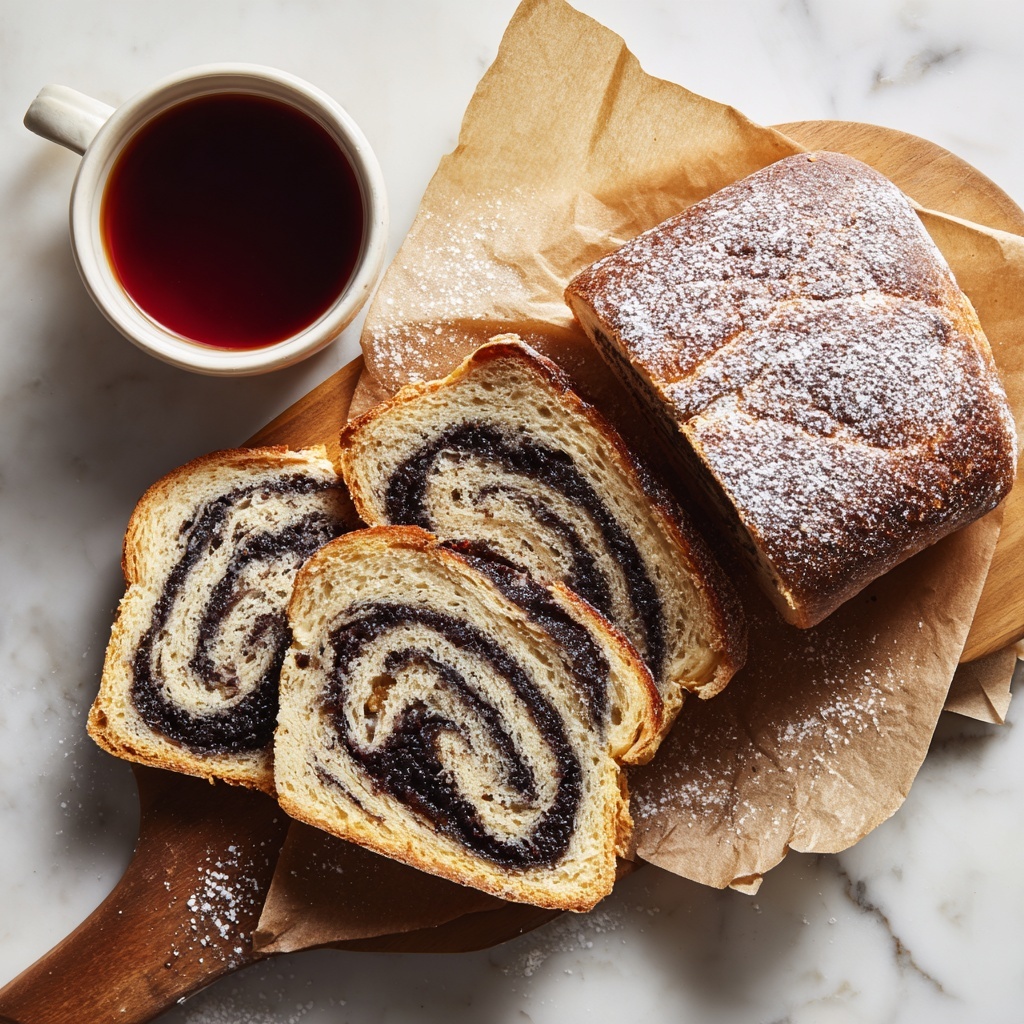
After the dough has risen beautifully, gently punch it down to release the air. Divide it into two equal portions. Here’s where the fun colors come in: add red food coloring to one half and black to the other, kneading each slightly until the color is evenly distributed. This step is what turns the bread from ordinary to extraordinary!
Step 4: Shape Your Vampire Bread
Roll out each colored dough portion on a lightly floured surface into flat rectangles. Then, layer the red dough on top of the black. Twist them together carefully to create those dramatic, swirling patterns inspired by the spooky vampire theme. Finally, shape the twisted dough into a loaf that’s ready to impress.
Step 5: Second Rise and Bake
Place your loaf onto a baking sheet and cover it again for another 30 minutes to rise just a little more. Preheat your oven to 350°F while you wait. When your bread is ready, bake it for about 30 minutes, until the crust is golden and tempting. Once out of the oven, allow your masterpiece to cool on a wire rack before slicing.
How to Serve Spooktacular Vampire Bread: Bake Fun and Flavor at Home Recipe
Garnishes
This bread is stunning on its own, but feel free to drizzle with a bit of garlic butter for an extra flavor punch. A sprinkle of crushed red pepper flakes or a brush of herb-infused oil can add a delicious aroma and kick that pairs perfectly with the bread’s rich flavors.
Side Dishes
Serve alongside a cozy bowl of tomato soup or a heartwarming chili for a meal that’s both comforting and visually thrilling. The bold colors and tender texture of the vampire bread complement hearty, savory sides wonderfully.
Creative Ways to Present
For parties or gatherings, slice the bread into thick pieces and arrange on a rustic wooden board surrounded by olives, cheese, and cured meats. You can also hollow out a loaf and fill it with creamy spinach dip, turning it into a dazzling centerpiece that invites everyone to dig in.
Make Ahead and Storage
Storing Leftovers
Keep your leftover Spooktacular Vampire Bread in an airtight container or wrapped tightly in plastic wrap at room temperature. It should stay fresh and soft for up to three days—perfect for quick snacks or sandwiches.
Freezing
If you want to enjoy this hauntingly good bread later, slice it and freeze it in a ziplock bag. Freezing preserves the flavor and texture beautifully – just thaw slices as needed for maximum convenience.
Reheating
Reheat your slices in a toaster or oven for a few minutes to bring back that fresh-baked warmth and softness. You’ll feel like you’re biting into a brand-new loaf each time!
FAQs
Can I use different colors for the dough?
Absolutely! While red and black give a classic vampire vibe, feel free to experiment with purple, orange, or even green for a unique twist on the Spooktacular Vampire Bread: Bake Fun and Flavor at Home Recipe.
Do I need special yeast for this recipe?
Nope! Regular active dry yeast works perfectly. Just make sure your water is warm—not hot—to activate the yeast effectively.
Can I substitute butter with oil?
Yes, using oil instead of butter works great and keeps the bread moist. Olive oil adds a nice flavor, but any neutral oil will do.
How long can I keep the bread after baking?
Stored properly, your vampire bread will stay fresh at room temperature for about three days. Beyond that, freezing is your best bet to maintain taste and texture.
Is this bread suitable for beginners?
Definitely! The recipe is straightforward, and the results are incredibly rewarding. It’s a wonderful project to try if you’re new to baking but want to make something festive and special.
Final Thoughts
There’s something truly magical about baking the Spooktacular Vampire Bread: Bake Fun and Flavor at Home Recipe. It’s a recipe that blends the joy of getting hands-on with dough, the thrill of vibrant colors, and the satisfaction of biting into warm, delicious bread. If you want to bring a little extra spirit to your kitchen and share a tasty treat that’s bound to impress, this vampire bread is exactly what you need. Happy baking!
Print
Spooktacular Vampire Bread: Bake Fun and Flavor at Home Recipe
- Prep Time: 25 minutes
- Cook Time: 30 minutes
- Total Time: 3 hours
- Yield: 12 servings
- Category: Bread
- Method: Baking
- Cuisine: American
Description
Create a spooky and delicious Vampire Bread at home with vibrant red and black swirled dough. This fun and festive bread combines the richness of buttery dough with a playful twist of food coloring, perfect for Halloween or any themed party. The process includes mixing, kneading, coloring, twisting, and baking to achieve a visually striking and flavorful loaf that yields 12 servings.
Ingredients
Dough
- 4 cups All-Purpose Flour (Foundation for fluffy bread)
- 2 tablespoons Yeast (Magic ingredient that makes bread rise)
- 2 tablespoons Sugar (Helps activate yeast)
- 1 teaspoon Salt (Enhances flavor)
- 1.5 cups Water, warm (about 110°F)
- 2 tablespoons Butter or Oil (Adds richness to the bread)
- 2 tablespoons Red Food Coloring (Transforms dough into a spooktacular work of art)
- 2 tablespoons Black Food Coloring (Transforms dough into a spooktacular work of art)
Instructions
- Mix Ingredients: In a large bowl, combine the all-purpose flour, sugar, yeast, and salt. Gradually add warm water and knead the dough thoroughly for about 8-10 minutes until smooth and elastic.
- First Rise: Cover the bowl with a clean kitchen towel and place it in a warm spot. Allow the dough to rise for 1-2 hours, or until it doubles in size.
- Divide and Color: Gently punch down the risen dough to release air. Divide the dough into two equal portions. Add red food coloring to one half and black food coloring to the other, kneading each until the color is evenly incorporated.
- Shape Dough: On a floured surface, roll out each colored dough portion into flat rectangles. Layer the red and black dough together, twist carefully to create a marbled effect, and form the twisted dough into a loaf shape.
- Second Rise: Place the shaped loaf onto a baking sheet. Cover and let it rise again for 30 minutes until it puffs up slightly.
- Preheat Oven: Preheat your oven to 350°F (175°C) to prepare for baking.
- Bake: Bake the loaf in the preheated oven for approximately 30 minutes or until the bread is golden brown and sounds hollow when tapped.
- Cool and Serve: Remove the bread from the oven and transfer it to a wire rack. Let it cool completely before slicing and serving.
Notes
- Use warm water (around 110°F) to activate the yeast properly without killing it.
- Knead dough thoroughly to develop gluten, which ensures a fluffy texture.
- Allow sufficient rising time for better bread volume and texture.
- Be careful when adding food coloring to achieve vibrant but not overpowering colors.
- Use a sharp knife to slice the bread to preserve the swirl pattern.
- Store bread in an airtight container to maintain freshness up to 3 days or freeze for longer storage.


