
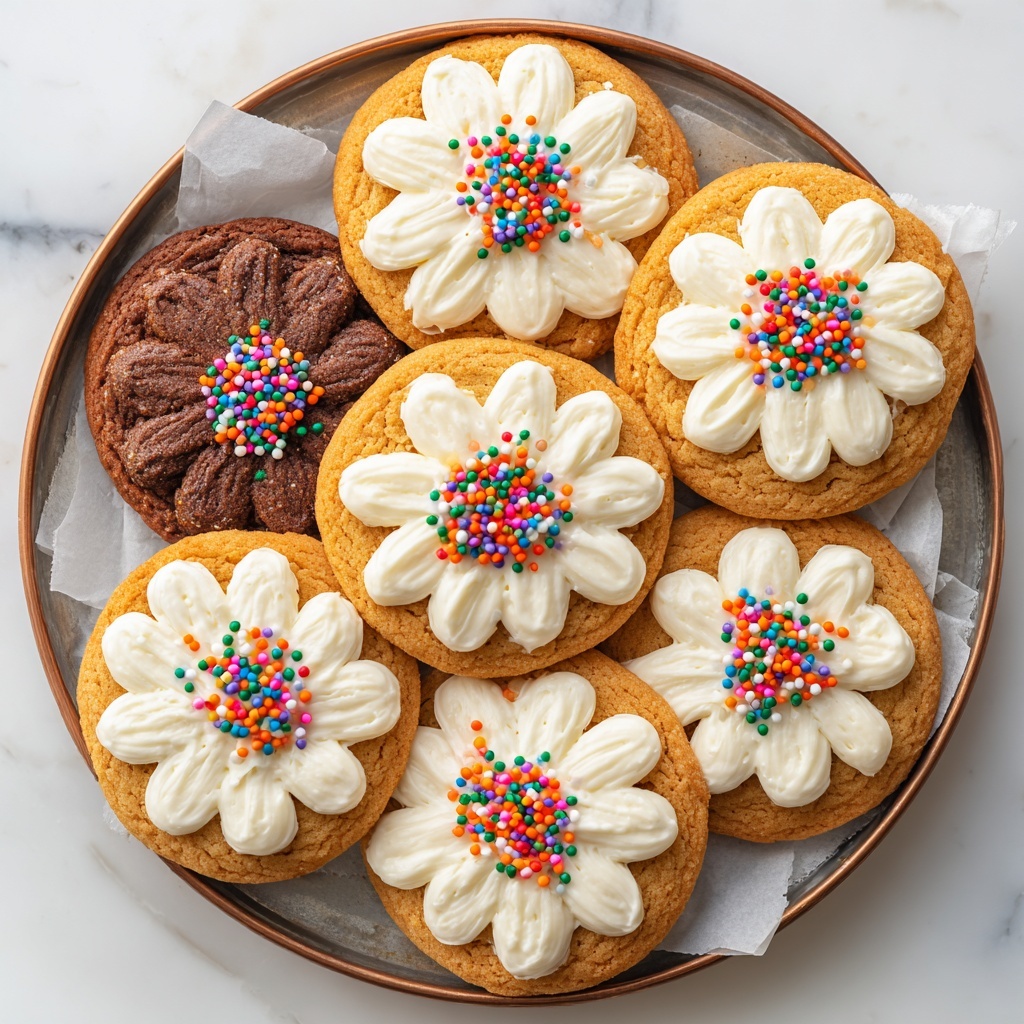
If you have a soft spot for buttery, melt-in-your-mouth treats, then the Piped Danish Butter Cookies Recipe is going to be an absolute game-changer in your baking repertoire. These cookies are the perfect combination of simple ingredients and elegant presentation, resulting in irresistibly tender bites that have a delicate crunch at the edges and a creamy center. Piped with a star-tipped nozzle, they carry a classic look that instantly elevates your cookie platter, whether it’s for a cozy afternoon with tea or to impress guests at a festive gathering. Let me walk you through how delightful and easy it is to create these timeless cookies right at home.
Ingredients You’ll Need
The magic of the Piped Danish Butter Cookies Recipe lies in how a handful of straightforward, quality ingredients come together to create such a rich and satisfying flavor. Each component plays a vital role, from adding buttery depth to a light, crisp texture and a subtle sweetness that isn’t overpowering.
- Unsalted butter, 1 cup: Using softened butter ensures the dough creams up beautifully for a tender crumb and classic buttery flavor.
- Powdered sugar, 1 cup: It blends smoothly, lending a gentle sweetness and delicate texture to the cookies.
- Vanilla extract, 1 teaspoon: A small splash enhances the flavor with warm, comforting notes central to Danish butter cookies.
- All-purpose flour, 2 cups: The backbone of the dough, it holds everything together and creates that perfect tender snap.
- Salt, 1/4 teaspoon: Just a pinch to balance out the sweetness and intensify the butter’s richness.
- Large egg (optional): Used as an egg wash to give the baked cookies a gorgeous, golden glossy finish.
How to Make Piped Danish Butter Cookies Recipe
Step 1: Preheat Your Oven
Start by setting your oven to 375°F (190°C). This temperature is key for baking the cookies just right — it ensures they get that perfect light golden edge without browning too fast or drying out.
Step 2: Cream Butter and Sugar
In a large bowl, beat the softened butter and powdered sugar together until the mixture is light and fluffy. This step is crucial because it adds air to the dough, making your cookies tender and giving them that melt-in-your-mouth texture we all love.
Step 3: Add Vanilla Extract
Stir in one teaspoon of vanilla extract. This little addition brings a subtle warmth and depth to the cookies that make their flavor evenly balanced and irresistibly inviting.
Step 4: Mix in Dry Ingredients
Gradually add the flour and salt to the wet mixture. Blend just until combined — over-mixing can stiffen the dough and negatively impact the texture. You want a smooth, pliable dough that holds its shape when piped.
Step 5: Prepare to Pipe
Transfer your cookie dough into a piping bag fitted with a star tip. This is where the magic of shaping begins and gives the cookies their signature look that’s both elegant and charming.
Step 6: Pipe Onto Baking Sheets
Pipe out your dough onto ungreased baking sheets in your favorite shapes—classic loops, rosettes, or even simple stars. Leave a little space between each cookie since they’ll hold their shape but spread just a bit while baking.
Step 7: Apply Egg Wash (Optional)
If you like your butter cookies with a shiny, golden finish, brush each one lightly with a beaten egg. This step is optional but highly recommended for a beautiful presentation, especially if you’re baking these for guests or special occasions.
Step 8: Bake to Perfection
Place the trays in the preheated oven and bake for 12 to 15 minutes. Keep an eye out for light golden edges; this indicates your Piped Danish Butter Cookies Recipe has been baked just right — tender inside with a slight crunch outside.
Step 9: Cool on Wire Racks
Once baked, transfer the cookies onto wire racks to cool completely. Cooling allows the structure to firm up, which is crucial for that perfect bite.
How to Serve Piped Danish Butter Cookies Recipe

Garnishes
While these cookies shine on their own, adding simple garnishes can provide a little extra flair. Consider a light dusting of powdered sugar, a drizzle of melted dark chocolate, or a sprinkle of colored sugar crystals before baking for some festive flair that still keeps the buttery richness front and center.
Side Dishes
Piped Danish Butter Cookies pair wonderfully with warm beverages like freshly brewed coffee, chai tea, or even a glass of cold milk. Their buttery texture and mild sweetness offer the perfect balance to both robust and creamy drinks, making teatime or coffee breaks a luxurious treat.
Creative Ways to Present
These cookies look stunning arranged in a decorative tin or on a tiered dessert tray. You can also sandwich them with a dollop of fruit preserves or ganache for an extra indulgent twist. For gifting, wrap them carefully in translucent parchment with a festive ribbon — they make wonderful homemade gifts that anyone would appreciate.
Make Ahead and Storage
Storing Leftovers
If you’re lucky enough to have leftovers (and trust me, this recipe usually doesn’t leave much behind), store the cookies in an airtight container at room temperature. They will keep their tenderness and crisp edges for up to a week, perfect for nibbling over several days.
Freezing
These butter cookies freeze beautifully. Simply place them in a single layer on a baking sheet to freeze initially, then transfer to a sealed container or freezer bag. Frozen cookies can be kept for up to three months and thawed at room temperature when you’re ready to enjoy them.
Reheating
If you prefer your cookies slightly warm, reheat them in a 300°F (150°C) oven for about 5 minutes. This briefly refreshes the texture, reviving that freshly baked appeal while maintaining their perfect buttery flavor.
FAQs
Can I use salted butter in this recipe?
It’s best to use unsalted butter to control the salt level in your cookies. If you only have salted butter, omit any additional salt in the recipe to avoid an overly salty taste.
Why do I need to pipe the dough instead of just shaping by hand?
Piping gives the Piped Danish Butter Cookies Recipe its signature look and delicate texture. The dough is quite soft, so shaping by hand can be tricky and may not yield the same crisp edges and light interiors.
What if I don’t have a star tip for piping?
No worries! A large round tip can work, though the classic star shape adds to the cookie’s charm. Alternatively, use a plastic bag with a small cut at the tip for simpler shapes.
Can I add flavor variations?
Absolutely! Try adding finely chopped nuts, citrus zest, or a dash of cinnamon to the dough for personalized flavor twists. Just be careful not to overpower the buttery base.
How do I ensure my cookies don’t spread too much during baking?
Using chilled dough helps, but since this dough is soft for piping, spacing cookies well apart on the tray and keeping the oven temperature steady at 375°F is key to maintaining their shape.
Final Thoughts
There’s something heartwarming about the Piped Danish Butter Cookies Recipe that makes baking feel like an art you can share with loved ones. With its few simple ingredients and straightforward methods, it invites anyone into the kitchen to create cookie magic in under an hour. Whether you’re an experienced baker or just starting, these buttery delights will quickly become a favorite to make and share. Give this recipe a try — I promise the joy of biting into one fresh from the oven is simply unbeatable!
Print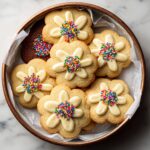
Piped Danish Butter Cookies Recipe
- Prep Time: 15 minutes
- Cook Time: 15 minutes
- Total Time: 30 minutes
- Yield: 24 servings
- Category: Dessert
- Method: Baking
- Cuisine: Danish
Description
These classic Piped Danish Butter Cookies are delicate, buttery, and melt-in-your-mouth treats perfect for any occasion. Made with simple ingredients and piped into beautiful shapes, they offer a crisp texture with a subtle sweetness. Ideal for tea time, holiday gifting, or a delightful homemade snack.
Ingredients
Cookie Dough
- 1 cup unsalted butter, softened
- 1 cup powdered sugar
- 1 teaspoon vanilla extract
- 2 cups all-purpose flour
- 1/4 teaspoon salt
Optional
- 1 large egg (for egg wash)
Instructions
- Preheat Oven: Preheat your oven to 375°F (190°C) to ensure it’s at the right temperature for baking the cookies evenly.
- Cream Butter and Sugar: In a large bowl, beat the softened unsalted butter and powdered sugar together until the mixture becomes light and fluffy, which helps create a tender texture in the cookies.
- Add Vanilla: Mix in the vanilla extract thoroughly to infuse the dough with a warm, aromatic flavor.
- Incorporate Dry Ingredients: Gradually add the all-purpose flour and salt to the butter mixture, stirring gently until all ingredients are combined into a smooth dough without overmixing.
- Prepare Piping Bag: Transfer the cookie dough into a piping bag fitted with a star-shaped tip, which will give the cookies their traditional ridged appearance.
- Pipe Cookies: Pipe the dough onto ungreased baking sheets, forming shapes like circles or pretzels according to your preference and spacing them adequately to allow for slight spreading.
- Apply Egg Wash (Optional): If desired, brush the piped dough lightly with beaten egg to achieve a shiny and appealing golden finish after baking.
- Bake Cookies: Place the baking sheets in the preheated oven and bake for 12-15 minutes or until the edges turn a light golden color, indicating that the cookies are perfectly crisp.
- Cool: Remove the cookies from the oven and let them cool on wire racks to set their shape and texture before serving or storing.
Notes
- Using softened butter is key for correctly creaming with sugar and achieving a tender texture.
- The egg wash is optional but recommended for a shiny, attractive finish.
- Make sure to pipe cookies evenly sized to ensure uniform baking.
- Store cookies in an airtight container to maintain freshness for up to one week.
- For a gluten-free version, substitute all-purpose flour with a gluten-free flour blend, keeping in mind texture differences.