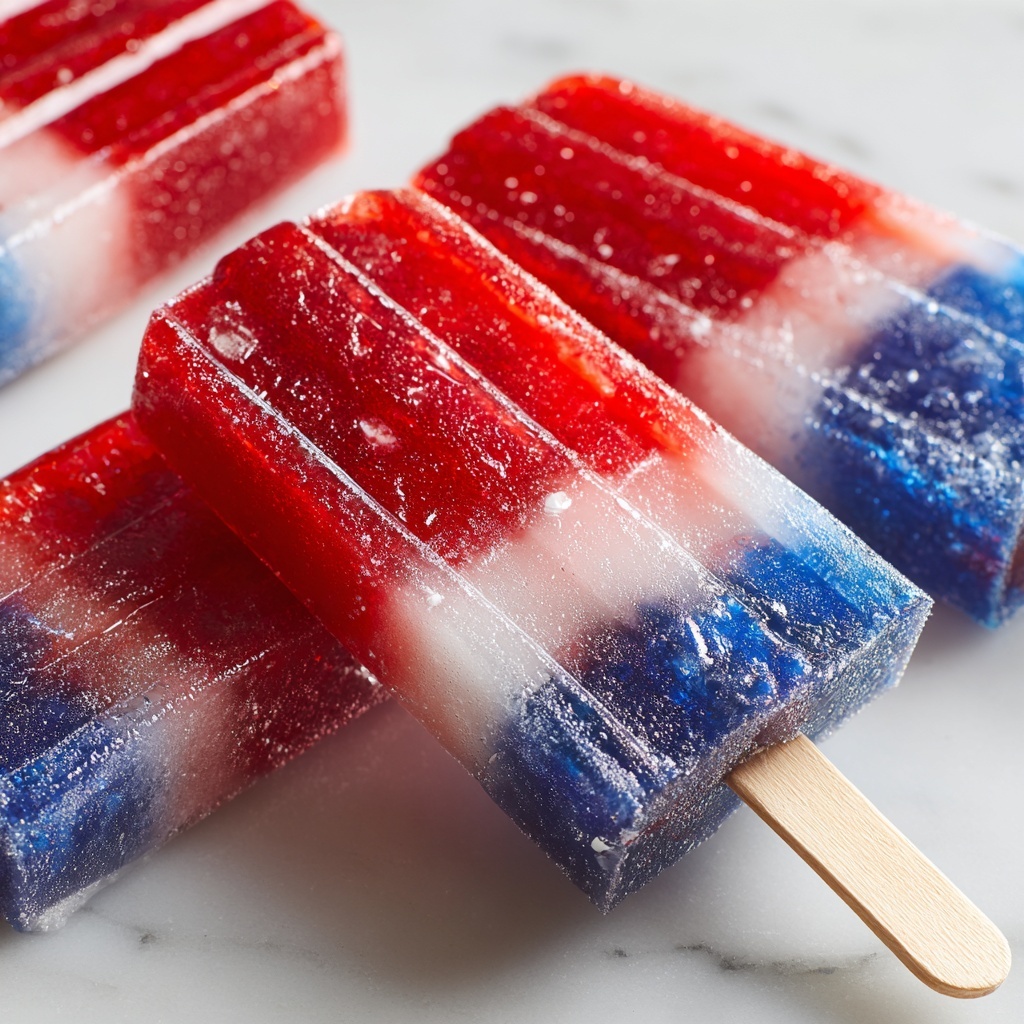
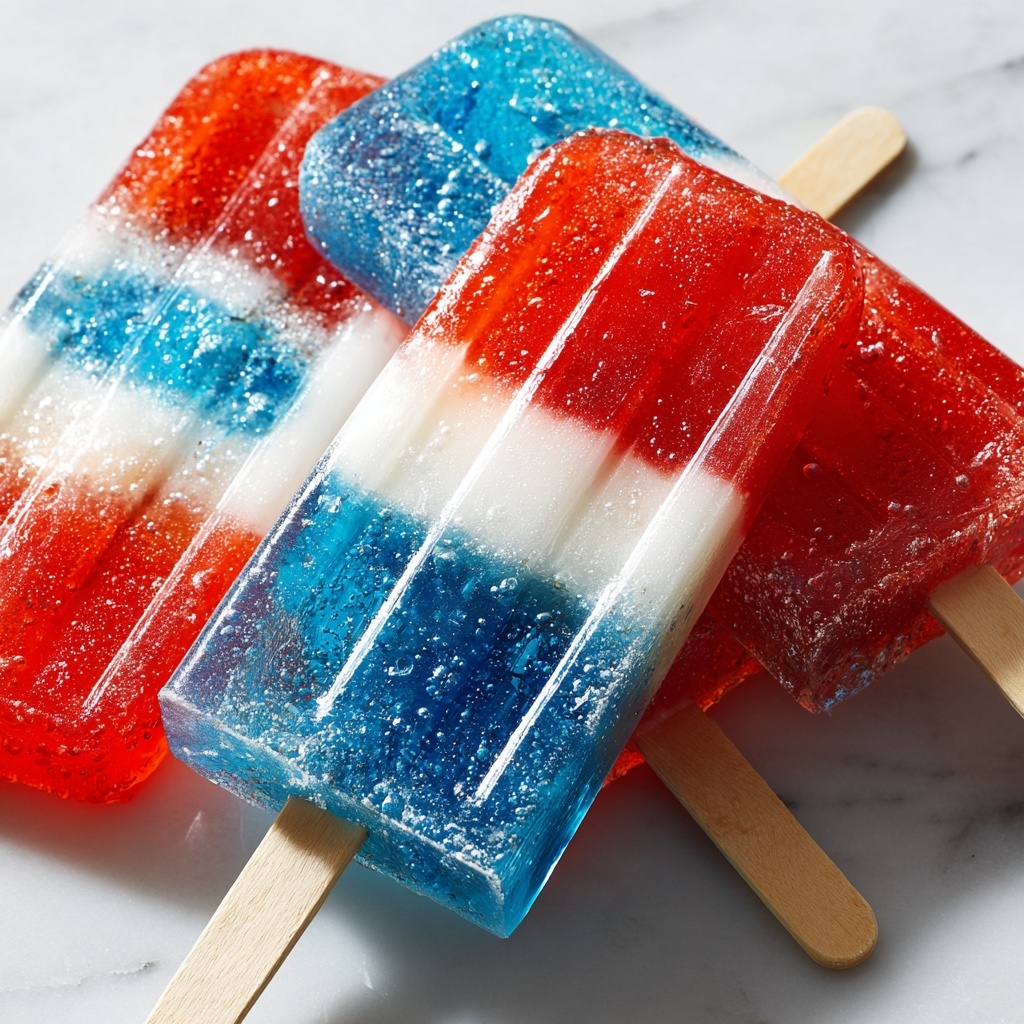
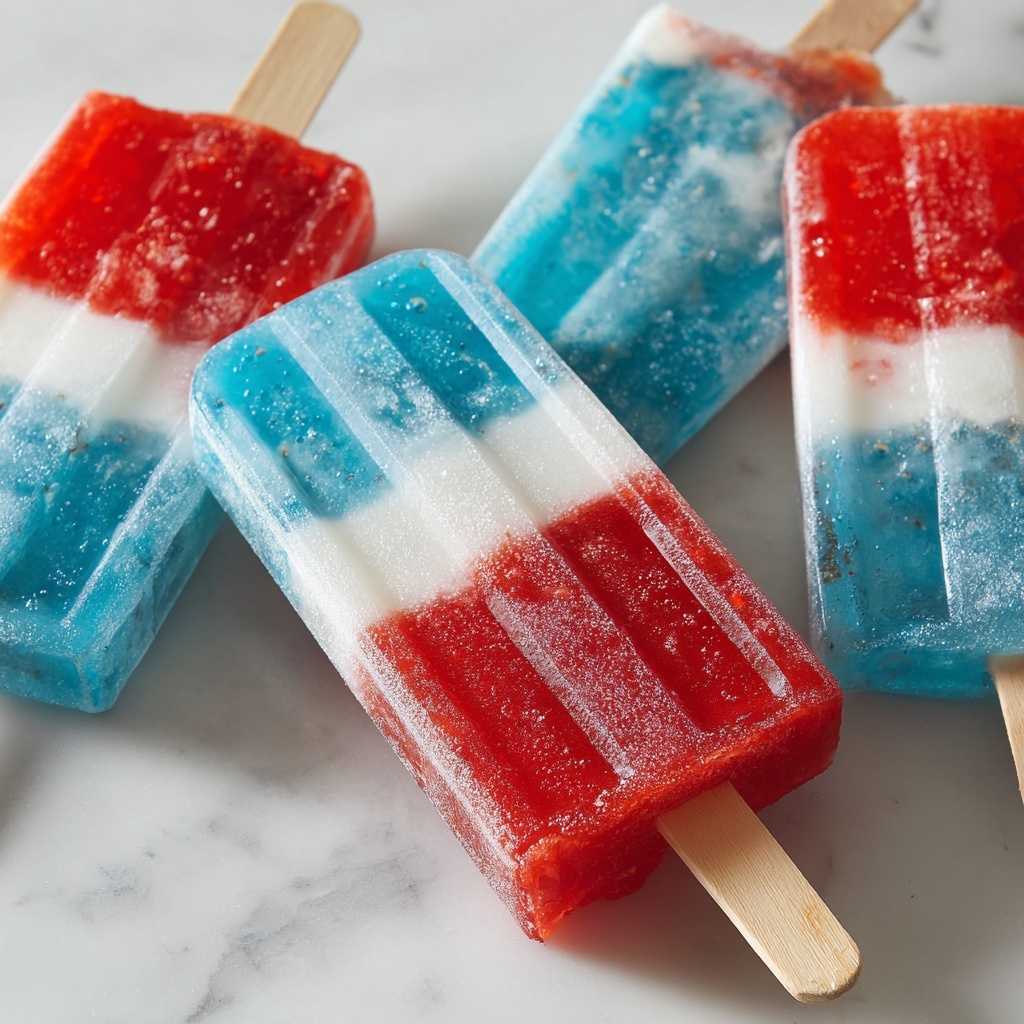
If you’ve ever craved a nostalgic treat with a burst of bright colors and flavors, this Homemade Bomb Pops Recipe will become your new summertime obsession. These layered popsicles are not only visually stunning with their iconic red, white, and blue stripes but also deliver a delightful mix of fruity and tangy tastes that cool you down instantly. What makes this Homemade Bomb Pops Recipe so special is how easy it is to whip up all-natural, customizable versions right in your own kitchen, turning simple ingredients into a festive frozen delight.
Ingredients You’ll Need
The magic behind this Homemade Bomb Pops Recipe lies in a handful of simple but essential ingredients. Each one plays a key role in creating the perfect texture, vibrant color, and refreshing taste of these frozen treats.
- 1 cup lemonade: Provides the creamy white middle layer with a slight tang that balances sweetness.
- 1 cup blue sports drink or blue raspberry drink: Adds a fun blue layer bursting with fruity flavor.
- 1 cup fruit punch or strawberry drink: Forms the bright red base packed with sweet berry goodness.
- 3 tablespoons sugar, divided: Sweetens each layer gently to enhance flavors without overpowering.
- 1 teaspoon lemon juice: Brightens up the white lemonade layer with a fresh zing.
- 1 teaspoon lime juice: Adds a touch of citrus complexity when desired.
- Popsicle molds and sticks: Essential tools to shape your colorful, refreshing frozen treats perfectly.
How to Make Homemade Bomb Pops Recipe
Step 1: Prepare the Red Layer
Start by mixing the fruit punch or strawberry drink with 1 tablespoon of sugar until fully dissolved. This sweetened red mixture will become the base of your popsicle, so carefully pour it into each mold filling about one third of the way. Freeze this first layer for 30 to 45 minutes, allowing it to partially set but still remain tacky enough to hold the next layer.
Step 2: Create the White Layer
While the red layer chills, combine the lemonade with lemon juice and another tablespoon of sugar. Stir it well until the sugar dissolves completely. Gently pour this white lemonade mixture over the partially frozen red layer, taking care not to mix the colors. Return the molds to the freezer for another 30 to 45 minutes until this second layer is firm enough for the final addition.
Step 3: Finish with the Blue Layer and Freeze
For the last blue layer, blend your chosen blue sports drink or blue raspberry drink with the remaining tablespoon of sugar. Pour this mixture over the white layer carefully, then insert the popsicle sticks straight into the molds. Freeze the entire popsicle for at least 4 to 6 hours or until fully solid for that perfect bite of icy refreshment.
How to Serve Homemade Bomb Pops Recipe
Garnishes
Though these popsicles are showstoppers on their own, serving them with fresh berries or a sprinkle of edible glitter can make them extra festive. A small dish of crushed peppermint or mini chocolate chips on the side can also be a fun addition for dipping or sprinkling, especially if serving at a summer party.
Side Dishes
Pair your Homemade Bomb Pops Recipe with light, summery snacks like fresh fruit salad, chilled yogurt parfaits, or crisp vegetable sticks with hummus to round out a refreshing, balanced treat. These sides keep the focus on cool, healthy bites that complement the icy sweetness.
Creative Ways to Present
Consider presenting your bomb pops in a rustic ice bucket filled with crushed ice to keep them frosty during outdoor gatherings. You can also stand them upright in a decorative flower pot filled with sugar or salt for a charming, playful display that invites everyone to grab one immediately.
Make Ahead and Storage
Storing Leftovers
If by any chance you have leftovers or want to prepare these treats ahead of time, keep the Homemade Bomb Pops Recipe stored in an airtight container or tightly sealed popsicle mold in the freezer. This prevents freezer burn and keeps flavors intact for several weeks.
Freezing
Freeze your popsicles on a flat surface for at least 6 hours until completely solid. If you plan on making batches in advance, make sure the molds are well sealed to avoid absorbing other freezer odors. Proper freezing ensures each layer stays beautifully distinct and perfectly textured.
Reheating
Reheating isn’t recommended for these frozen delights. To easily release them from the molds, simply run the bottoms under warm water for a few seconds. This quick trick loosens them without melting or altering their perfect, icy form.
FAQs
Can I use natural fruit juices instead of sports drinks?
Absolutely! Using natural fruit juices is a wonderful way to make your Homemade Bomb Pops Recipe healthier and even more flavorful. Just be mindful to adjust the sugar depending on the sweetness of the juices you choose.
How do I keep the layers from mixing?
The key is patience! Freeze each layer until it’s partially or mostly set before carefully adding the next. Pouring slowly and gently is essential to maintain those crisp, iconic stripes.
Can I make these popsicles creamier?
Yes! Swap out the white lemonade layer with coconut milk or a blend of coconut milk and some lemon juice. This adds a rich, creamy texture that pairs beautifully with the fruity layers.
How long do Homemade Bomb Pops last in the freezer?
Stored properly in airtight molds, these popsicles can last up to 3 weeks without losing their great texture or flavor.
What if I don’t have popsicle molds?
No worries! You can use small paper cups and insert wooden sticks once the layers are partially frozen. Just be sure to cover the cups with foil or plastic wrap to keep everything tidy.
Final Thoughts
There’s something truly special about making the Homemade Bomb Pops Recipe yourself, from layering each vibrant color to anticipating that first perfect icy bite. It’s a simple project that yields a fun, nostalgic treat everyone will adore. So grab your ingredients, invite some friends, and dive into crafting your own freshly made bomb pops for endless sunny smiles and sweet summertime memories.
Print
Homemade Bomb Pops Recipe
- Prep Time: 10 minutes
- Cook Time: 0 minutes
- Total Time: 6 hours 10 minutes
- Yield: 6 popsicles
- Category: Dessert
- Method: Freezing
- Cuisine: American
- Diet: Vegetarian
Description
Enjoy a nostalgic summer favorite with these Homemade Bomb Pops. Layered with vibrant fruit flavors and lightly sweetened, these frozen treats are perfect to beat the heat and delight kids and adults alike. Made from simple ingredients and easy to prepare, these popsicles allow you to customize sweetness and even swap in natural juices for a healthier twist.
Ingredients
Red Layer
- 1 cup fruit punch or strawberry drink
- 1 tablespoon sugar
White Layer
- 1 cup lemonade
- 1 teaspoon lemon juice
- 1 tablespoon sugar
Blue Layer
- 1 cup blue sports drink or blue raspberry drink
- 1 tablespoon sugar
Additional
- 1 teaspoon lime juice
- Popsicle molds and sticks
Instructions
- Prepare the red layer: In a small bowl, mix the fruit punch with 1 tablespoon of sugar until the sugar is completely dissolved. Pour this mixture into your popsicle molds, filling each mold about one third of the way. Place the molds in the freezer and allow the red layer to freeze for 30 to 45 minutes until it is partially set but not fully hardened.
- Make the white layer: In another bowl, combine the lemonade with lemon juice, lime juice, and 1 tablespoon of sugar. Stir the mixture until the sugar dissolves entirely. Gently pour this white layer over the partially frozen red layer in the molds to avoid mixing the colors. Return the molds to the freezer to freeze the white layer for another 30 to 45 minutes until it is partially set.
- Prepare and add the blue layer: Mix the blue sports drink with the remaining tablespoon of sugar. Once the white layer is partially frozen, pour the blue mixture slowly over it, filling the molds to the top. Insert popsicle sticks into each mold. Place the molds back into the freezer and allow the Bomb Pops to freeze for at least 4 to 6 hours or until fully solid.
- Unmold and serve: To release the popsicles from the molds, run the outside of each mold under warm water for a few seconds. Gently pull the sticks to remove the popsicles. Serve immediately and enjoy your colorful, refreshing homemade Bomb Pops!
Notes
- Use natural fruit juices or low-sugar drink options for a healthier variation.
- Pour each layer slowly and carefully to maintain clear, distinct color layers in your popsicles.
- Adjust the amount of sugar based on the natural sweetness of your chosen drinks.
- For a creamier white layer, consider substituting the lemonade mixture with coconut milk combined with lemon and lime juice.
