
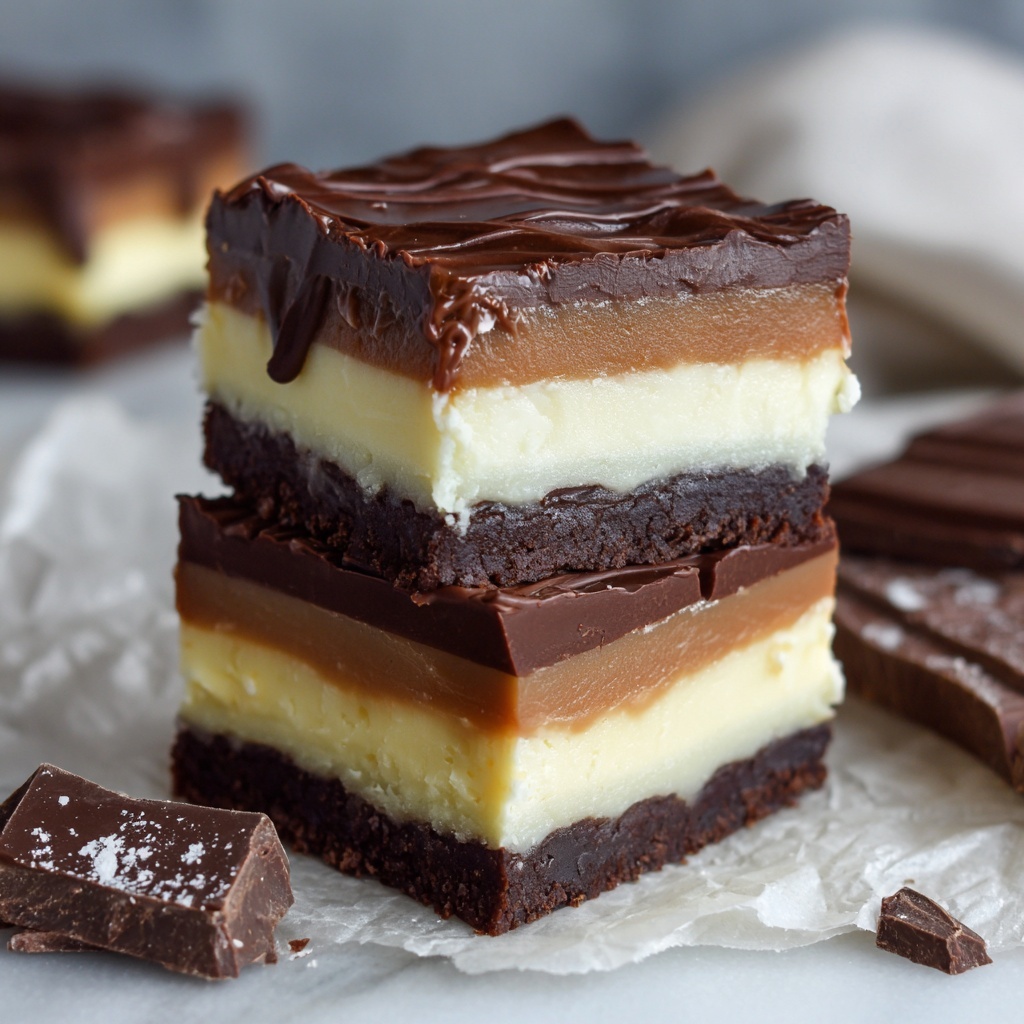
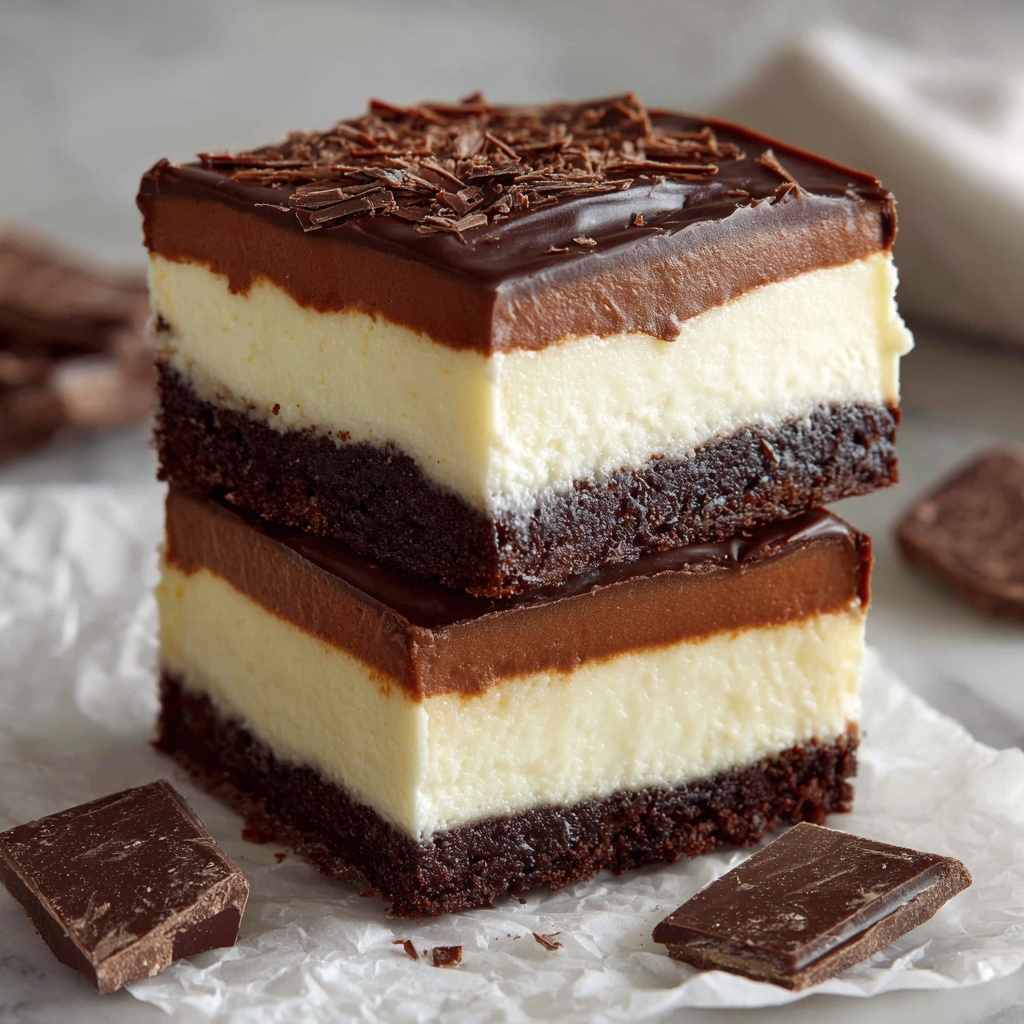
If you love rich, creamy, and delightfully indulgent sweets, the Boston Cream Fudge Recipe is absolutely for you. This luscious treat captures the essence of the classic Boston cream pie, transforming it into a velvety fudge that melts in your mouth with every bite. Combining layers of smooth white chocolate fudge with a swirl of cocoa-infused richness and finishing off with a glossy chocolate dip, this recipe brings extraordinary flavor and texture together for a show-stopping dessert experience.
Ingredients You’ll Need
The magic of the Boston Cream Fudge Recipe lies in its straightforward, yet perfectly balanced ingredients. Each one plays a vital role in creating the creamy texture, the layered flavors, and the classic contrast between the white and dark chocolate elements.
- Granulated sugar (2 cups + 2 cups): Provides sweetness and helps achieve the perfect fudge consistency.
- Unsalted butter (3/4 cup + 3/4 cup): Adds richness and a silky mouthfeel to the fudge.
- Heavy cream (2/3 cup + 2/3 cup): Contributes to the creaminess and smooth texture throughout the fudge.
- Light corn syrup (1/4 cup): Ensures a glossy finish and prevents sugar crystallization for that perfect fudge texture.
- White baking chocolate, chopped (6 ounces): Brings a sweet, creamy base reminiscent of the traditional Boston cream filling.
- Marshmallow cream (7 ounces): Adds lightness and chewiness that balances the richness of the chocolate.
- Vanilla extract (1 teaspoon): Enhances and rounds out all the flavors beautifully.
- Unsweetened cocoa powder, sifted (1 1/2 tablespoons): Introduces a rich chocolate swirl contrast that’s visually and tastefully stunning.
- Semi-sweet chocolate chips (1 cup): Used to create the luscious chocolate dip on top for a perfect finish.
- Vegetable oil (1 1/2 tablespoons): Helps the melted chocolate become smooth and easy to dip.
How to Make Boston Cream Fudge Recipe
Step 1: Prepare Your Pan
Start by lining an 8×8-inch baking pan with parchment paper, leaving some overhang for easy removal later, then lightly spray it with nonstick cooking spray. This simple prep prevents the fudge from sticking and makes clean-up a breeze.
Step 2: Cook the Base Mixture
In a heavy saucepan, combine the sugar, butter, heavy cream, and light corn syrup. Cook over medium heat, stirring constantly until the mixture reaches a rolling boil. This step is essential to dissolve the sugar evenly and incorporates the fats for that melt-in-your-mouth texture.
Step 3: Achieve the Correct Temperature
Continue stirring as you boil for another 4 to 5 minutes until the temperature reaches between 235°F and 240°F. Using a candy thermometer here is key – this precise temperature creates the perfect fudge consistency without being too soft or too hard.
Step 4: Mix in White Chocolate and Marshmallow Cream
Remove the saucepan from heat and immediately stir in the chopped white baking chocolate until melted and smooth. Mix in the marshmallow cream and vanilla extract thoroughly. This combination forms the creamy white layer that echoes the classic Boston cream pie filling.
Step 5: Layer the White Portion into the Pan
Pour approximately three-quarters of this luscious white mixture into your prepared pan, spreading it evenly for a smooth base on which to add your chocolate swirl.
Step 6: Create the Cocoa Swirl
Add the sifted cocoa powder to the remaining fudge mixture in the pan; whisk until it becomes perfectly smooth and chocolatey. Spoon this dark chocolate mixture over the white layer, then gently swirl together with a toothpick or skewer to create a beautiful marbled effect.
Step 7: Cool and Set
Allow the fudge to cool at room temperature for about an hour, then transfer it to the refrigerator for another hour until it’s completely set. This cooling process solidifies the fudge layers for that signature melt-in-your-mouth texture.
Step 8: Cut and Dip in Chocolate
Lift the firm fudge out of the pan using the parchment paper overhang and cut it into 25 delightful squares. Melt the semi-sweet chocolate chips with the vegetable oil in the microwave in short bursts, stirring until silky and smooth. Dip the tops of each fudge square into the chocolate and let them set, creating an irresistible glossy finish.
How to Serve Boston Cream Fudge Recipe
Garnishes
To elevate the look and flavor, consider topping each fudge piece with a sprinkle of finely chopped nuts, a dusting of cocoa powder, or even a few tiny edible gold flakes for festive occasions. These touches add texture and make the fudge look as luxurious as it tastes.
Side Dishes
Though this Boston Cream Fudge Recipe stands on its own as a decadent treat, it pairs wonderfully with a cup of freshly brewed coffee or a bold black tea to balance the sweetness. For an extra special dessert spread, complement it with fresh berries or a scoop of vanilla bean ice cream.
Creative Ways to Present
Serve your fudge on a beautiful platter with doilies or in small decorative boxes as gifts for friends and family. You can also arrange squares stacked in tiers with edible flowers interspersed, making for a stunning centerpiece at any gathering.
Make Ahead and Storage
Storing Leftovers
Boston Cream Fudge Recipe keeps exceptionally well when stored in an airtight container at room temperature or in the refrigerator. Wrapped carefully, it stays fresh and chewy for up to two weeks, allowing you to enjoy it at your pace without losing its delightful texture.
Freezing
If you want to keep your fudge longer, freezing is a great option. Individually wrap squares in parchment paper and place them in a freezer-safe container. When properly stored, the fudge can last up to three months frozen without sacrificing flavor or texture.
Reheating
When you’re ready to enjoy frozen fudge, simply let it thaw at room temperature for about 30 minutes. Avoid microwaving as it can cause the fudge to lose its creamy consistency. Thawed fudge tastes just as divine as freshly made, preserving the charm of the Boston Cream Fudge Recipe.
FAQs
Can I use regular marshmallows instead of marshmallow cream?
While marshmallow cream gives that smooth, chewy consistency, you can melt regular marshmallows with a bit of cream to substitute. Be sure to stir gently to avoid lumps and achieve the right texture.
What if I don’t have a candy thermometer?
It’s best to use a candy thermometer for precision, but if you don’t have one, you can test the fudge by dropping a small amount into cold water to see if it forms a soft ball. This traditional method can help gauge readiness.
Is it possible to make this recipe dairy-free?
Yes! You can use coconut cream instead of heavy cream, dairy-free butter, and dairy-free chocolate alternatives. Keep in mind that texture and flavor might vary slightly but still delicious.
Why is the fudge grainy sometimes?
Graininess usually happens if the sugar crystallizes during cooking or if the fudge is stirred too much while cooling. Using corn syrup and proper temperature helps prevent this, ensuring a silky finish.
Can I add flavors like coffee or fruit extracts?
Absolutely! Vanilla is classic, but you can experiment with coffee, almond, or even a splash of fruit extract to give a personal twist to your Boston Cream Fudge Recipe. Just add extracts sparingly to keep balance.
Final Thoughts
This Boston Cream Fudge Recipe is a true showstopper, whether you’re making it for holidays, parties, or just a special treat for yourself. Its beautiful layers and luxurious flavors offer a perfect blend of nostalgia and indulgence that will surely become a beloved favorite. I can’t wait for you to try it and share this delicious experience with everyone you know!
Print
Boston Cream Fudge Recipe
- Prep Time: 20 minutes
- Cook Time: 10 minutes
- Total Time: 2 hours 30 minutes
- Yield: 25 servings
- Category: Dessert
- Method: Stovetop
- Cuisine: American
Description
This Boston Cream Fudge recipe combines a rich, creamy white chocolate layer with a smooth cocoa swirl, finished with a semi-sweet chocolate ganache topping. Perfectly sweet and velvety, this dessert offers a delightful blend of textures and flavors inspired by the classic Boston cream pie, made into a luscious fudge treat suitable for sharing.
Ingredients
Fudge Base
- 2 cups granulated sugar
- 3/4 cup unsalted butter
- 2/3 cup heavy cream
- 1/4 cup light corn syrup
- 6 ounces white baking chocolate, chopped
- 7 ounces marshmallow cream
- 1 teaspoon vanilla extract
Cocoa Swirl
- 1 1/2 tablespoons unsweetened cocoa powder, sifted
Chocolate Topping
- 1 cup semi-sweet chocolate chips
- 1 1/2 tablespoons vegetable oil
Instructions
- Prepare Pan: Line an 8×8-inch baking pan with parchment paper leaving an overhang to easily lift the fudge later and lightly coat with nonstick spray for effortless removal.
- Cook Base Mixture: In a heavy saucepan over medium heat, combine the granulated sugar, unsalted butter, heavy cream, and light corn syrup. Stir constantly until the mixture reaches a rolling boil.
- Boil to Soft Ball Stage: Continue boiling while stirring for 4 to 5 minutes, until the temperature reaches between 235°F and 240°F (soft ball stage), which ensures proper fudge consistency.
- Add White Chocolate and Marshmallow Cream: Remove the saucepan from heat and stir in the chopped white baking chocolate until fully melted and smooth. Then mix in the marshmallow cream and vanilla extract until the mixture is homogenous.
- Pour White Layer: Pour about three-quarters of this white chocolate mixture into the prepared baking pan, spreading evenly.
- Prepare Cocoa Swirl: To the remaining fudge mixture in the saucepan, add the sifted unsweetened cocoa powder. Whisk until completely smooth and then spoon this chocolate mixture over the white layer in the pan. Use a toothpick to gently swirl the cocoa layer to create a marbled effect.
- Cool and Set: Allow the fudge to cool at room temperature for 1 hour, then refrigerate it for an additional hour until the fudge is fully set and firm.
- Cut into Squares: Use the parchment paper overhang to lift the fudge from the pan and place on a cutting board. Cut into approximately 25 squares.
- Melt Chocolate Topping: In a microwave-safe bowl, melt the semi-sweet chocolate chips with vegetable oil in short intervals, stirring between each, until smooth and shiny.
- Dip and Set Chocolate Tops: Dip the top of each fudge square into the melted chocolate ganache and place them on parchment or a wire rack to set completely before serving.
Notes
- Ensure the sugar mixture reaches the proper temperature (235-240°F) for the fudge to set correctly; use a candy thermometer for precision.
- The marshmallow cream adds a unique smooth texture and sweetness; do not substitute with marshmallows for best results.
- Swirling the cocoa mixture into the white fudge creates a beautiful marbled effect—do not overmix to maintain distinct layers.
- Let the fudge cool completely before cutting to avoid melting or crumbling.
- Dipping the fudge tops in melted chocolate adds an elegant finish and extra chocolate flavor.

