If you are looking for a delightful way to celebrate the spooky season, these Halloween Mini Pizzas: Fun, Custom Treats for Family Fun Recipe will be your new go-to! Bursting with vibrant colors, delicious flavors, and endless opportunities for creativity, this recipe turns ordinary mini pizzas into festive works of edible art. Whether you’re baking with kids or preparing a party snack, these mini pizzas offer a perfect blend of fun and flavor that’s sure to become a family favorite every autumn.
Ingredients You’ll Need
Gathering simple, fresh ingredients is the first step to making these charming Halloween mini pizzas come alive. Each item plays an essential role—from the crispy mini crusts that form the base to the colorful toppings that bring fun and spookiness with every bite.
- 8 ounces Mini Pizza Crusts: Choose store-bought for convenience or homemade for a personal touch – these small bases are perfect for individual treats.
- 1 tablespoon Olive Oil Spray: Ensures your mini pizzas won’t stick to the baking sheet and adds a subtle gleam to the crust.
- 3/4 cup Pizza Sauce: A rich, tangy foundation that adds moisture and flavor; marinara works well as a substitute.
- 1 cup Mozzarella Cheese (Shredded): Melts beautifully for a gooey, cheesy topping everyone adores.
- 4 sticks Part-Skim String Cheese: Perfect for crafting ‘mummy’ designs by pulling apart and layering strips.
- 1/4 cup Black Olives (Sliced): Ideal for adding “eyes” and extra savory notes to your spooky creations.
- 1/4 cup Mini Pepperoni (Optional): Adds a bit of meatiness and traditional pizza flavor for those who want it.
- 1 cup Orange & Green Bell Peppers (Thin strips): These vibrant slices bring festive autumn colors and a satisfying crunch.
- 2 tablespoons Fresh Basil (Chiffonade): A fresh herb garnish that brightens flavors and adds a touch of elegance.
How to Make Halloween Mini Pizzas: Fun, Custom Treats for Family Fun Recipe
Step 1: Prepare Your Workstation and Oven
Start by preheating your oven to 425°F (220°C). While it warms up, lightly mist a baking sheet with olive oil spray to keep your mini pizzas from sticking and help achieve a golden crust. Setting up your space beforehand makes the whole process smooth and enjoyable.
Step 2: Sauce the Mini Crusts
Spread 1 to 2 tablespoons of pizza sauce evenly over each mini pizza crust. Be sure to leave a small border around the edges, which encourages that classic crust crunch after baking. This simple base layer locks in moisture and lays down the perfect flavor foundation.
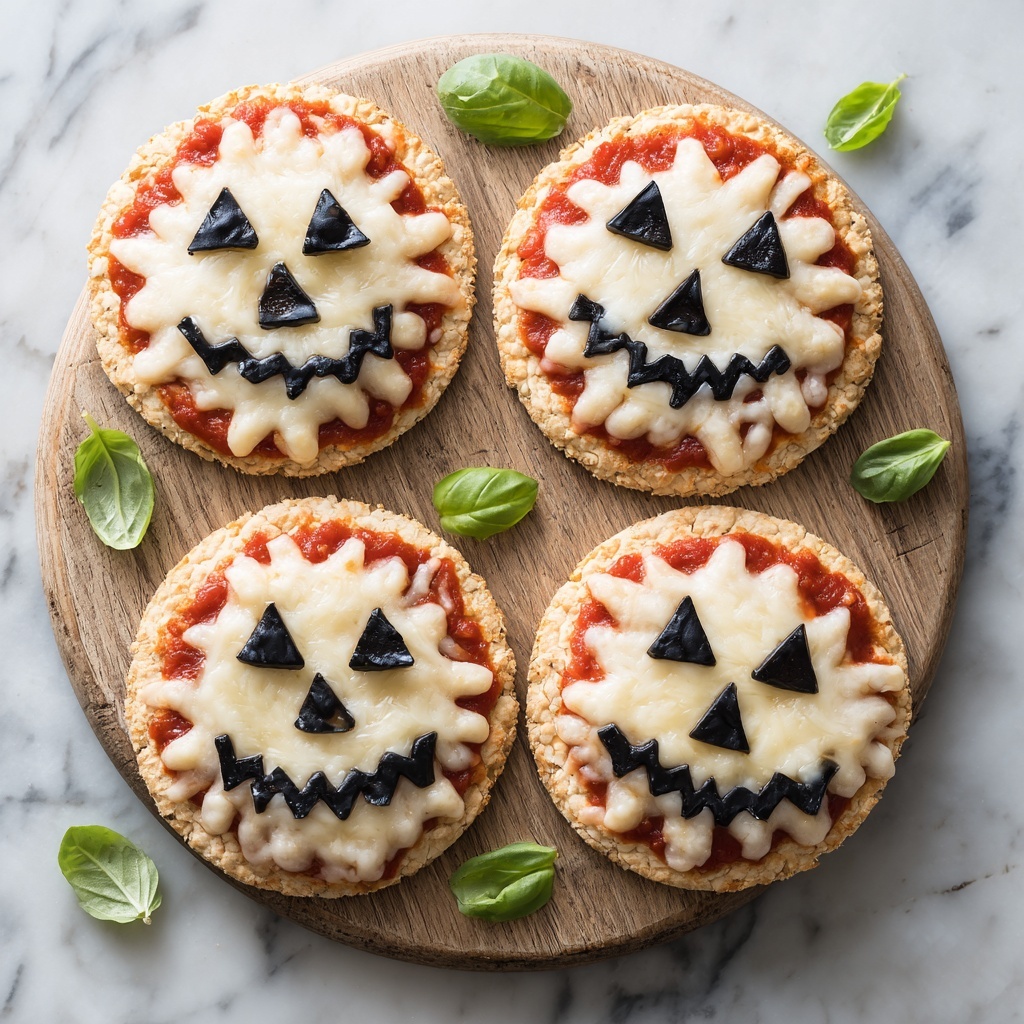
Step 3: Add the Cheese and Create Mummy Faces
On half of the mini pizzas, generously sprinkle shredded mozzarella cheese to guarantee that lush, melty goodness. For the other half, get creative with the string cheese by gently pulling it apart into thin strips and arranging them across the crust to mimic mummy wrappings. This step is as fun to do as it is to eat!
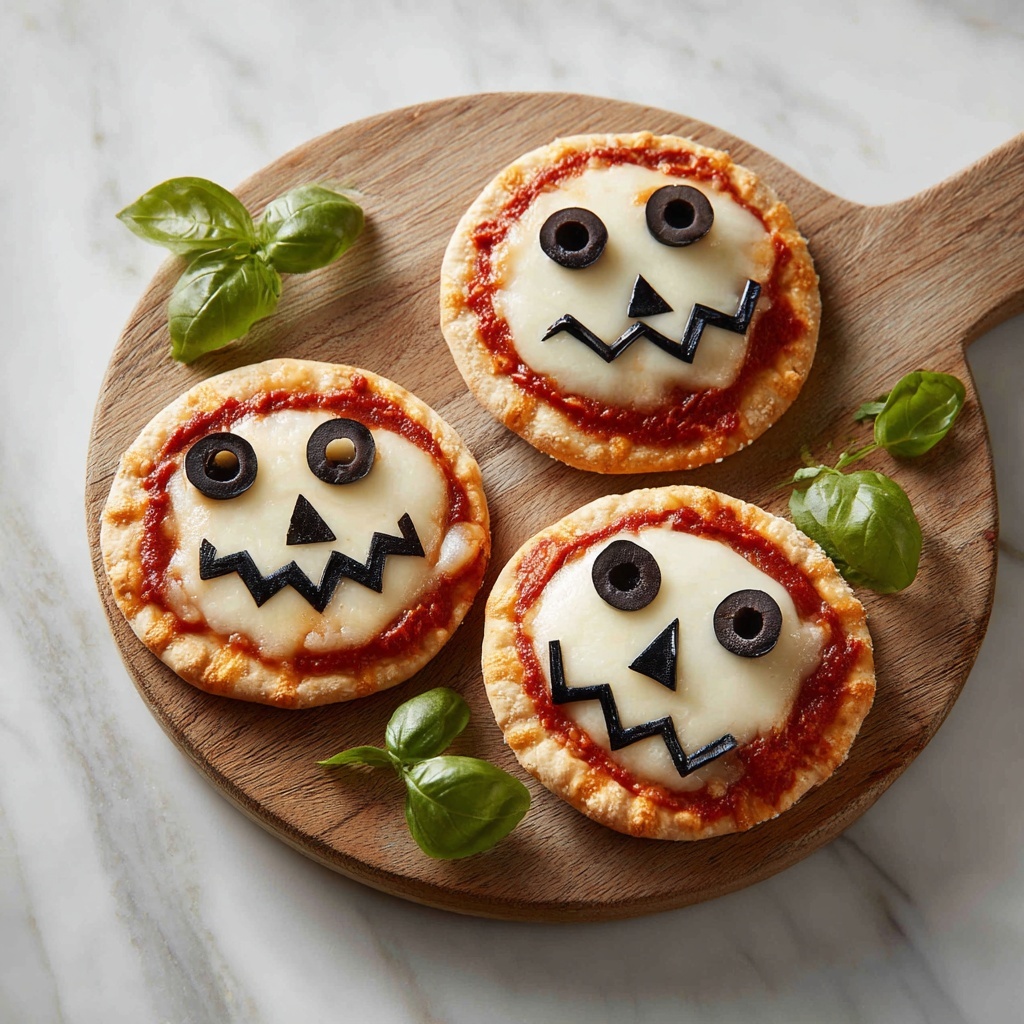
Step 4: Decorate with Spooky Toppings
Now the real artistry begins: decorate each pizza with sliced black olives for creepy “eyes,” add vibrant orange and green bell pepper strips for pops of Halloween color, and scatter mini pepperoni slices if you like a savory, meaty element. Customize each pizza with your favorite designs—it’s a perfect activity for the whole family.
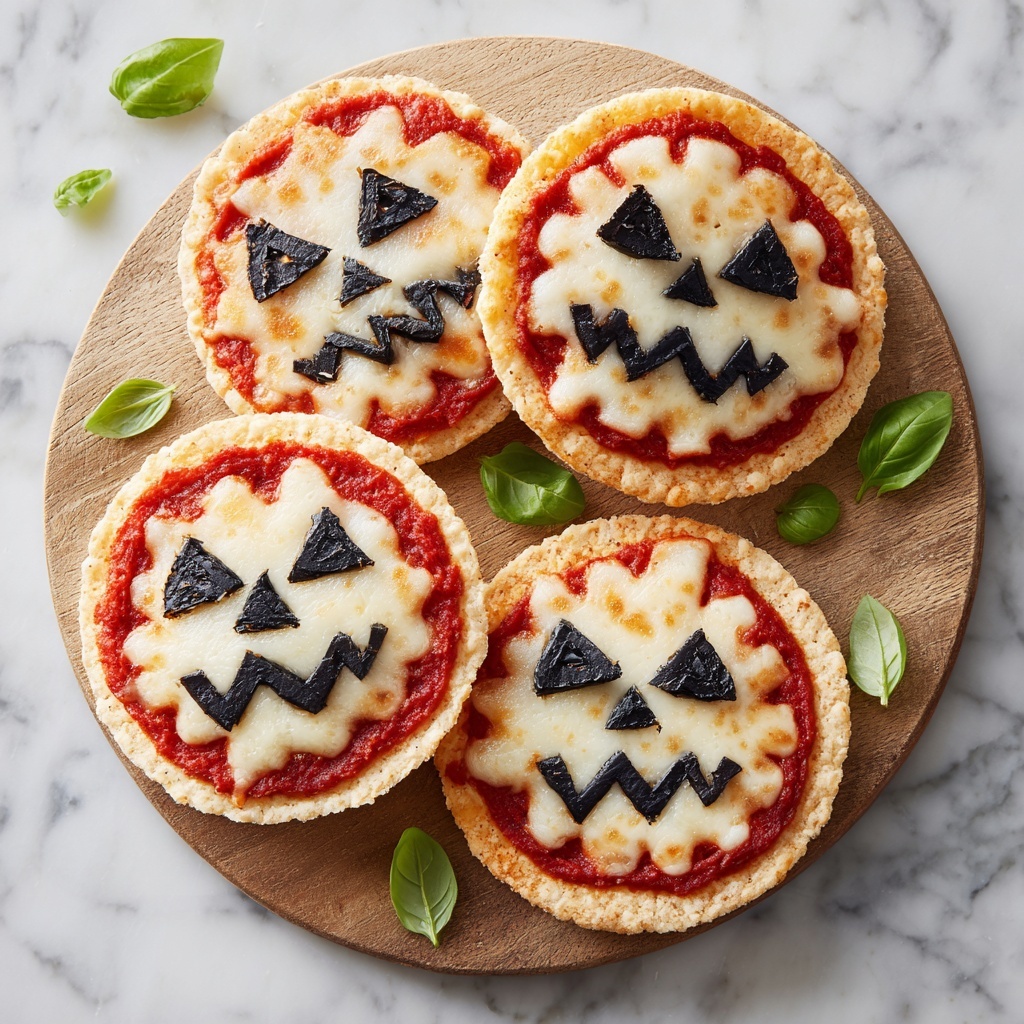
Step 5: Bake Until Golden and Bubbling
Pop the mini pizzas into your preheated oven and bake them for 10 to 12 minutes. Watch as the crusts turn a beautiful golden brown and the cheese melts into bubbly perfection. This precise timing ensures every bite is warm, flavorful, and satisfying.
Step 6: Garnish and Cool
Once baked, allow the pizzas to cool for a couple of minutes to set the toppings. Then sprinkle freshly chiffonaded basil over the top. This final flourish adds freshness and a lovely herbal aroma, rounding out the tasty experience.
How to Serve Halloween Mini Pizzas: Fun, Custom Treats for Family Fun Recipe
Garnishes
Fresh garnishes can elevate your Halloween mini pizzas from simple snacks to festive delights. Besides the basil chiffonade, consider adding a drizzle of balsamic glaze or a sprinkle of red pepper flakes for a subtle kick that intrigues the palate and complements the cheesy base.
Side Dishes
These mini pizzas pair wonderfully with light side dishes that keep the Halloween theme alive. A crisp green salad with autumn vinaigrette or a bowl of spiced pumpkin soup makes the meal feel well-rounded and nourishing without overpowering the main treat.
Creative Ways to Present
Presentation is everything when it comes to festive treats! Arrange your mini pizzas on a rustic wooden board or a Halloween-themed platter. Add some plastic spiders or small decorative pumpkins around the plate for a whimsical touch. For extra fun, serve with small bowls of dipping sauces like ranch or spicy marinara, letting everyone customize their bites further.
Make Ahead and Storage
Storing Leftovers
Unsurprisingly, these mini pizzas are almost too good to have leftovers, but if you do have some, store them in an airtight container in the refrigerator for up to 3 days. Keeping them covered helps maintain their texture and flavors, so they taste fresh when enjoyed later.
Freezing
You can also freeze any extra mini pizzas by placing them on a baking sheet to freeze individually, then transferring them to a freezer-safe bag. They keep well for up to 2 months and make an easy, quick snack when Halloween fun continues beyond the initial celebration.
Reheating
To reheat, pop the mini pizzas in a preheated oven at 375°F (190°C) for about 5-7 minutes until warmed through and the cheese is soft again. Avoid microwaving if possible, as that can make the crust soggy instead of crisp and enjoyable.
FAQs
Can I use a different type of cheese?
Absolutely! While mozzarella melts beautifully and is classic on pizzas, feel free to experiment with cheddar, provolone, or even a bit of parmesan for unique flavor twists.
Are these mini pizzas suitable for kids to make?
Definitely! This recipe is very kid-friendly and perfect for involving little ones in the kitchen, especially with the decorating part where they can get creative with toppings.
What if someone has dietary restrictions?
For gluten-free needs, use gluten-free mini crusts. Dairy-free cheese options can substitute mozzarella, and you can adjust toppings according to preferences or allergies.
How can I make these pizzas spookier?
Use toppings creatively to craft faces like ghosts, pumpkins, and witches. Adding edible eyes or using cut-out bell peppers can add an extra layer of Halloween fun.
Can I double the recipe for a larger crowd?
Yes! This recipe scales easily—just add more mini crusts and toppings. You might need to bake the pizzas in batches to keep that perfect crispness.
Final Thoughts
Halloween Mini Pizzas: Fun, Custom Treats for Family Fun Recipe make for a fantastic way to combine food, creativity, and family bonding. They invite everyone to get involved in cooking and celebrating, delivering delicious results that you’ll want to return to year after year. Go ahead, try making these at your next Halloween gathering and watch smiles appear with every tasty bite!
Print
Halloween Mini Pizzas: Fun, Custom Treats for Family Fun Recipe
- Prep Time: 10 minutes
- Cook Time: 12 minutes
- Total Time: 22 minutes
- Yield: 4 servings
- Category: Snack
- Method: Baking
- Cuisine: American
- Diet: Vegetarian
Description
Halloween Mini Pizzas are fun and festive treats perfect for family gatherings and celebrations. These customizable mini pizzas are decorated with spooky designs using string cheese, olives, bell peppers, and optional mini pepperoni, making them a creative and delicious activity for kids and adults alike. Baked to golden perfection, they are topped with fresh basil for a burst of flavor.
Ingredients
Base
- 8 ounces Mini Pizza Crusts (Store-bought or homemade)
- 1 tablespoon Olive Oil Spray (For greasing the baking sheet)
- 3/4 cup Pizza Sauce (Marinara can be used as a substitute)
Cheeses
- 1 cup Mozzarella Cheese (Shredded)
- 4 sticks Part-Skim String Cheese (For ‘mummy’ designs)
Toppings
- 1/4 cup Black Olives (Sliced)
- 1/4 cup Mini Pepperoni (Optional)
- 1 cup Orange & Green Bell Peppers (Thin strips)
Garnish
- 2 tablespoons Fresh Basil (Chiffonade for garnishing)
Instructions
- Preparation: Preheat your oven to 425°F (220°C). Lightly mist a baking sheet with olive oil spray to prevent sticking of the mini pizza crusts during baking.
- Sauce Application: Spread 1-2 tablespoons of pizza sauce evenly over each mini pizza crust, leaving a small border around the edges to form the crust.
- Cheese Topping: Sprinkle shredded mozzarella cheese over half of the mini pizzas. For the remaining pizzas, pull apart the part-skim string cheese sticks and arrange them to create ‘mummy’ designs by wrapping the cheese strips.
- Decorate with Toppings: Use sliced black olives, thin strips of orange and green bell peppers, and optional mini pepperoni to create spooky Halloween designs on the pizzas.
- Baking: Place the prepared mini pizzas on the baking sheet and bake in the preheated oven for 10-12 minutes until the crusts turn golden brown and the cheese is fully melted.
- Cooling and Garnishing: Remove the pizzas from the oven and let them cool for about 2 minutes to set. Garnish with fresh basil chiffonade for added color and flavor before serving.
Notes
- Use marinara sauce as a substitute if pizza sauce is not available.
- Mini pepperoni is optional; you can omit it for a vegetarian version.
- Be creative with the spooky designs—use olives and peppers to make eyes, mouths, and other fun shapes.
- If you prefer a crispier crust, bake a couple of minutes longer but watch carefully to avoid burning.
- These pizzas are best served warm for optimal flavor and texture.

