
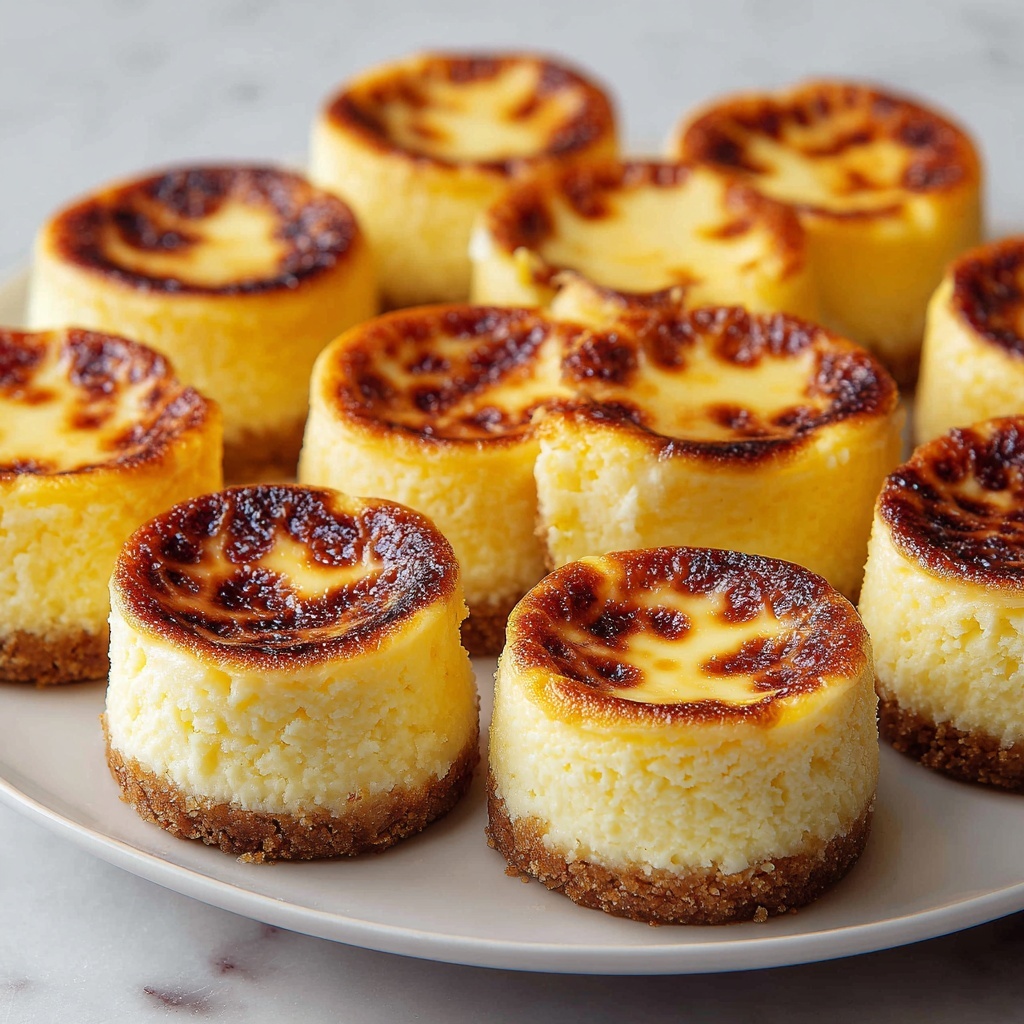
If you’re looking for a dessert that’s irresistibly charming and packed with creamy, sweet goodness, this Mini Cheesecake Tarts Recipe is going to become your new favorite. These bite-sized delights combine a buttery graham cracker crust with a smooth, luscious cheesecake filling, all topped with vibrant fresh berries or your favorite drizzle. Perfect for parties, special occasions, or a simple indulgence, this recipe delivers effortless elegance that’s sure to impress everyone at the table.

Ingredients You’ll Need
Simple, straightforward ingredients come together in this recipe to create complex flavors and delightful textures. Each element plays a key role, whether it’s the crunch of the graham cracker crust, the velvety cream cheese filling, or the fresh and colorful garnishes on top.
- Graham cracker crumbs: The foundation of the crust, providing that perfect crisp texture and delicious flavor.
- Granulated sugar: Adds sweetness to the crust and balances the creaminess of the filling.
- Unsalted butter, melted: Binds the crust crumbs together while adding richness and a buttery taste.
- Cream cheese, softened: The star of the cheesecake filling, delivering a smooth and creamy texture.
- Powdered sugar: Sweetens the filling and the whipped cream without any grittiness.
- Vanilla extract: Lifts the flavor, adding warmth and depth to each bite.
- Heavy whipping cream: Whipped to stiff peaks, it lightens the cream cheese mixture, making the filling airy yet luscious.
- Fresh berries: Offer a burst of color, freshness, and natural sweetness that perfectly complements the richness.
- Chocolate shavings or drizzle: Add a touch of decadence and a hint of bitterness for balance.
- Caramel sauce: For a luscious, sticky sweetness that pairs beautifully with the tartness of the berries.
- Fruit preserves: Bring an extra layer of fruity flavor and a glossy finish to your tarts.
How to Make Mini Cheesecake Tarts Recipe
Step 1: Make the Crust
Preheat your oven to 350°F (175°C) to get everything ready. In a medium bowl, combine the graham cracker crumbs, sugar, and melted butter, mixing until the crumbs are evenly coated and crumbly but packable. Spoon about a tablespoon of this mixture into each tart pan or muffin tin, then press down firmly to create a compact crust base. Pop these into the oven for 5 to 7 minutes until golden brown and fragrant. Once baked, set aside to cool completely before adding your filling.
Step 2: Prepare the Cheesecake Filling
Start by beating the softened cream cheese until it’s perfectly smooth and creamy, a great way to avoid lumps and ensure a velvety texture. Slowly blend in the powdered sugar and vanilla extract, mixing thoroughly for a balanced sweetness and aromatic kick. In a separate bowl, whip the heavy cream and powdered sugar until you see stiff peaks form—this lightens the filling and adds a fluffy, dreamy quality.
Step 3: Combine and Fill
Carefully fold the whipped cream into your cream cheese mixture using a spatula, taking care not to deflate the air you just incorporated. The result is a brilliantly smooth yet airy filling. Once the crusts are completely cool, spoon the cheesecake filling in generously, smoothing the tops with a spatula. You can fill them slightly over the edge if you want a tall, impressive look. Chill the tarts in the refrigerator for at least two hours to let the cheesecake set and deepen its flavors.
Step 4: Add Your Favorite Toppings
After chilling, the fun part begins: decorating! Top each tart with fresh berries that burst with juiciness and color, or get creative with chocolate shavings, caramel swirls, or your favorite fruit preserves for a glossy finish. These toppings not only enhance the appearance but also perfectly complement the creamy filling and crisp crust beneath.
How to Serve Mini Cheesecake Tarts Recipe
Garnishes
Fresh berries like blueberries, raspberries, and strawberries are classic choices that bring lively colors and a touch of tartness, balancing the sweetness of the cheesecake. A light dusting of powdered sugar or a drizzle of chocolate or caramel sauce amps up both the flavor and presentation, turning each tart into a little work of art.
Side Dishes
While mini cheesecake tarts are delightful on their own, pairing them with a scoop of vanilla ice cream or a dollop of freshly whipped cream takes the experience to another level. For a refreshing contrast, some chilled herbal teas or sparkling fruit-based beverages complement the richness wonderfully.
Creative Ways to Present
Serve these mini tarts on a pretty platter lined with fresh mint leaves for a pop of green and freshness. Arrange them in rows on individual dessert plates for parties or even package them in small gift boxes as charming homemade treats. Experiment with layered toppings or edible flowers to add a personal, elegant touch.
Make Ahead and Storage
Storing Leftovers
Mini cheesecake tarts keep wonderfully in the fridge for up to three days. Store them in an airtight container to preserve their delicate texture and prevent any fridge odors from seeping in. They’re perfect for making in advance before an event or saving a few for a treat later.
Freezing
If you want to prepare these tarts ahead of time, they freeze well. After assembling but before adding fresh toppings, wrap the tarts carefully with plastic wrap and place them in a freezer-safe container. Freeze up to one month, and when ready to enjoy, thaw them overnight in the refrigerator.
Reheating
Because these are no-bake cheesecake tarts that should be served chilled, reheating is not necessary—and not recommended. Just bring them to room temperature for about 10-15 minutes before serving if you find them too cold from the fridge or freezer, but keep the refreshing, creamy texture intact.
FAQs
Can I use store-bought graham cracker crumbs?
Absolutely! Store-bought graham cracker crumbs save time and work perfectly for the crust. Just make sure they are finely crushed for the best texture and easy packing into the tart pans.
How do I soften cream cheese quickly?
The easiest way is to leave it out on the counter for about 30 minutes before starting or gently microwave it for 10-15 seconds, checking frequently to avoid melting.
Can I make this recipe dairy-free?
You can substitute dairy-free cream cheese and coconut cream for the heavy whipping cream to make a tasty dairy-free version, though the texture may be slightly different but still delicious.
What if I don’t have tart pans?
Muffin tins work perfectly as an alternative. Just be sure to line them with cupcake liners or grease them well so your tarts release easily.
How long can I store the decorated tarts?
Once decorated with fresh fruit, it’s best to enjoy the tarts the same day for the freshest taste and best texture, as fruit can release moisture and affect the crust.
Final Thoughts
This Mini Cheesecake Tarts Recipe is one you’ll want to keep in your dessert repertoire, whether for impressing guests or treating yourself to a sweet moment of joy. The balance of textures and flavors, ease of preparation, and endless customization possibilities mean these mini tarts have all the ingredients for becoming a beloved classic. So go ahead, gather your ingredients, and share the delicious happiness of these charming little desserts with everyone you love.
Print
Mini Cheesecake Tarts Recipe
- Prep Time: 20 minutes
- Cook Time: 7 minutes
- Total Time: 2 hours 27 minutes
- Yield: 12 mini tarts
- Category: Dessert
- Method: Baking
- Cuisine: American
- Diet: Vegetarian
Description
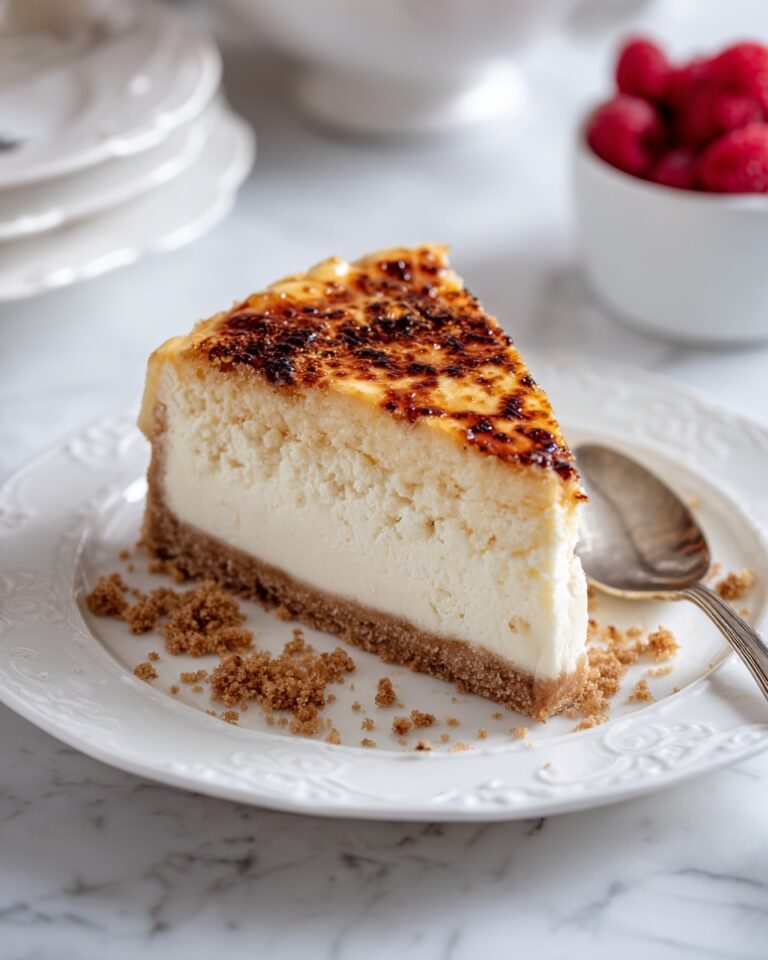
These Mini Cheesecake Tarts feature a crisp graham cracker crust filled with a smooth and creamy cream cheese filling, topped with fresh berries, chocolate shavings, caramel, or fruit preserves. Perfectly portioned and chilled for a refreshing dessert that’s easy to prepare and impressive to serve.
Ingredients
For the Crust
- 1 ½ cups graham cracker crumbs
- ¼ cup granulated sugar
- 6 tablespoons unsalted butter, melted
For the Cheesecake Filling
- 8 oz cream cheese, softened
- ½ cup powdered sugar
- 1 teaspoon vanilla extract
- 1 cup heavy whipping cream
- 2 tablespoons powdered sugar (for whipped cream)
Toppings
- Fresh berries (blueberries, strawberries, raspberries, etc.)
- Chocolate shavings or drizzle
- Caramel sauce
- Fruit preserves (apricot, strawberry, etc.)
Instructions
- Make the crust: Preheat your oven to 350°F (175°C). In a medium bowl, mix together the graham cracker crumbs, granulated sugar, and melted butter until well combined. Spoon about 1 tablespoon of the crust mixture into the bottom of each tart pan or muffin tin. Press down firmly with the back of a spoon or your fingers to form an even crust layer. Bake in the preheated oven for 5-7 minutes until golden brown. Remove and let them cool completely.
- Prepare the cheesecake filling: In a medium mixing bowl, beat the softened cream cheese with a hand mixer on medium speed until smooth and creamy. Add the ½ cup powdered sugar and vanilla extract, continuing to mix until fully incorporated and smooth.
- Make whipped cream: In a separate bowl, whip the heavy whipping cream and 2 tablespoons powdered sugar using an electric mixer until stiff peaks form, approximately 2-3 minutes.
- Combine filling and whipped cream: Gently fold the whipped cream into the cream cheese mixture, carefully mixing until smooth and fully combined, creating a light and creamy cheesecake filling.
- Assemble the tarts: Once the crusts have cooled, spoon the cheesecake filling into each tart shell, smoothing the tops with a spatula. You can fill them slightly over the edge if a taller tart is desired.
- Chill: Refrigerate the assembled mini tarts for at least 2 hours to allow the cheesecake filling to set firmly.
- Add toppings and serve: After chilling, top the mini cheesecake tarts with your choice of fresh berries, chocolate shavings or drizzle, caramel sauce, or fruit preserves. Serve chilled and enjoy the refreshing and creamy dessert.
Notes
- Ensure cream cheese is softened to room temperature for easier mixing and a smoother filling.
- If tart pans are unavailable, muffin tins work as an excellent alternative.
- Pressing the crust firmly helps maintain the shape of the crust after baking and filling.
- The cheesecake filling can be customized with different flavor extracts like lemon or almond for variety.
- Store leftover mini tarts covered in the refrigerator for up to 3 days.
- For a dairy-free version, substitute cream cheese and heavy cream with suitable plant-based alternatives.

