
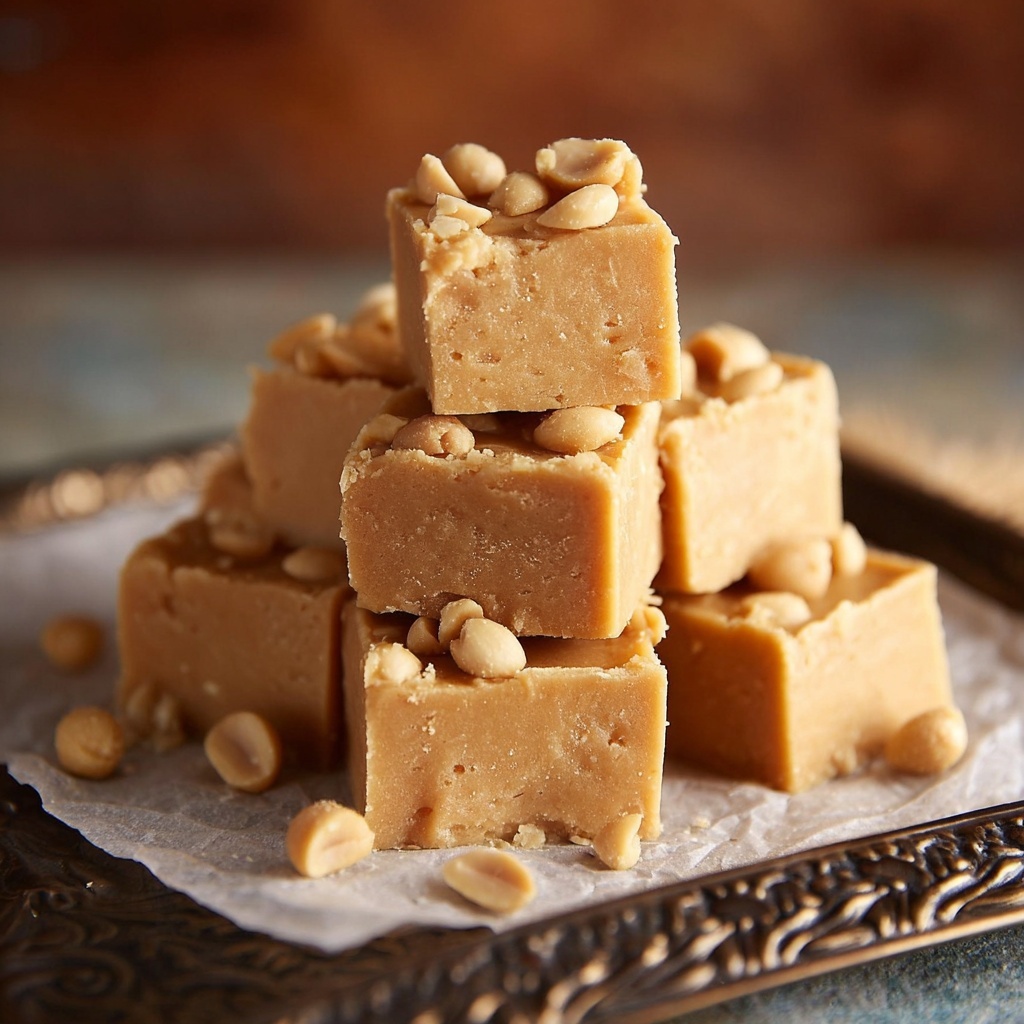
If you have a sweet tooth and a love for peanut butter, this Easy Peanut Butter Fudge Recipe is about to become your new best friend in the kitchen. It’s delightfully creamy, packed with rich peanut butter flavor, and has just the right balance of sweetness and texture. This fudge comes together with simple pantry ingredients and doesn’t require any fancy equipment, which means you can whip it up for last-minute gatherings or just to satisfy your own cravings. Once you taste this melt-in-your-mouth treat, you’ll wonder why you didn’t try making homemade fudge sooner!

Ingredients You’ll Need
All of the ingredients in this recipe are straightforward pantry staples, but each one plays an essential role in crafting that perfect fudgy texture and irresistible peanut buttery taste. From creamy peanut butter to luscious marshmallow creme, these ingredients combine beautifully without any fuss.
- 3 cups granulated sugar: Provides the classic sweet base and structure for a rich fudge consistency.
- 1 (5-ounce) can evaporated milk: Adds creaminess and smoothness, essential for luscious texture.
- 3/4 cup unsalted butter (12 tablespoons): Gives a rich, velvety mouthfeel that melts in your mouth.
- 1/3 cup peanut butter (creamy or crunchy): The star ingredient delivering that signature peanut flavor and subtle saltiness.
- 1 (10-ounce) package peanut butter chips: Boosts peanut intensity and adds a slight bite.
- 1 (7-ounce) jar marshmallow creme: Creates a smooth, fluffy texture and enhances sweetness without graininess.
- 1/4 cup salted peanuts (optional): Adds an extra crunch and salty contrast if you want some textural variety.
How to Make Easy Peanut Butter Fudge Recipe
Step 1: Prepare Your Pan and Ingredients
First things first, butter an 8×8-inch baking dish or spray it with nonstick cooking spray. This step ensures your fudge won’t stick and it will be easy to cut into neat squares later. Have all your ingredients measured and ready because once the cooking starts, things move quickly.
Step 2: Combine and Cook the Sugar Mixture
In a medium-sized, heavy-bottomed pot, combine the granulated sugar, evaporated milk, and butter. Place the pot over medium heat and stir frequently. The mixture will dissolve and slowly start to come to a boil. Keep stirring as this is key to preventing burning and ensuring even cooking. Once boiling, continue to boil for about 5 minutes, stirring constantly to reach the perfect fudge texture.
Step 3: Achieve the Soft Ball Stage
Using a candy thermometer, monitor the temperature carefully until it hits 235°F. This “soft ball” stage is crucial for fudge because it means your mixture will set correctly—not too hard, not too soft. It may feel like a little bit of science, but trust me, the candy thermometer is your best friend here for consistent, professional results.
Step 4: Add Peanut Butter and Marshmallow Creme
Remove the pot from heat and quickly stir in the peanut butter, peanut butter chips, and marshmallow creme. Keep stirring until the mixture becomes creamy and smooth with no lumps. This step locks in that luscious peanut flavor and creates an ultra-silky texture. If you want to add the optional salted peanuts, fold them in now, reserving a few to sprinkle on top for an inviting finish.
Step 5: Pour, Cool, and Cut
Immediately pour the hot fudge into your prepared baking dish, smoothing out the top with a spatula. Allow it to cool completely at room temperature—it will firm up nicely. Once set, cut into squares and prepare to be amazed by your homemade peanut butter fudge creation!
How to Serve Easy Peanut Butter Fudge Recipe
Garnishes
To elevate your fudge for guests or a special treat, sprinkle a handful of chopped salted peanuts or even a light drizzle of melted chocolate on top before it fully sets. These little touches add texture variety and a pop of visual appeal that makes it even more irresistible.
Side Dishes
Serving this fudge alongside a cup of strong coffee or a glass of cold milk is a classic combo. The fudge’s richness pairs beautifully with the bitter or creamy notes of your beverage choice. You can also serve it as part of a dessert platter with fresh fruit or cookies for an indulgent snack spread.
Creative Ways to Present
For gift-giving or parties, cut the fudge into bite-sized cubes and place them in decorative cupcake liners or small cellophane bags tied with a festive ribbon. You can even layer fudge pieces with crushed cookies or nuts in clear glass jars to show off the beautiful layers for a charming homemade gift.
Make Ahead and Storage
Storing Leftovers
Store your leftover fudge in an airtight container at room temperature for up to one week. Keeping it sealed ensures it stays moist and chewy, and avoids drying out or absorbing other fridge odors.
Freezing
If you want to keep your fudge for longer, it freezes beautifully. Wrap individual pieces tightly in plastic wrap, then place them in a freezer-safe container. Frozen fudge can stay fresh for up to three months and thaw quickly at room temperature when you’re ready to enjoy.
Reheating
Generally, fudge is best enjoyed cold or at room temperature. However, if you’d like it softer, briefly warm a piece in the microwave for about 5-10 seconds. Be careful not to overheat it, or the texture might become overly soft or oily.
FAQs
Can I use crunchy peanut butter instead of creamy in this Easy Peanut Butter Fudge Recipe?
Absolutely! Using crunchy peanut butter will add an extra layer of texture and nutty surprise in each bite, which some peanut butter lovers adore. Just keep in mind it may change the overall smoothness slightly.
Do I have to use marshmallow creme in this recipe?
The marshmallow creme helps create the soft, fluffy texture typical of great fudge. Skipping it can result in a denser, less creamy fudge, so it’s recommended to keep it for the classic taste and texture.
Why is the candy thermometer important for making fudge?
Reaching the precise temperature, called the soft ball stage, ensures your fudge will set correctly—neither too hard nor too gooey. Without the thermometer, it’s tricky to know when to stop cooking, which is why it’s a handy tool for consistent success.
Can I add chocolate chips to this Easy Peanut Butter Fudge Recipe?
You can definitely experiment by adding chocolate chips for a peanut butter-chocolate combo, but adding too many may alter the texture and setting of the fudge. It’s best to keep the chocolate modest or swirl it in gently for a marbled effect.
How long does it take for the fudge to set?
Typically, the fudge needs to cool at room temperature for a few hours until it’s completely firm. To speed up the process, you can place it in the refrigerator, but avoid freezing immediately as it can cause texture changes.
Final Thoughts
There is something so satisfying about making your own peanut butter fudge, and this Easy Peanut Butter Fudge Recipe delivers creamy, dreamy results with just a handful of ingredients and simple steps. Whether you are a seasoned baker or a beginner looking for a sweet project, this fudge will bring smiles and cravings. Give it a try—you’ll love the flavor-packed richness that homemade fudge brings to your dessert table!
Print
Easy Peanut Butter Fudge Recipe
- Prep Time: 10 minutes
- Cook Time: 20 minutes
- Total Time: 30 minutes
- Yield: 24 servings
- Category: Dessert
- Method: Stovetop
- Cuisine: American
Description
This Easy Peanut Butter Fudge recipe delivers a rich, creamy, and irresistibly sweet treat, perfect for satisfying your peanut butter cravings. Made with simple ingredients like sugar, evaporated milk, butter, peanut butter, peanut butter chips, and marshmallow creme, it’s a classic no-bake fudge that sets beautifully and is perfect for sharing. This recipe yields 24 generous servings and can optionally include salted peanuts for added texture.
Ingredients
Fudge Base
- 3 cups granulated sugar
- 1 (5-ounce) can evaporated milk (about 2/3 cup)
- 3/4 cup unsalted butter (12 tablespoons)
Flavor and Texture
- 1/3 cup peanut butter (creamy or crunchy)
- 1 (10-ounce) package peanut butter chips
- 1 (7-ounce) jar marshmallow creme
- 1/4 cup salted peanuts (optional, chopped)
Instructions
- Prepare the Baking Dish: Butter an 8×8-inch baking dish or spray it with nonstick cooking spray and set aside to ensure the fudge does not stick.
- Cook the Sugar Mixture: In a medium-sized, heavy pot, combine the granulated sugar, evaporated milk, and unsalted butter. Cook over medium heat, stirring frequently to prevent burning, until the mixture comes to a boil.
- Boil to Soft Ball Stage: Once boiling, continue to cook the mixture for about 5 minutes, stirring constantly. Use a candy thermometer to monitor the temperature and remove the pot from heat when it reaches 235°F (soft ball stage).
- Mix in Peanut Butter and Chips: Remove the pot from heat. Stir in the peanut butter, peanut butter chips, and marshmallow creme until the mixture is creamy and smooth.
- Add Nuts (Optional): If using, fold in chopped salted peanuts, reserving a few to sprinkle on top for garnish and added crunch.
- Pour and Set: Immediately pour the fudge mixture into the prepared baking dish. Spread evenly and allow it to cool completely at room temperature until set.
- Cut and Store: Once fully cooled and firm, cut the fudge into desired pieces. Store in an airtight container to maintain freshness.
Notes
- Using a candy thermometer is crucial to achieve the perfect soft ball stage for fudge consistency.
- For a crunchier texture, use crunchy peanut butter and add salted peanuts.
- Ensure to stir constantly during boiling to prevent burning or scorching the sugar mixture.
- Fudge can be stored at room temperature for up to a week or refrigerated for longer freshness.
- You can substitute salted peanuts with unsalted if preferred, but this will reduce the salty balance.

