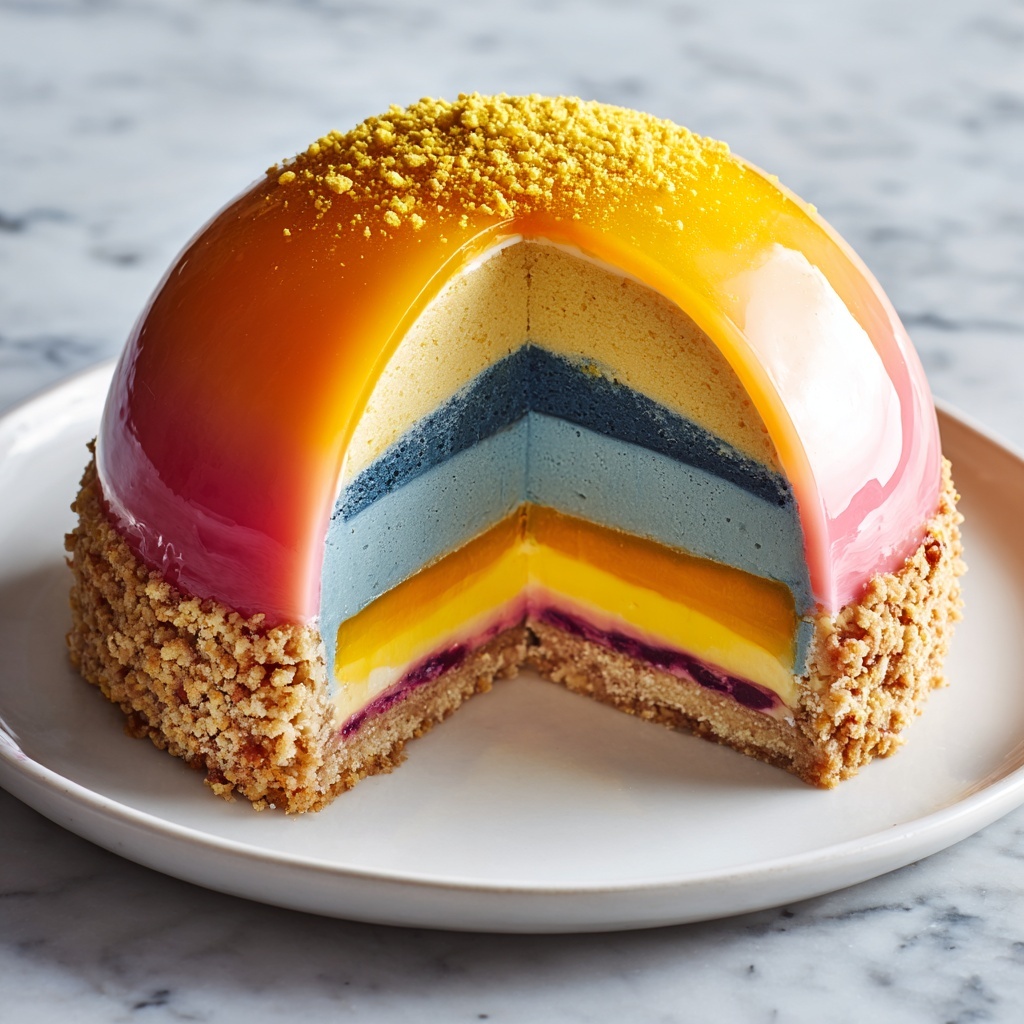
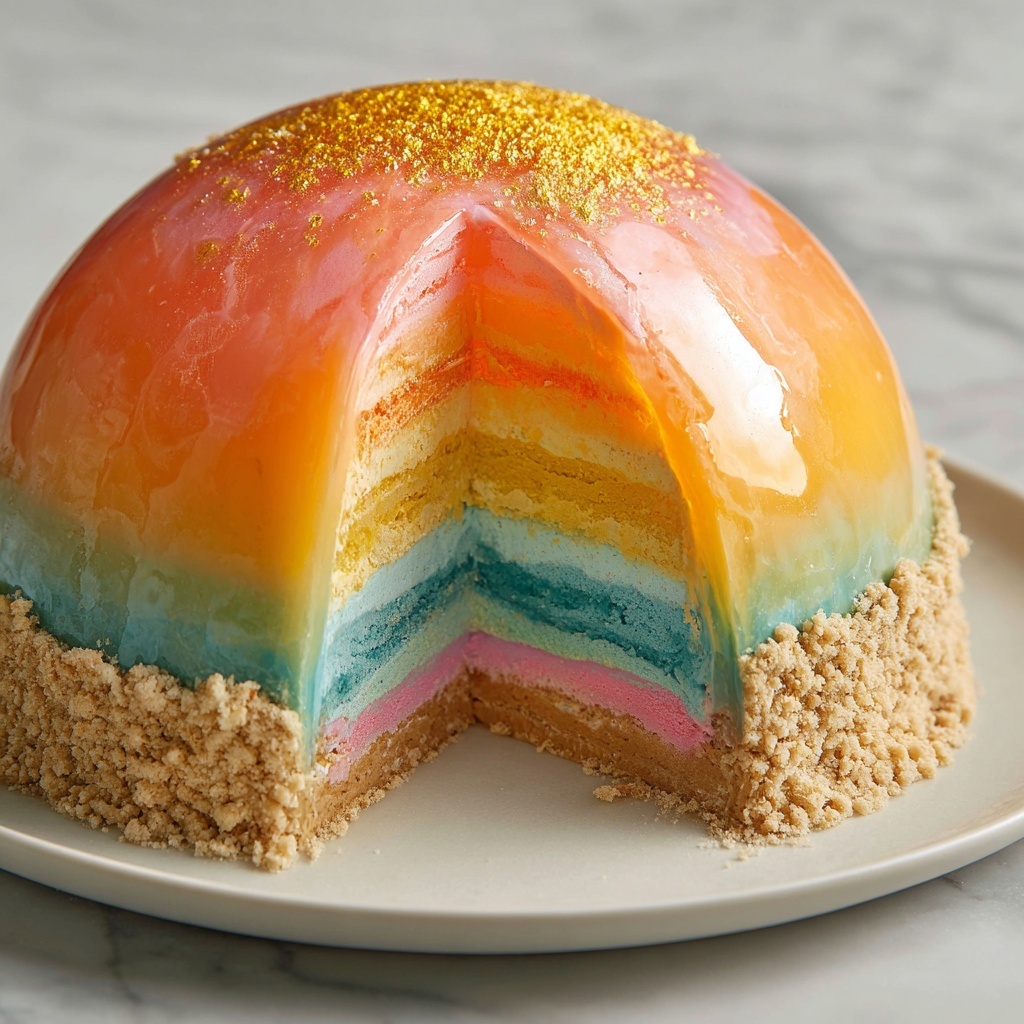
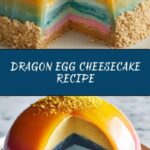
If you have ever dreamed of indulging in a dessert that feels like it belongs in a mythical realm, the Dragon Egg Cheesecake Recipe is exactly what you need to bring that fantasy to life at your very own table. This stunning cheesecake combines rich, creamy texture with enchanting marbled colors that resemble a dragon’s mystical eggshell, making it not only a treat for the taste buds but also a feast for the eyes. Whether you are hosting a themed party or simply want to impress your friends with a magical creation, this Dragon Egg Cheesecake Recipe stands out as a showstopper that is surprisingly simple to make.
Ingredients You’ll Need
Gathering the right ingredients is the first step to creating that perfect balance of flavors and textures in the Dragon Egg Cheesecake Recipe. Each component plays an important role, from the crunch of the chocolate cookie crust to the luscious, smooth cheesecake filling, and the colorful swirls that bring the magic to life.
- Chocolate cookie crumbs: Provides a rich, crisp base that complements the creamy filling perfectly.
- Unsalted butter (melted): Binds the cookie crumbs nicely, adding a subtle richness to the crust.
- Cream cheese (softened): The star of the cheesecake, offering a smooth and velvety texture that melts in your mouth.
- Granulated sugar: Sweetens the cheesecake without overwhelming the delicate cream cheese flavor.
- Large eggs: Essential for structure and that creamy, smooth consistency.
- Vanilla extract: Adds a warm, floral aroma that enhances the overall flavor.
- Sour cream: Introduces a hint of tanginess that balances the rich sweetness.
- Gel food coloring (red, purple, green – optional): Creates the enchanting marbled “dragon egg” look without altering texture.
- Edible shimmer or luster dust (optional): Adds a magical sparkle to truly mimic a dragon’s egg.
- Chocolate shell pieces or candy scales: Decorative elements that give an authentic, scaled texture to the finished cheesecake.
How to Make Dragon Egg Cheesecake Recipe
Step 1: Prepare the Crust
Start by preheating your oven to 325°F (163°C). In a medium bowl, combine the chocolate cookie crumbs with the melted butter. This mixture forms the sturdy and delicious base of your cheesecake. Press it firmly and evenly into the bottom of a 9-inch springform pan to create a solid layer. Bake the crust for 10 minutes to set it, then remove and let it cool while you prepare the filling.
Step 2: Make the Cheesecake Filling
In a large bowl, beat the softened cream cheese and sugar together until the mixture becomes smooth and creamy—this is key for that silky texture. Add the eggs one at a time, ensuring each is fully incorporated for an even consistency. Mix in vanilla extract and sour cream gently; these will give your cheesecake a lovely aroma and balanced flavor.
Step 3: Add the Magical Colors
If you want your cheesecake to look like an authentic dragon egg, divide the batter into portions and add your gel food coloring—red, purple, and green work beautifully. Swirl the colors gently in the pan atop the crust to create an enchanting marbled effect that’s as magical as it is appetizing.
Step 4: Bake the Cheesecake
Pour the colorful batter over the cooled crust and smooth the top carefully. Bake the cheesecake for 50 to 60 minutes, or until the center is just set and still slightly jiggles—it will firm up more as it cools. Turn off the oven, crack the door open, and let the cheesecake cool inside for an hour before refrigerating it for at least 4 hours or overnight to achieve the perfect texture.
Step 5: Decorate Your Dragon Egg
Once chilled, bring your dragon egg to life by decorating its surface with edible shimmer or luster dust for that mystical glow. Finish by arranging chocolate shell pieces or candy scales around the cheesecake to mimic a dragon’s scales, making this dessert an unforgettable centerpiece.
How to Serve Dragon Egg Cheesecake Recipe

Garnishes
Adding the right garnishes can elevate your Dragon Egg Cheesecake Recipe from delicious to extraordinary. A sprinkle of edible shimmer dust instantly catches the light, while chocolate scales or candy shards add texture and visual interest. Fresh berries or edible flowers can also complement the flavors and enhance the fantasy vibe.
Side Dishes
While the cheesecake is a rich treat on its own, pairing it with simple sides like a fresh fruit salad, a dollop of whipped cream, or a drizzle of raspberry coulis can create a harmonious balance. You want accompaniments that brighten the palate without overpowering the magical layers of flavor in the cheesecake.
Creative Ways to Present
Presentation makes all the difference when unveiling your Dragon Egg Cheesecake Recipe. Consider placing the cheesecake on a rustic wooden serving board surrounded by “dragon’s claws” made from twisted breadsticks or chocolate shards. Wrapping the serving plate with vines or moss-like garnishes offers an enchanted forest feel that fits perfectly with the mythical theme.
Make Ahead and Storage
Storing Leftovers
If you have any leftovers from your Dragon Egg Cheesecake Recipe, store them tightly covered in the refrigerator. Wrapped well, these slices will maintain their creamy texture and fresh flavor for up to 4 days, giving you a magical treat to enjoy long after the celebration.
Freezing
This cheesecake freezes beautifully if you want to prepare it well in advance. Wrap the whole cake or individual slices tightly in plastic wrap and then foil to protect it from freezer burn. Frozen cheesecake can keep for up to 2 months; just thaw it overnight in the fridge before serving for the best texture.
Reheating
While cheesecake is best served chilled, if you prefer your slice slightly warmer, simply allow it to sit at room temperature for 15-20 minutes before eating. Avoid microwaving, which can cause uneven texture and alter the delicate marbling of your Dragon Egg Cheesecake Recipe.
FAQs
Can I use regular food coloring instead of gel for the marbling?
You could, but gel food coloring is recommended because it provides vivid colors without adding extra liquid that might affect the cheesecake’s texture. Regular food coloring could make the batter thinner and less stable.
How do I make the chocolate scales for decorating?
Simply melt some chocolate and spread it thinly on parchment paper. Let it set until firm, then break into jagged pieces that resemble scales. This adds a fun, tactile element to your cheesecake’s presentation.
Is this Dragon Egg Cheesecake Recipe suitable for vegetarians?
Yes, this recipe uses no meat or gelatin, making it suitable for vegetarian diets. Just be sure to check that your decorations and colorings follow vegetarian-friendly guidelines.
Can I make this cheesecake dairy-free or vegan?
To adapt the Dragon Egg Cheesecake Recipe for dairy-free or vegan diets, you will need to substitute with suitable cream cheese alternatives and egg replacements, though these changes can affect the classic texture and flavor.
What is the best pan to use for this cheesecake?
A 9-inch springform pan is ideal because it allows for easy removal of the cheesecake without disturbing the stunning marbled design and delicate crust. It also helps the cake bake evenly.
Final Thoughts
Creating the Dragon Egg Cheesecake Recipe is a delightful journey—each step builds the magic from crust to swirl to shimmering finish. Whether for a special occasion or just to bring whimsy into your everyday, this cheesecake is guaranteed to wow and satisfy every mythical dessert craving. Don’t hesitate to try it yourself and share a piece of this fantasy-inspired treat with loved ones. The enchanted flavor and beautiful presentation will make it a treasured favorite in your recipe collection.
Print
Dragon Egg Cheesecake Recipe
- Prep Time: 25 minutes
- Cook Time: 60 minutes
- Total Time: 6 hours
- Yield: 12 servings
- Category: Dessert
- Method: Baking
- Cuisine: Fantasy-inspired
- Diet: Vegetarian
Description
This Dragon Egg Cheesecake is a magical, fantasy-inspired dessert featuring a rich chocolate cookie crust and a creamy, marbled cheesecake filling. Swirled with vibrant gel food colors and adorned with edible shimmer and chocolate scales, it creates the perfect themed party centerpiece that looks as impressive as it tastes.
Ingredients
Crust
- 2 cups chocolate cookie crumbs
- 1/2 cup unsalted butter, melted
Filling
- 3 (8 oz) packages cream cheese, softened
- 1 cup granulated sugar
- 3 large eggs
- 1 teaspoon vanilla extract
- 1/2 cup sour cream
- Gel food coloring (red, purple, green – optional for a dragon egg look)
Decoration
- Edible shimmer or luster dust (optional)
- Chocolate shell pieces or candy scales for decorating
Instructions
- Prepare the crust: Preheat the oven to 325°F (163°C). In a medium bowl, combine the chocolate cookie crumbs with the melted butter until well mixed. Press this mixture firmly and evenly into the bottom of a 9-inch springform pan. Bake the crust for 10 minutes, then remove and allow it to cool completely.
- Make the cheesecake batter: In a large mixing bowl, beat the softened cream cheese and granulated sugar together until smooth and creamy, ensuring no lumps remain. Add the eggs one at a time, mixing well after each addition to incorporate fully. Stir in the vanilla extract and sour cream until just combined.
- Color and swirl: If using, divide the batter into separate portions and tint each with gel food coloring to desired shades (such as red, purple, and green). Pour the colored batters back into the cooled crust in sections or swirls, gently swirling with a knife or skewer to create a marbled dragon egg effect. Smooth the top with a spatula.
- Bake the cheesecake: Bake the assembled cheesecake at 325°F (163°C) for 50 to 60 minutes, or until the center is just set but still slightly jiggly — this ensures a creamy texture after cooling. Once baked, turn off the oven, crack the door open, and let the cheesecake cool inside for 1 hour to prevent cracking.
- Chill thoroughly: Remove the cheesecake from the oven and refrigerate it for at least 4 hours or preferably overnight. This chilling step allows it to fully set and enhances the flavors.
- Decorate: Before serving, decorate the chilled cheesecake with edible shimmer or luster dust for a magical finish. Add chocolate shell pieces or candy scales on top to resemble the textured surface of a dragon egg, creating an impressive and whimsical dessert presentation.
Notes
- For vibrant colors without affecting batter consistency, always use gel-based food coloring.
- To make chocolate scales, melt chocolate and spread it thinly over parchment paper. Let it harden, then break into jagged pieces to use as decoration.
- A light dusting of edible luster dust or shimmer powder provides a fantasy-like, iridescent finish perfect for themed events.
