
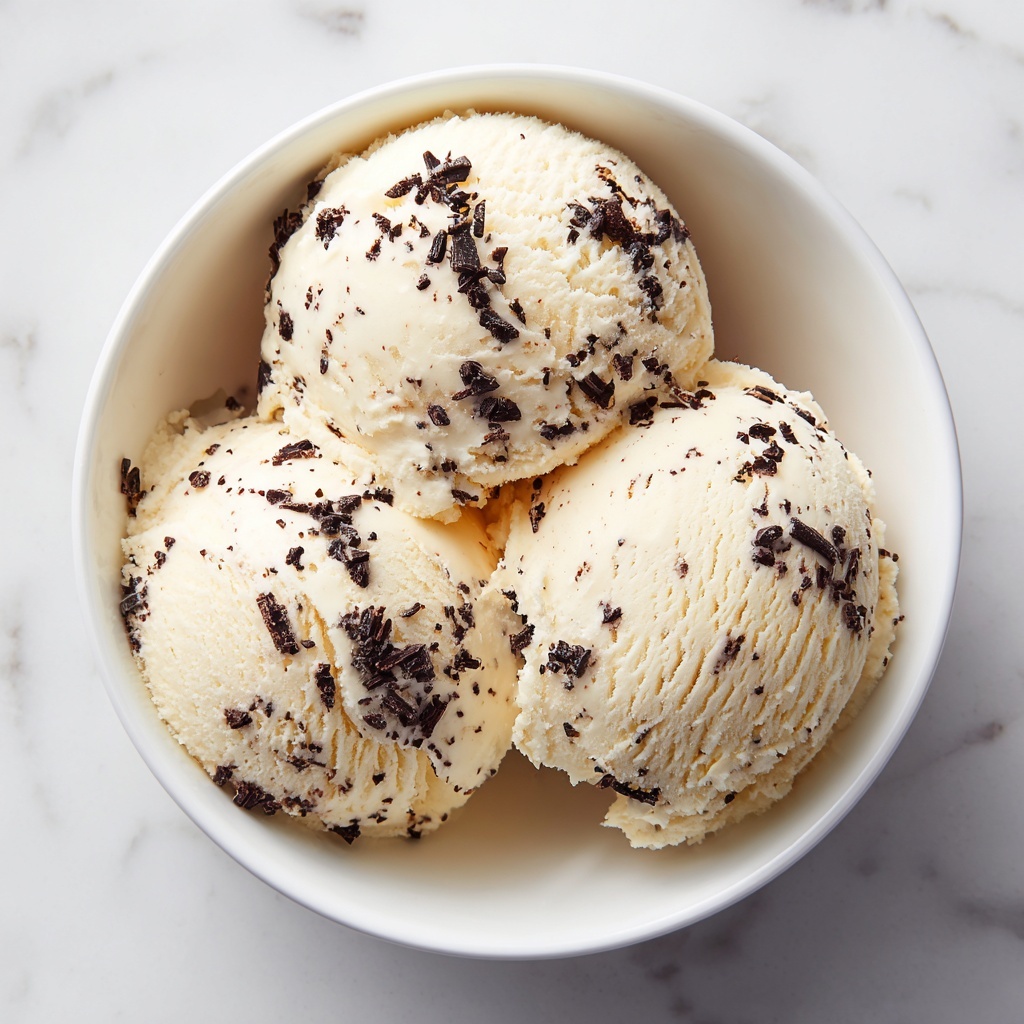
If you’ve ever dreamed of crafting the perfect scoop of creamy, dreamy vanilla ice cream at home, then you’re in for a treat with this Classic Vanilla Ice Cream Recipe. It’s rich, velvety, and boasts that unmistakable pure vanilla flavor that makes every bite feel like a delightful celebration. Whether you’re serving it solo, topping a warm pie, or mixing into a sundae extravaganza, this recipe captures ice cream perfection in your own kitchen.
Ingredients You’ll Need
This Classic Vanilla Ice Cream Recipe depends on just a handful of ingredients that are simple but absolutely essential. Each one plays a crucial role, from creating that luscious texture to ensuring the flavor shines through beautifully.
- Heavy cream: The backbone of creaminess that gives your ice cream its rich, indulgent mouthfeel.
- Whole milk: Balances the cream’s richness and keeps the texture smooth and not too dense.
- Granulated sugar: Sweetens the mixture perfectly while also helping with freezing consistency.
- Pure vanilla extract: The star flavor enhancer that brings warmth and depth.
- Large egg yolks: Act as natural emulsifiers, giving your ice cream a silky custard base.
- Pinch of salt: Elevates all the other flavors and balances the sweetness.
How to Make Classic Vanilla Ice Cream Recipe
Step 1: Heat the Cream, Milk, and Sugar
Start by combining your heavy cream, whole milk, and sugar in a medium saucepan. Gently heat this mixture over medium heat, stirring occasionally until the sugar dissolves and the liquid is hot — but be sure not to let it boil, as that can affect the texture later.
Step 2: Whisk Egg Yolks and Salt
While the cream mixture warms, whisk your egg yolks together with a pinch of salt in a separate bowl until smooth. This step is crucial for creating that silky custard base that makes this Classic Vanilla Ice Cream Recipe so irresistibly smooth.
Step 3: Temper the Eggs
Slowly add about half a cup of the hot cream mixture into the egg yolks, whisking constantly. This process warms the eggs gradually, avoiding any scrambling and ensuring a perfect custard.
Step 4: Combine Mixtures
Pour the egg yolk mixture back into the saucepan with the remaining cream and milk, stirring constantly. This mixture is starting to transform into the base of your ice cream and needs gentle care.
Step 5: Cook Until Thickened
Return the saucepan to medium-low heat and cook, stirring constantly, until the mixture thickens just enough to coat the back of a spoon—aiming for around 170°F (77°C). This is your sign that the custard is ready.
Step 6: Add Vanilla Extract
Remove the saucepan from heat and stir in the pure vanilla extract. The aroma at this point is heavenly and essential to the Classic Vanilla Ice Cream Recipe’s iconic flavor.
Step 7: Strain the Custard
Pour the custard through a fine mesh strainer into a clean bowl to catch any bits of cooked egg, ensuring a silky-smooth texture.
Step 8: Cool and Chill
Allow the custard to cool to room temperature before refrigerating it for at least 4 hours or overnight. This chilling step is key to the ice cream’s creamy consistency.
Step 9: Churn the Ice Cream
Pour your chilled custard into your ice cream maker and churn according to the manufacturer’s instructions. This is when that luscious ice cream texture really develops.
Step 10: Freeze Until Firm
Transfer the churned ice cream to a container and freeze it for at least 4 hours to set fully. Patience here rewards you with the perfect scoop every time.
Step 11: Serve and Enjoy!
Finally, scoop out your homemade Classic Vanilla Ice Cream Recipe and relish every bite of that rich, creamy sweetness!
How to Serve Classic Vanilla Ice Cream Recipe

Garnishes
Classic Vanilla Ice Cream Recipe shines beautifully on its own, but topping it with a sprinkle of fresh berries, a drizzle of caramel sauce, or some chopped nuts adds delightful texture and flavor contrasts you won’t want to miss.
Side Dishes
Pairing this vanilla ice cream with a warm apple pie, freshly baked brownies, or even a slice of rich chocolate cake elevates your dessert game instantly. The creamy ice cream cools and balances the warmth or richness of these treats perfectly.
Creative Ways to Present
For a fun twist, serve scoops in waffle cones or bowls lined with crushed cookies. You can even layer scoops between brownies or cookies to create an indulgent ice cream sandwich that’s bound to impress.
Make Ahead and Storage
Storing Leftovers
After you’ve enjoyed your ice cream, store any leftovers in an airtight container to keep your Classic Vanilla Ice Cream Recipe fresh and free from freezer burn. A tight seal helps maintain its creamy texture.
Freezing
If you want to prepare the custard base ahead of time, you can freeze it before churning, but best results come from fresh preparation. Once churned, store the ice cream in the coldest part of your freezer for up to two weeks.
Reheating
Ice cream is truly best served cold and scooped fresh. If it becomes too hard, simply let it sit at room temperature for a few minutes before scooping to soften, but never try to heat it as it will melt and lose its magic.
FAQs
Can I make Classic Vanilla Ice Cream Recipe without an ice cream maker?
While an ice cream maker produces the creamiest texture, you can still make it by freezing the custard and stirring vigorously every 30 minutes to break up ice crystals, but the texture will be less smooth.
What type of vanilla extract is best to use?
Pure vanilla extract is the best choice for authentic flavor. Avoid artificial vanilla as it can taste flat or chemical; real vanilla brings warmth and richness.
Can I substitute the heavy cream for something else?
Heavy cream is critical to the creamy texture of this Classic Vanilla Ice Cream Recipe. Light creams or milk won’t deliver the same indulgent mouthfeel, so it’s best not to substitute here.
Why do I need to temper the eggs?
Tempering the eggs by slowly mixing in warm cream prevents them from scrambling and helps create a silky custard base essential to the ice cream’s smooth texture.
How long does homemade vanilla ice cream last in the freezer?
Stored properly in an airtight container, homemade ice cream stays delicious for about two weeks. After that, ice crystals may form and change the texture.
Final Thoughts
There’s something utterly magical about making your own Classic Vanilla Ice Cream Recipe at home. The simple ingredients come together into something truly special — creamy, velvety, and bursting with real vanilla flavor. Dive in and treat yourself; once you’ve tasted homemade, you’ll never want store-bought again!
Print
Classic Vanilla Ice Cream Recipe
- Prep Time: 15 minutes
- Cook Time: 20 minutes
- Total Time: 4 hours 35 minutes
- Yield: 4 servings
- Category: Dessert
- Method: Stovetop
- Cuisine: American
Description
This Classic Vanilla Ice Cream recipe delivers rich, creamy homemade ice cream with a smooth texture and traditional vanilla flavor. Made with simple ingredients including heavy cream, whole milk, and egg yolks, this custard-based ice cream is cooked gently on the stovetop, then churned and frozen to perfect a silky and indulgent dessert ideal for any occasion.
Ingredients
Ice Cream Base
- 2 cups heavy cream
- 1 cup whole milk
- 3/4 cup granulated sugar
- 1 tablespoon pure vanilla extract
- 5 large egg yolks
- Pinch of salt
Instructions
- Heat Cream and Milk Mixture: In a medium saucepan, combine the heavy cream, whole milk, and sugar. Heat over medium heat, stirring occasionally, until the sugar dissolves and the mixture is hot but not boiling. Remove from heat.
- Whisk Egg Yolks: In a separate bowl, whisk together the egg yolks and a pinch of salt until smooth and pale.
- Temper Egg Yolks: Gradually whisk about 1/2 cup of the hot cream mixture into the egg yolks, constantly whisking to prevent curdling and gently raise the temperature of the eggs.
- Combine Mixtures: Slowly pour the tempered egg yolk mixture back into the saucepan with the remaining cream mixture, whisking continuously to combine fully.
- Cook Custard: Return the saucepan to medium-low heat and cook the mixture, stirring constantly, until it thickens slightly and coats the back of a spoon, reaching around 170°F (77°C). Do not boil.
- Add Vanilla: Remove the custard from heat and stir in the pure vanilla extract to infuse the classic vanilla flavor.
- Strain Custard: Pour the custard through a fine mesh strainer into a clean bowl to remove any curdled bits or lumps for a smooth texture.
- Chill Custard: Allow the custard to cool to room temperature, then refrigerate for at least 4 hours or overnight to fully chill and develop flavors.
- Churn Ice Cream: Pour the chilled custard into an ice cream maker and churn according to the manufacturer’s instructions until it reaches a soft-serve consistency.
- Freeze Ice Cream: Transfer the churned ice cream to a container and freeze for at least 4 hours to firm up before serving.
- Serve and Enjoy: Scoop out your creamy, homemade vanilla ice cream and enjoy as a delicious classic dessert.
Notes
- Use fresh, high-quality vanilla extract for the best flavor.
- Do not let the custard boil during cooking to prevent curdling.
- Tempering the egg yolks is essential to avoid scrambling them when combining with hot cream.
- If you don’t have an ice cream maker, pour the custard into a shallow container and freeze, stirring every 30 minutes until smooth and frozen.
- Store leftover ice cream in an airtight container to keep it fresh longer.
