
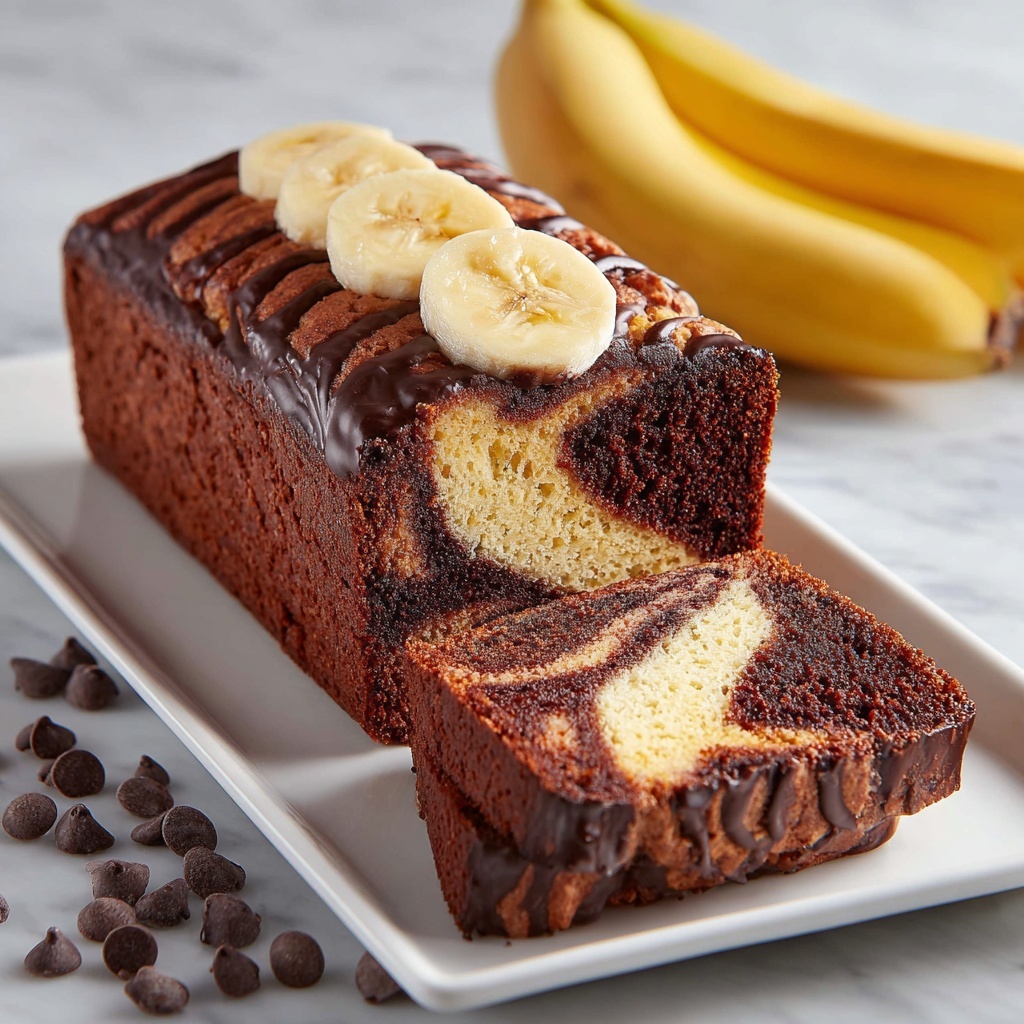
If you are on the lookout for a luscious treat that combines the best of two worlds, look no further than this delightful Chocolate Marble Banana Bread Recipe. This loaf brings together the moist, tender goodness of ripe bananas with the rich, indulgent swirls of chocolate, creating a perfect balance that both kids and adults will adore. Whether you are craving breakfast with a twist, an afternoon snack, or a cozy dessert, this recipe promises a warm, comforting experience with every bite.
Ingredients You’ll Need
Gathering your ingredients is a breeze for this recipe since each component plays a vital part in the ultimate flavor and texture of your bread. From the richness of butter to the natural sweetness of bananas and the deep cocoa notes, every ingredient shines through.
- All-purpose flour (1 1/2 cups): The base that provides structure and a tender crumb to your bread.
- Baking soda (1 tsp): Helps the bread rise beautifully while keeping it light and airy.
- Salt (1/2 tsp): A pinch to balance the sweetness and bring out flavors.
- Unsalted butter, softened (1/2 cup): Adds richness and moisture for that melt-in-your-mouth feel.
- Granulated sugar (3/4 cup): Sweetens the bread without overpowering the natural banana flavor.
- Large eggs (2): Acts as a binder and adds to the bread’s fluffiness.
- Mashed ripe bananas (1 cup): The star ingredient giving natural sweetness and incredible moisture.
- Sour cream (1/4 cup): Enhances tenderness and adds a subtle tanginess.
- Vanilla extract (1 tsp): Infuses warmth and rounds out the flavor profile.
- Unsweetened cocoa powder (1/4 cup): Provides the rich chocolate swirl with depth and intensity.
- Semi-sweet chocolate chips (1/4 cup): Melts into pockets of gooey chocolate for extra indulgence.
How to Make Chocolate Marble Banana Bread Recipe
Step 1: Prep Your Workspace and Oven
Begin by preheating your oven to 350°F (175°C) and greasing a 9×5-inch loaf pan so your bread will bake evenly and release easily once done. This simple prep sets the stage for a perfectly baked loaf every time.
Step 2: Mix the Dry Ingredients
In a medium bowl, whisk together the flour, baking soda, and salt. Combining these ingredients first ensures a consistent rise and even flavor distribution throughout your bread.
Step 3: Cream Butter and Sugar
Using a large bowl, beat the softened butter and granulated sugar together until light and fluffy. This is the magic stage that incorporates air, giving your banana bread a tender crumb and delightful texture.
Step 4: Add Eggs, Bananas, Sour Cream, and Vanilla
Beat in the eggs one at a time to maintain softness and richness. Then fold in your mashed bananas, sour cream, and vanilla extract, which all work together to create a moist and flavorful batter that’s impossible to resist.
Step 5: Combine Wet and Dry Ingredients
Gradually add the dry mixture to your wet ingredients, stirring just until everything comes together. Overmixing can make the bread tough, so gentle incorporation is key here.
Step 6: Create the Chocolate Marble Batter
Divide the batter in half. To one half, fold in the cocoa powder and semi-sweet chocolate chips, forming the chocolate portion of the batter. This contrast is what gives the bread its gorgeous and delicious marble effect.
Step 7: Assemble the Marble Effect
Spoon the plain banana batter and the chocolate batter alternately into your prepared loaf pan. Then, use a knife to gently swirl the two batters together to create beautiful chocolate marbling without over-mixing them.
Step 8: Bake Until Golden
Bake your bread for 50 to 60 minutes or until a toothpick inserted in the center comes out clean. The aroma filling your kitchen at this point is sheer bliss!
Step 9: Cool for Best Results
Let the loaf cool in its pan for about 10 minutes before transferring it to a wire rack to cool completely. This resting time is essential to preserve the bread’s moisture and texture.
How to Serve Chocolate Marble Banana Bread Recipe

Garnishes
A dusting of powdered sugar or a thin spread of softened butter can make your slices even more irresistible. For a special touch, sprinkle some chopped nuts or drizzle some melted chocolate over the top.
Side Dishes
This bread pairs wonderfully with a robust coffee or a creamy cup of tea. For a heartier option, serve alongside fresh fruit or a scoop of vanilla ice cream for a decadent afternoon treat.
Creative Ways to Present
Cut the bread into thick slices and toast lightly to enjoy a warm, crispy crust that contrasts perfectly with the soft interior. Alternatively, try serving it as French toast for a fun twist on breakfast or brunch.
Make Ahead and Storage
Storing Leftovers
Store any leftover Chocolate Marble Banana Bread in an airtight container at room temperature for up to three days, keeping it soft and delicious without drying out.
Freezing
Wrap your cooled loaf tightly in plastic wrap and place it inside a freezer bag. Frozen banana bread will keep for up to three months and thaws beautifully overnight in the fridge or at room temperature.
Reheating
To warm up slices, simply toast them lightly or microwave for about 15 seconds. This brings back the fresh-from-the-oven warmth and enhances the chocolate aroma, making each bite feel like a hug.
FAQs
Can I use overripe bananas for this recipe?
Absolutely! Overripe bananas are perfect because they’re sweeter and softer, enhancing the flavor and moisture of your banana bread.
Is it possible to substitute sour cream?
Yes, you can substitute sour cream with plain yogurt or buttermilk, which will maintain the tender texture and slight tanginess.
Can I add nuts or other mix-ins?
Definitely! Walnuts, pecans, or even shredded coconut add great texture and complement both the banana and chocolate flavors beautifully.
What if I don’t have semi-sweet chocolate chips?
You can substitute with dark or milk chocolate chips depending on your sweetness preference, or chop up a chocolate bar for chunkier bites.
How do I know when the bread is fully baked?
Insert a toothpick into the center; if it comes out clean or with just a few crumbs clinging, your bread is perfectly baked and ready to enjoy.
Final Thoughts
There’s something truly special about a homemade loaf of banana bread, and the addition of chocolate makes this Chocolate Marble Banana Bread Recipe a standout favorite. It’s a simple yet impressive treat that brings joy to your kitchen and smiles to every table. I can’t encourage you enough to give it a try — you might just find a new classic to share with your loved ones!
Print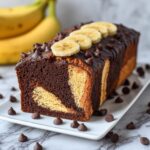
Chocolate Marble Banana Bread Recipe
- Prep Time: 15 minutes
- Cook Time: 50-60 minutes
- Total Time: 1 hour 15 minutes
- Yield: 10 servings
- Category: Dessert
- Method: Baking
- Cuisine: American
Description
This delicious Chocolate Marble Banana Bread combines classic moist banana bread with a rich chocolate swirl for an indulgent treat. Soft bananas and sour cream keep the bread tender while a marbled mixture of cocoa powder and chocolate chips adds decadent chocolate flavor. Perfect for breakfast, dessert, or a snack, this loaf is easy to prepare and bake to perfection.
Ingredients
Dry Ingredients
- 1 1/2 cups all-purpose flour
- 1 tsp baking soda
- 1/2 tsp salt
Wet Ingredients
- 1/2 cup unsalted butter, softened
- 3/4 cup granulated sugar
- 2 large eggs
- 1 cup mashed ripe bananas (about 2–3 medium bananas)
- 1/4 cup sour cream
- 1 tsp vanilla extract
Chocolate Mixture
- 1/4 cup unsweetened cocoa powder
- 1/4 cup semi-sweet chocolate chips
Instructions
- Preheat Oven and Prepare Pan: Preheat your oven to 350°F (175°C) and grease a 9×5-inch loaf pan to prevent sticking and ensure easy removal.
- Mix Dry Ingredients: In a medium bowl, whisk together the flour, baking soda, and salt to distribute the leavening agents evenly throughout the flour.
- Cream Butter and Sugar: In a large bowl, use an electric mixer to beat the softened butter and sugar until the mixture is light and fluffy, which will help create a tender crumb in the bread.
- Add Wet Ingredients: Beat in the eggs one at a time, making sure each is fully incorporated. Then add mashed bananas, sour cream, and vanilla extract, mixing well to combine all flavors.
- Combine Dry and Wet Mixtures: Gradually add the dry ingredients to the wet ingredients, mixing just until combined to avoid overworking the batter and resulting in a dense loaf.
- Prepare Chocolate Batter: Divide the batter in half. Into one half, fold in the cocoa powder and semi-sweet chocolate chips to create the chocolate portion of the marble bread.
- Swirl the Batter: Spoon the plain banana batter and the chocolate batter alternately into the prepared loaf pan. Use a knife or skewer to gently swirl the two batters together for a beautiful marbled effect.
- Bake: Bake the loaf in the preheated oven for 50-60 minutes, or until a toothpick inserted into the center comes out clean, indicating the bread is fully cooked.
- Cool the Bread: Let the bread cool in the pan for about 10 minutes to firm up, then transfer it to a wire rack and cool completely before slicing to maintain its structure and flavor.
Notes
- For best flavor, use very ripe bananas with brown spots for natural sweetness and moisture.
- Do not overmix the batter once the dry ingredients are added to keep the bread light and tender.
- Check the bread at 50 minutes; if a toothpick doesn’t come out clean, bake for an additional 5-10 minutes.
- Sour cream adds moisture and helps keep the bread soft, but plain yogurt can be substituted if necessary.
- Store leftover banana bread in an airtight container at room temperature for up to 3 days or freeze for longer storage.
