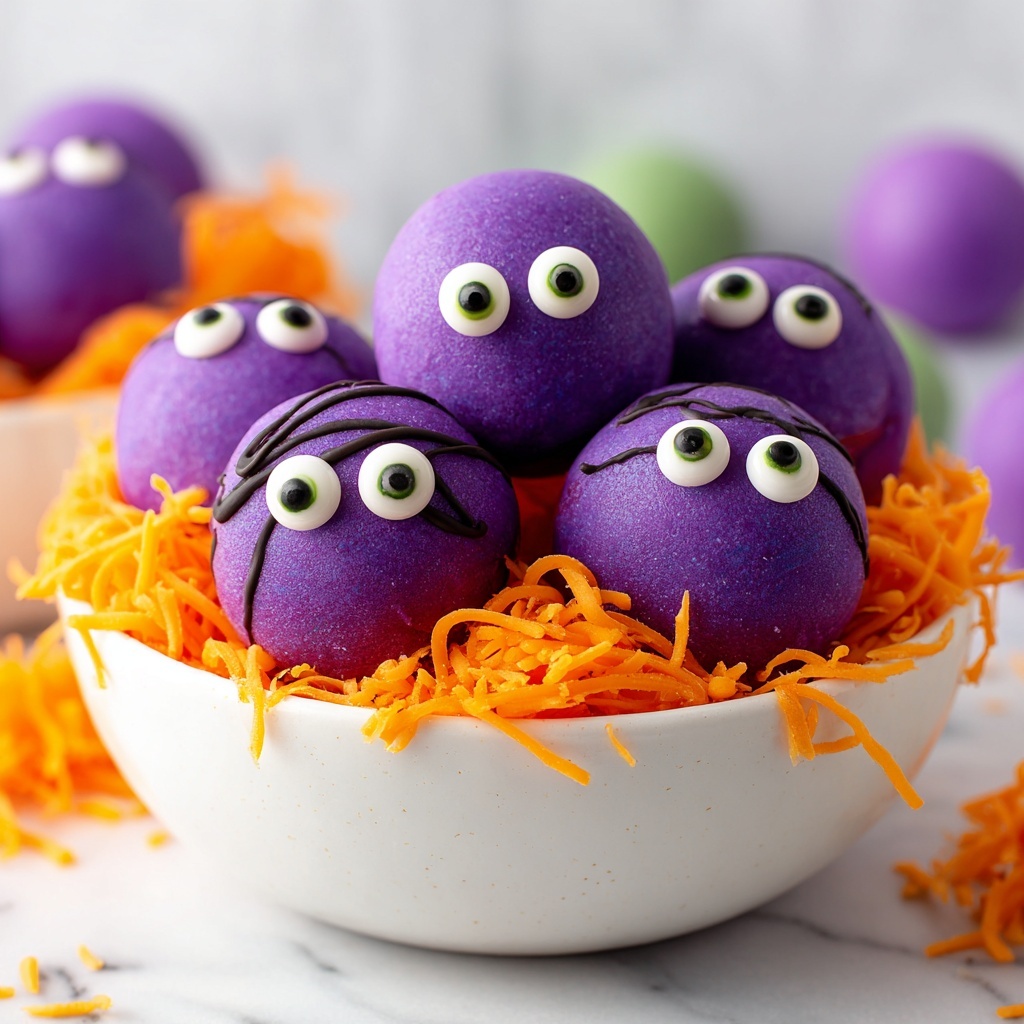
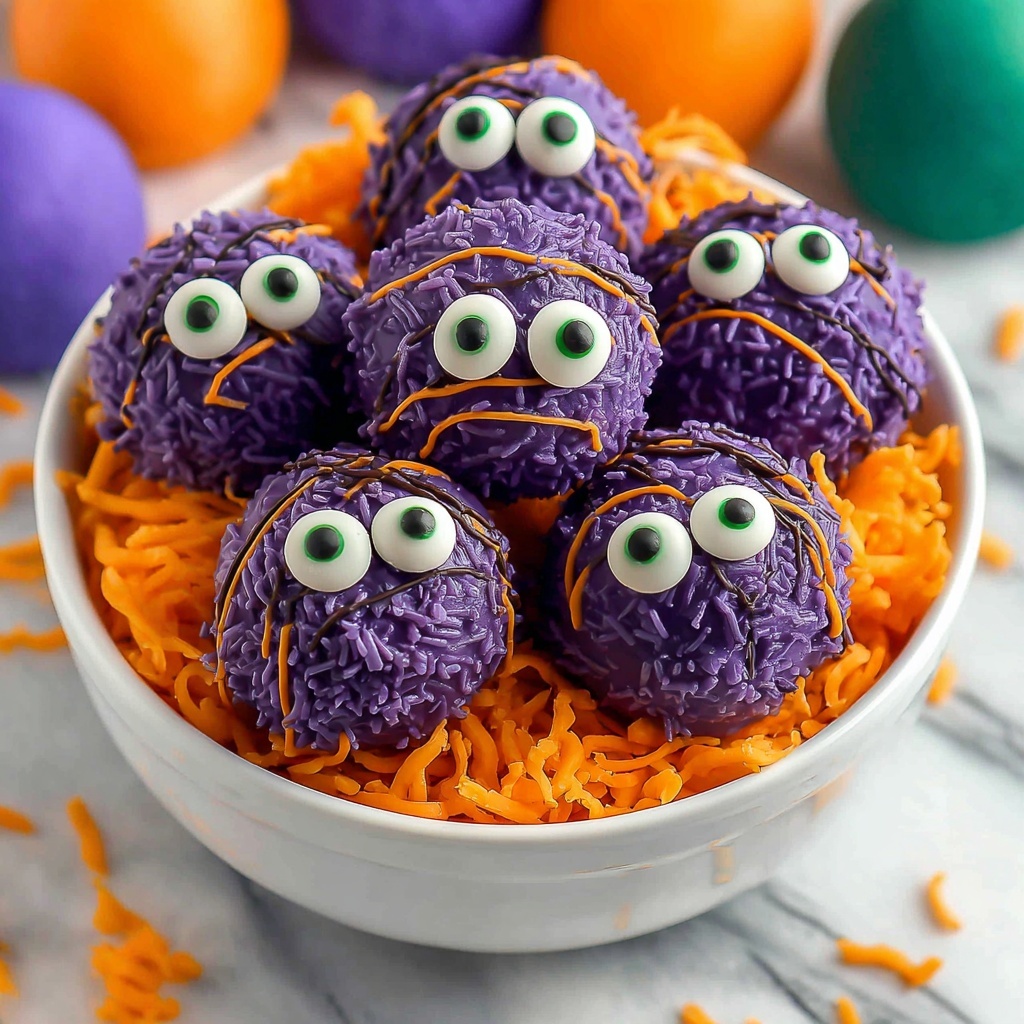
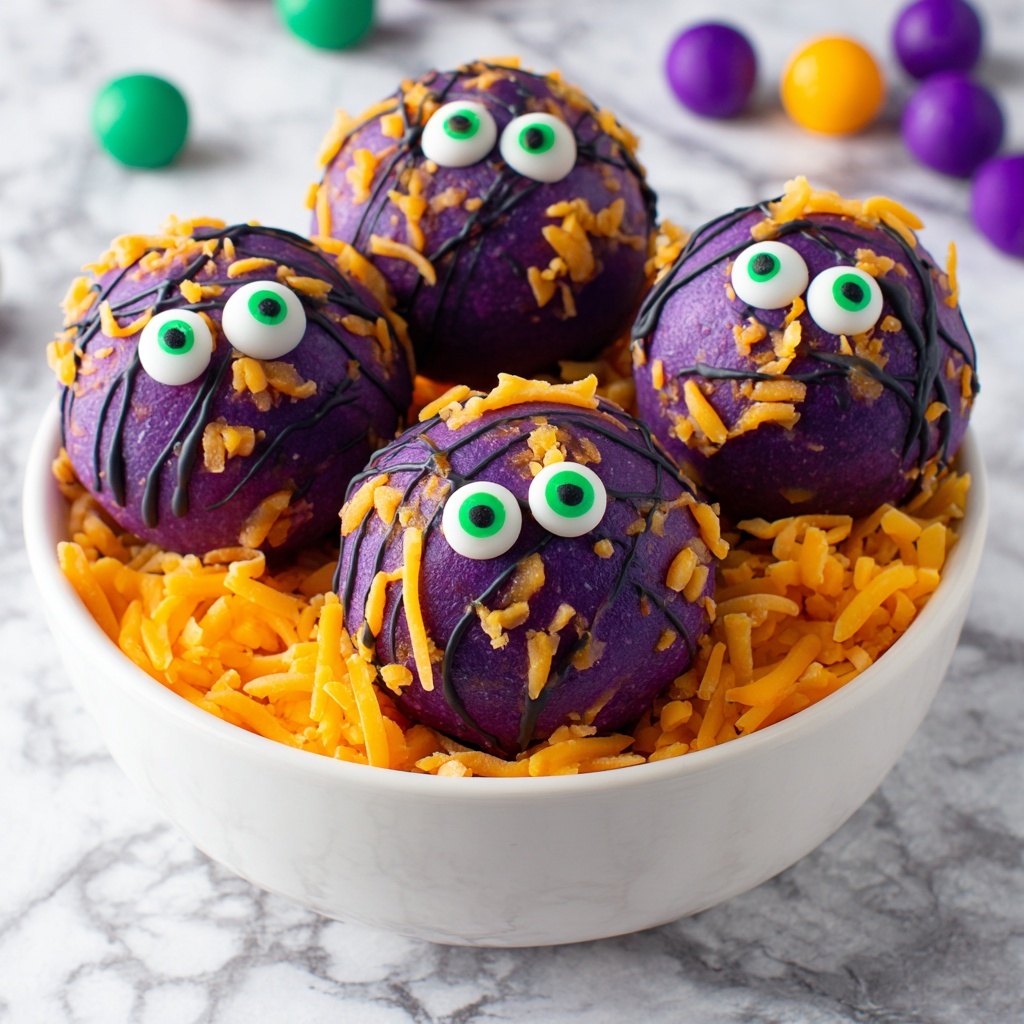
If you’re on the hunt for a delightfully spooky treat that is as fun to make as it is to devour, then the Monster Eyeballs: Fun No-Bake Halloween Oreos Recipe is about to become your new favorite go-to. Think vibrant, gooey candy coatings enveloping creamy Oreo truffles that pop with character thanks to oversized candy eyes and playful sprinkles. This recipe captures all the joy and whimsy of Halloween, without needing an oven, offering a perfectly spooky snack that’s as engaging to create as it is to share at your next seasonal bash or cozy autumn night in.
Ingredients You’ll Need
Getting started with the Monster Eyeballs: Fun No-Bake Halloween Oreos Recipe is a breeze thanks to its simple but essential lineup of ingredients. Each one plays a vital role in delivering the perfect blend of texture, flavor, and festive color that brings these treats to life on your plate.
- Golden Oreos (19.1 ounces): The cookie base that gives these truffles a slightly buttery flavor and a beautiful light color perfect for matching colorful coatings.
- Cream Cheese (8 ounces): Using room temperature cream cheese helps bind the Oreo crumbs into a smooth, creamy mixture for the perfect truffle texture.
- Colored Candy Melts (12 ounces): Choose your favorite Halloween colors or mix them up for variety; these melts coat the truffles and add a sweet, glossy finish.
- Color-Matching Sprinkles: Add texture, sparkle, and an extra pop of festive fun to each eyeball with sprinkles that complement your candy melts.
- Large Candy Eyes: The star decoration that turns these delicious bites into playful monsters and truly brings the “eyeball” concept to life.
How to Make Monster Eyeballs: Fun No-Bake Halloween Oreos Recipe
Step 1: Crush the Cookies
The first step is all about getting that perfect crumb texture, so use a food processor to crush your Golden Oreos until they’re finely ground. This ensures a uniform base that mixes evenly with the cream cheese, avoiding any graininess.
Step 2: Mix with Cream Cheese
Add your softened cream cheese to the Oreo crumbs and pulse in the processor until the mixture turns smooth and cohesive. This creamy blend is what will hold your monster eyeballs together, creating that indulgently soft center we all crave.
Step 3: Shape the Truffles
Using about one and a half tablespoons of the mixture per truffle, roll the dough into uniform balls. Practice makes perfect here, but don’t worry if they’re not exactly the same size—this just adds to their homemade charm!
Step 4: Chill for Setting
Lay the shaped truffles on parchment-lined baking sheets and pop them into the refrigerator for 15 to 30 minutes. This chilling step is crucial because it firms them up and helps the coating stick better later on.
Step 5: Melt the Candy
Gently melt your colored candy melts in a microwave-safe bowl, warming in short bursts and stirring frequently until silky smooth. Avoid overheating to prevent clumps or seizing.
Step 6: Coat the Truffles
Now comes the fun part—dipping each chilled truffle into the melted candy coating. Let the excess drip off before placing them back on the parchment to avoid pooling and keep each truffle perfectly covered.
Step 7: Decorate with Eyes and Sprinkles
While the coating is still wet, press a candy eye onto each truffle and generously sprinkle with your chosen color-matching sprinkles. This step turns your treats from simple truffles into delightful little monsters full of personality.
Step 8: Final Chill
Refrigerate your decorated creations for an additional 30 minutes so the coating fully hardens. This final chill locks in the shape and decorations, making your Monster Eyeballs ready to wow anyone who sees them.
Step 9: Serve and Enjoy
These fun no-bake treats can be served chilled or at room temperature. Either way, they’re delicious, festive, and guaranteed to bring smiles wherever they appear!
How to Serve Monster Eyeballs: Fun No-Bake Halloween Oreos Recipe
Garnishes
To elevate your monster eyeballs even more, consider adding a bit of edible glitter or a drizzle of contrasting chocolate after the coating sets. This adds shimmer and dimension, making each eye look eerily lifelike and super festive.
Side Dishes
Pair your monster eyeballs with complementary treats like fresh fruit skewers or mini pumpkin muffins to balance sweetness with seasonal flavors. A spooky punch or hot cocoa also makes a perfect companion drink for your Halloween spread.
Creative Ways to Present
Bring extra flair by displaying your monster eyeballs on dark serving trays dusted lightly with coconut “spider webs” or edible moss made from crumbled graham crackers tinted with food coloring. You can also arrange them in a bowl lined with candy corn for a burst of color and crunch.
Make Ahead and Storage
Storing Leftovers
Store any leftover monster eyeballs in an airtight container in the refrigerator. They keep well for up to a week and maintain both texture and flavor, making them perfect for a Halloween week-long treat.
Freezing
If you want to prepare monster eyeballs ahead of time, freeze them after the final chill on parchment-lined trays, then transfer to a sealed freezer container. They’ll keep for up to 3 months and thaw beautifully in the fridge overnight when ready to enjoy.
Reheating
Since these treats are no-bake and best enjoyed cold or at room temperature, avoid heating them in the microwave or oven. Instead, simply bring them to room temperature by leaving them out for about 15 minutes before serving for optimal texture and flavor.
FAQs
Can I use other types of Oreos in this recipe?
Absolutely! While Golden Oreos give a nice light color, any sandwich cookie works well. Just keep in mind that darker cookies will give the mixture a richer color and slightly different flavor profile.
What can I substitute for cream cheese?
Cream cheese is essential for that creamy texture and tangy flavor, but if you want a lighter version, you can try mascarpone or even softened butter, though the consistency and taste will differ somewhat.
How do I make sure the candy melts don’t seize?
Heat the candy melts gently in short intervals, stirring frequently to avoid overheating. If they become too thick, a tiny bit of vegetable oil or shortening can help smooth them out again.
Can I make these Monster Eyeballs vegan or dairy-free?
Yes! Use dairy-free cream cheese and vegan sandwich cookies, and swap the candy melts for a certified vegan brand. Just double-check all ingredients for allergen compliance.
How long do the monster eyeballs last once made?
Stored in an airtight container in the fridge, they stay fresh for up to seven days. For longer storage, freezing is recommended to keep them tasty and fresh.
Final Thoughts
I hope you’re feeling inspired to bring some spooky sweetness into your home with the Monster Eyeballs: Fun No-Bake Halloween Oreos Recipe. It’s more than just a treat—it’s a joyful project that captures the spirit of the season perfectly. Go ahead, dive in, and delight your friends and family with these charming, tasty monsters. Happy Halloween and happy snacking!
Print
Monster Eyeballs: Fun No-Bake Halloween Oreos Recipe
- Prep Time: 20 minutes
- Cook Time: 0 minutes
- Total Time: 1 hour 15 minutes
- Yield: 24 servings
- Category: Dessert
- Method: No-Cook
- Cuisine: American
Description
Monster Eyeballs are a spooky and fun no-bake Halloween treat made from crushed Golden Oreos mixed with cream cheese, coated in colorful candy melts, and decorated with candy eyes and sprinkles. These bite-sized truffles are perfect for Halloween parties or as a festive dessert that kids and adults will love.
Ingredients
Cookie Mixture
- 19.1 ounces Golden Oreos (or any sandwich cookie)
- 8 ounces cream cheese, room temperature
Coating and Decoration
- 12 ounces colored candy melts (choose any color or mix for variety)
- Color-matching sprinkles for decoration
- Large candy eyes to bring your monster to life
Instructions
- Crush the Cookies: Begin by crushing 19.1 ounces of Golden Oreos in a food processor until they achieve a fine crumb texture, which will help the mixture bind smoothly.
- Mix with Cream Cheese: Add 8 ounces of room temperature cream cheese to the crushed Oreos. Pulse in the food processor until the mixture is thoroughly combined and smooth, forming a dough-like consistency.
- Shape the Truffles: Using about 1½ tablespoons of the mixture, roll it into balls and place them on parchment-lined baking sheets to prepare for chilling.
- Chill for Setting: Refrigerate the baking sheets for 15-30 minutes until the truffles are firm enough to handle for coating.
- Melt the Candy: In a microwave-safe bowl, melt the 12 ounces of candy melts in short intervals, stirring frequently until completely smooth and ready for dipping.
- Coat the Truffles: Dip each chilled truffle into the melted candy, making sure they are fully coated. Let any excess coating drip back into the bowl before placing them back on the parchment paper.
- Decorate with Eyes: While the coating is still wet, press a large candy eye onto each truffle and sprinkle with color-matching sprinkles to create the monster eyeball effect.
- Final Chill: Refrigerate the decorated truffles for an additional 30 minutes to allow the coating to harden completely.
- Serve and Enjoy: Once set, serve these spooky Monster Eyeballs cold or at room temperature for a delightful Halloween treat.
Notes
- Using room temperature cream cheese helps achieve a smooth mixture and easier rolling.
- You can substitute Golden Oreos with any sandwich cookie of your choice.
- Choose candy melt colors and sprinkles that match your Halloween theme for more festive fun.
- Store any leftovers in the refrigerator to keep the truffles firm.
- If melting candy melts in the microwave, use short 20-30 second bursts to avoid burning.