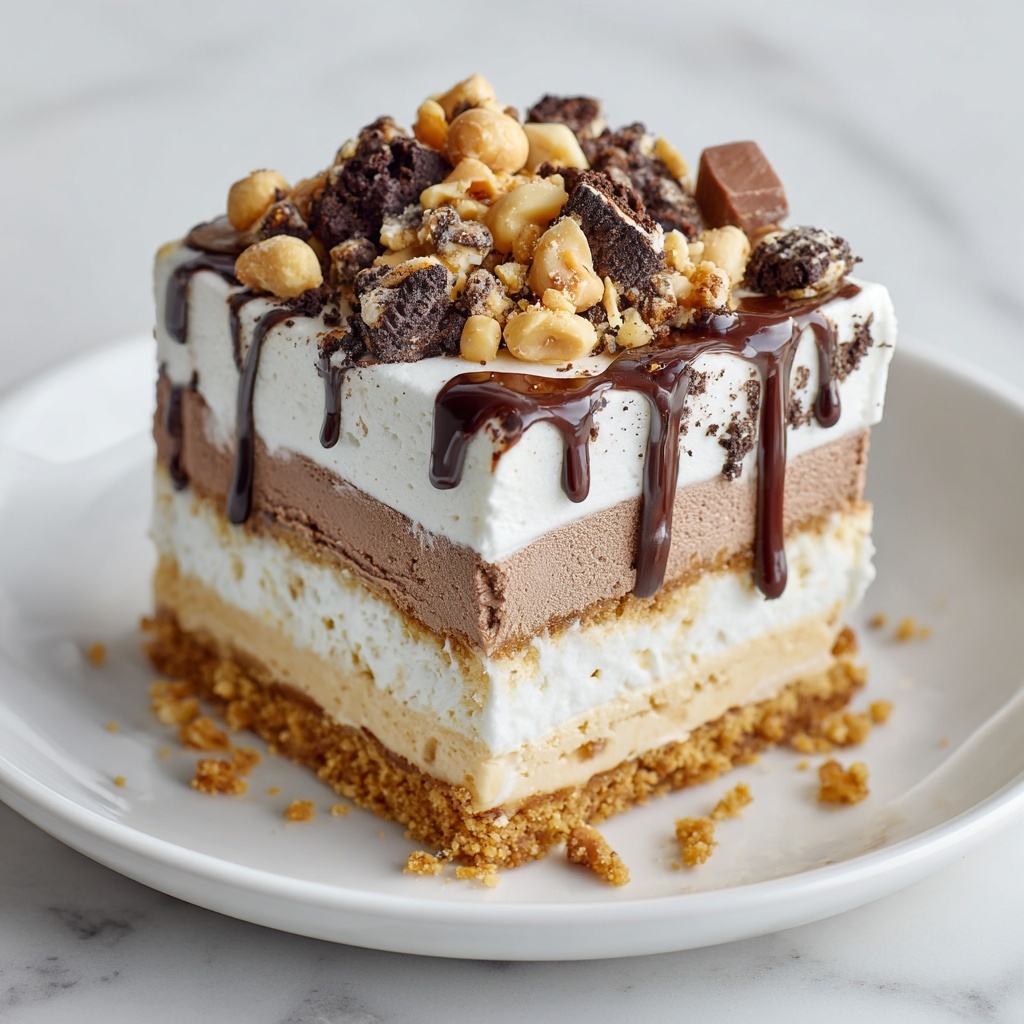
If you have a hankering for a dessert that feels like a nostalgic trip down ice cream aisle memory lane, the Buster Bar Ice Cream Cake Recipe is your perfect match. This dessert brings together creamy vanilla ice cream, rich chocolate, crunchy peanuts, and luscious caramel in a layered cake that’s as fun to assemble as it is to devour. It’s simple enough to whip up for your next gathering but impressive enough to have everyone asking for the secret. Trust me, once you try this, the Buster Bar Ice Cream Cake Recipe will become your go-to summer treat and year-round crowd-pleaser.
Ingredients You’ll Need
Gathering the ingredients for the Buster Bar Ice Cream Cake Recipe is delightfully straightforward, yet each component plays a crucial role in creating the cake’s trademark flavor and texture. From the chocolate and caramel for that indulgent sweetness to the peanuts adding a satisfying crunch, every element is essential.
- Ice cream sandwiches: These form the sturdy, creamy base and top layers, making assembly super easy and delicious.
- Chocolate chips: Melting these creates a smooth, rich chocolate layer that binds the cake’s flavors perfectly.
- Unsalted butter: Combining with chocolate chips, it adds a silky gloss and balances the sweetness.
- Chopped peanuts: They bring a nutty crunch to contrast the soft ice cream and creamy toppings.
- Caramel sauce: Drizzled over peanuts, this adds a sticky, buttery sweetness that elevates the cake.
- Vanilla ice cream: The creamy heart of the cake, providing the classic cool, smooth texture.
How to Make Buster Bar Ice Cream Cake Recipe
Step 1: Line the Baking Dish
Start by taking a 9×13-inch baking dish and lining it with ice cream sandwiches. These will act as the base of your cake, giving it that iconic Buster Bar shape and flavor. Make sure the sandwiches fit snugly to create an even foundation.
Step 2: Prepare the Chocolate Layer
In a microwave-safe bowl or over a double boiler, melt together the chocolate chips and unsalted butter. Stir constantly until smooth and glossy, then pour this luscious chocolate mixture evenly over the ice cream sandwiches. This step is where the magic starts to come together by infusing creamy, rich chocolate that sets beautifully.
Step 3: Add Crunch with Peanuts
Sprinkle the chopped peanuts generously over the chocolate layer while it’s still warm. This crunchy layer is what makes the Buster Bar Ice Cream Cake Recipe feel truly indulgent and textured, perfectly balancing the soft ice cream and smooth chocolate.
Step 4: Drizzle Caramel Sauce
Drizzle the caramel sauce over the peanuts. The caramel’s gooey sweetness seeps into the nuts and chocolate, creating pockets of flavor that make every bite unforgettable.
Step 5: Add the Vanilla Ice Cream Layer
Top this off with a smooth, even layer of vanilla ice cream. Use a spatula to spread it out nicely, making sure the cake has a creamy, smooth finish. This vanilla layer ties all the other flavors together perfectly.
Step 6: Freeze Until Firm
Pop the whole cake into the freezer for at least 4 hours. This chilling period is key because it allows the layers to meld and firm up, making the cake easy to slice and serve.
Step 7: Slice and Serve
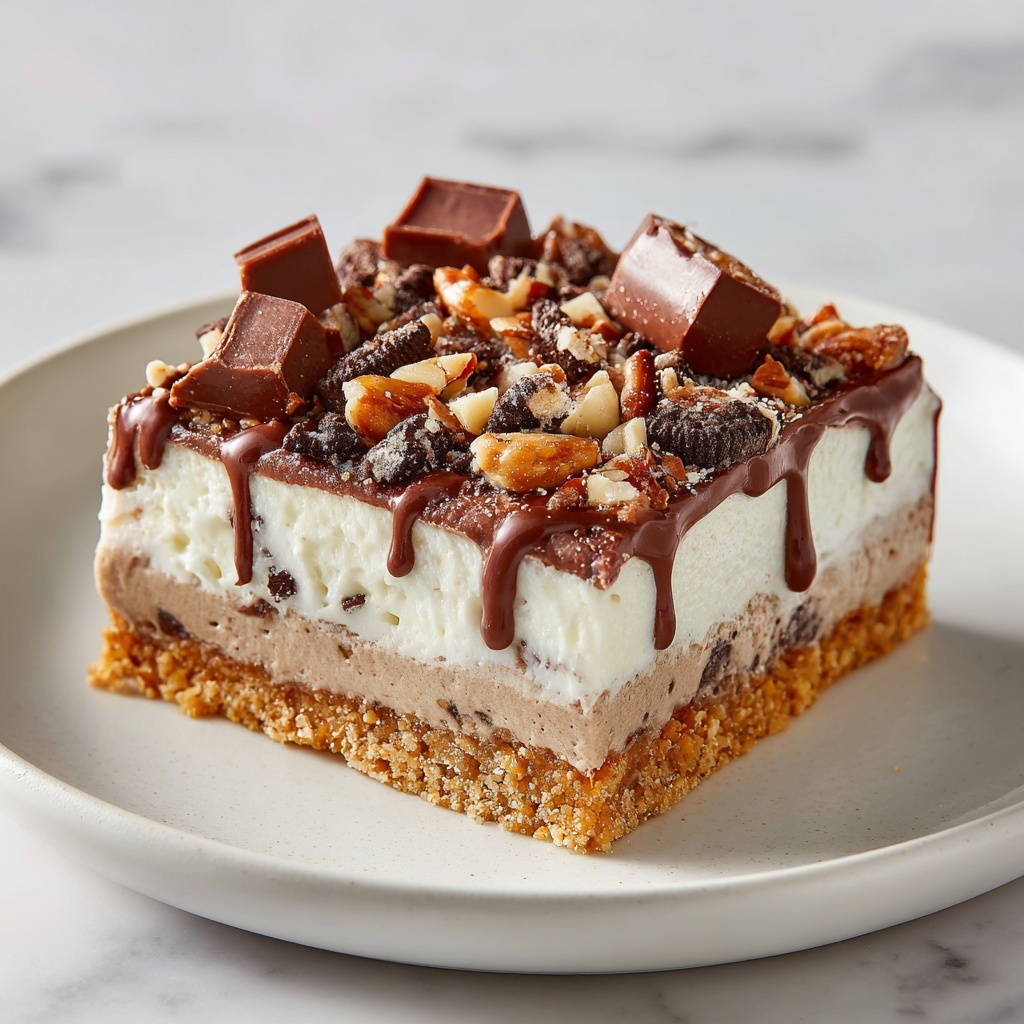
Once frozen solid, cut the Buster Bar Ice Cream Cake Recipe into squares and serve them cold for the ultimate refreshing dessert experience. Each piece is packed with different textures and delightful flavors that will have everyone coming back for seconds.
How to Serve Buster Bar Ice Cream Cake Recipe

Garnishes
While the cake is amazing on its own, you can add a little extra flair with whipped cream, a sprinkle of extra chopped peanuts, or even a drizzle of additional caramel or chocolate sauce. These garnishes add layers of appeal and invite everyone to personalize their slice.
Side Dishes
This dessert works beautifully alongside fresh berries or a simple fruit salad which brings a fresh, tangy contrast to the richness of the cake. A cup of coffee or iced cold milk also complements the dessert perfectly, rounding out the indulgence with familiar tastes.
Creative Ways to Present
Think outside the box by serving individual portions in clear cups to show off the layers, or layering the cake crumbles with whipped cream to create a parfait-style treat. You can even add a fun twist by using flavored ice cream sandwiches to mix things up and surprise your guests.
Make Ahead and Storage
Storing Leftovers
Wrap any leftover Buster Bar Ice Cream Cake Recipe tightly in plastic wrap or store it in an airtight container in the freezer. This keeps it fresh and prevents freezer burn, preserving its creamy texture and flavor.
Freezing
The cake can be frozen for up to a week or two without losing its delicious texture. Just be sure to cover it well to avoid absorbing any unwanted freezer odors.
Reheating
No reheating needed here! Since this is a frozen dessert, simply let slices sit at room temperature for a few minutes before serving if it’s too hard to cut right out of the freezer.
FAQs
Can I use store-bought ice cream sandwiches for this recipe?
Absolutely! Pre-made ice cream sandwiches make this recipe quick and fuss-free while providing that classic base for your cake.
What type of chocolate chips work best?
Semi-sweet chocolate chips are great for balancing sweetness, but you can also use milk chocolate for a creamier taste or dark chocolate if you prefer a richer, more intense flavor.
Can I substitute peanuts with another nut?
Yes, feel free to use almonds, pecans, or even walnuts if you’d like a different flavor or if you have a peanut allergy. Just chop them coarsely for the best crunch.
Is it necessary to freeze the cake for 4 hours?
Freezing for at least 4 hours ensures the cake is firm enough to slice cleanly and helps all layers meld beautifully. If you’re short on time, try to freeze it for at least 2 hours, but longer is best.
Can I make this cake dairy-free or vegan?
With some ingredient swaps like dairy-free ice cream sandwiches, vegan chocolate chips, and plant-based butter, you can definitely adapt the Buster Bar Ice Cream Cake Recipe to suit dietary needs.
Final Thoughts
The Buster Bar Ice Cream Cake Recipe is one of those delightful desserts that brings simple ingredients together in a way that feels special and indulgent. It’s perfect for summer parties, celebrations, or anytime you want to treat yourself and your loved ones to a cool, scrumptious slice of joy. I can’t wait for you to try it and see for yourself just how easy and satisfying this cake is!
Print
Buster Bar Ice Cream Cake Recipe
- Prep Time: 15 minutes
- Cook Time: 5 minutes
- Total Time: 4 hours 20 minutes
- Yield: 12 servings
- Category: Dessert
- Method: No-Cook
- Cuisine: American
Description
This Buster Bar Ice Cream Cake is a delightful no-bake dessert that combines layers of ice cream sandwiches, rich chocolate, crunchy peanuts, luscious caramel sauce, and smooth vanilla ice cream. Perfect for gatherings and warm days, this easy-to-make cake offers a delicious combination of textures and flavors, served cold and ready in just over four hours.
Ingredients
Base Layer
- 1 box of ice cream sandwiches
Chocolate Topping
- 2 cups chocolate chips
- 1/4 cup unsalted butter
Toppings
- 1 cup peanuts, chopped
- 1/2 cup caramel sauce
Ice Cream Layer
- 2 cups vanilla ice cream
Instructions
- Prepare the Base: Line a 9×13-inch baking dish evenly with ice cream sandwiches, creating a solid base layer for the cake.
- Melt Chocolate Mixture: Combine the butter and chocolate chips in a microwave-safe bowl or in a small saucepan over low heat. Stir continuously until the mixture is completely smooth and glossy.
- Apply Chocolate Layer: Pour the melted chocolate mixture evenly over the arranged ice cream sandwiches, ensuring full coverage.
- Add Peanuts: Sprinkle the chopped peanuts generously on top of the warm chocolate layer to add crunch and flavor.
- Drizzle Caramel Sauce: Evenly drizzle the caramel sauce over the peanuts, allowing the sweetness to complement the chocolate and nuts.
- Top with Vanilla Ice Cream: Spread 2 cups of softened vanilla ice cream over the caramel layer, smoothing the surface with a spatula for a clean finish.
- Freeze: Place the entire cake in the freezer for at least 4 hours, or until it is completely firm and set.
- Serve: Once frozen solid, cut the cake into squares and serve cold. Enjoy this rich and refreshing dessert!
Notes
- For best results, allow the vanilla ice cream to soften slightly before spreading to ensure a smooth layer.
- You can substitute peanuts with other nuts like almonds or pecans if preferred.
- If you want a nut-free version, omit the peanuts and increase the caramel sauce slightly for extra flavor.
- Use high-quality chocolate chips for a richer chocolate taste.
- Make sure to freeze the cake thoroughly to prevent melting when cutting and serving.

