
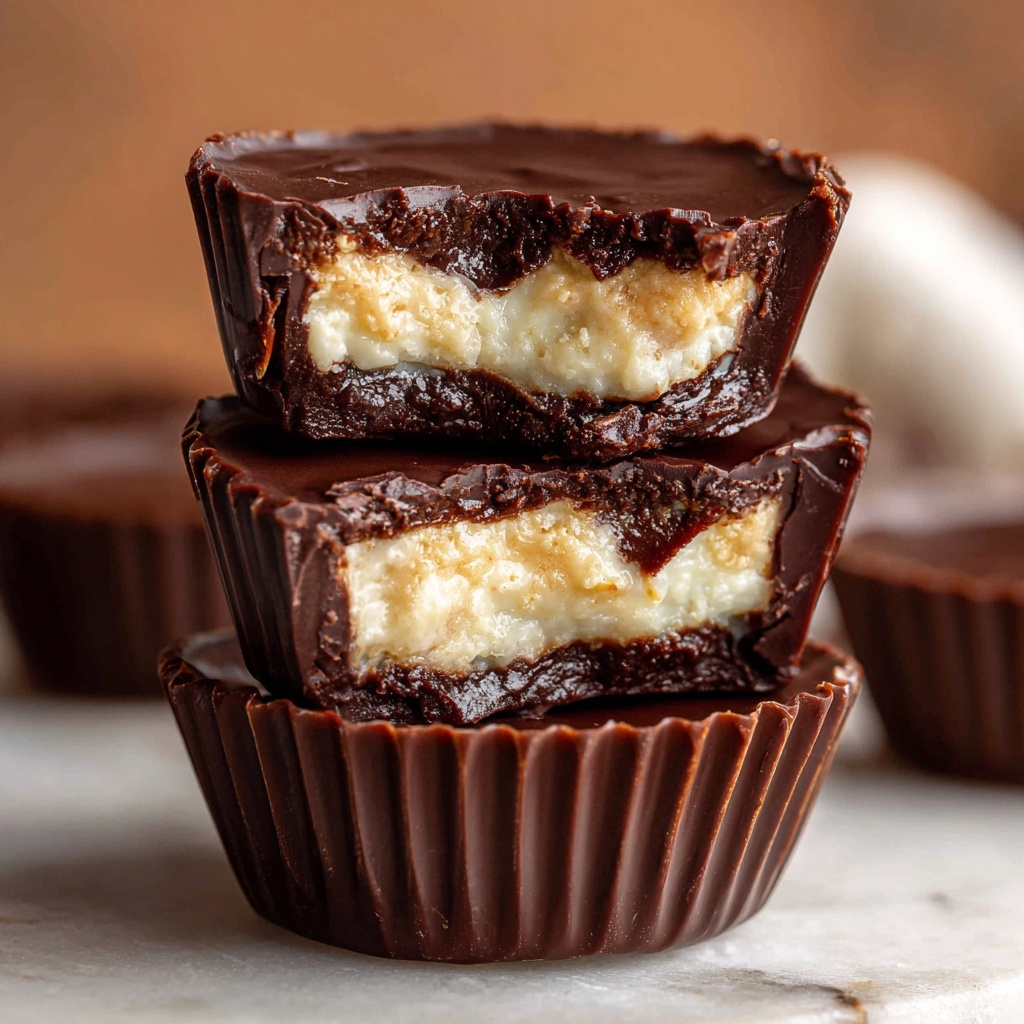
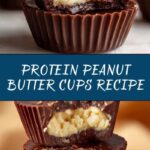
If you have a craving for something both indulgent and nourishing, this Protein Peanut Butter Cups Recipe is going to be your new best friend. Packed with the wholesome goodness of protein powder, creamy peanut butter, and rich dark chocolate, these homemade treats strike the perfect balance between satisfying your sweet tooth and fueling your body. Whether you need a post-workout snack or just a guilt-free dessert, these cups bring a delicious twist to a classic favorite that’s easy to make and impossible to resist.
Ingredients You’ll Need
Getting the ingredients right for this Protein Peanut Butter Cups Recipe is simpler than you think, but each component plays a vital role. From the luscious dark chocolate that gives you that melt-in-your-mouth feeling, to the protein powder that adds a powerful punch, every element is carefully chosen to create harmony in flavor, texture, and nutrition.
- Dark chocolate chips: Choose high-quality dark chocolate chips for a deep, rich flavor and smooth melting texture.
- Coconut oil: Helps to melt the chocolate smoothly and adds a subtle tropical note that complements the peanut butter.
- Natural peanut butter: Opt for creamy and unsweetened for the perfect nutty base in the filling.
- Protein powder: Vanilla or chocolate flavor works wonderfully here, providing that extra boost of protein and a touch of sweetness.
- Maple syrup: Adds natural sweetness that balances the slight bitterness of dark chocolate.
- Sea salt: Sprinkling this on top enhances all the flavors and offers a delightful salty contrast.
How to Make Protein Peanut Butter Cups Recipe
Step 1: Melt the Chocolate and Coconut Oil
Begin by gently melting the dark chocolate chips together with the coconut oil. You can do this in a microwave-safe bowl in 20-second bursts or over a double boiler, stirring frequently until completely smooth. This silky chocolate base is what makes your peanut butter cups so decadent and smooth.
Step 2: Create the Chocolate Base
Line a muffin tin with paper liners and spoon a generous layer of the melted chocolate into each cavity. This bottom layer acts as the sturdy, chocolatey foundation of your cups. Pop the tin into the freezer for about 10 minutes so the chocolate firms up nicely before adding the filling.
Step 3: Prepare the Peanut Butter Filling
While the base sets, combine the natural peanut butter, protein powder, and maple syrup in a bowl. Stir until you have a smooth, creamy mixture that’s easy to spoon. This filling is the heart of the Protein Peanut Butter Cups Recipe, packing in flavor and muscle-building protein.
Step 4: Assemble the Cups
Remove the muffin tin from the freezer and spoon the peanut butter mixture evenly onto each hardened chocolate base. Once all the cups are filled, pour the remaining melted chocolate over the top, covering the peanut butter layer completely. This top coat seals your treats and adds that luscious chocolate finish.
Step 5: Add the Finishing Touch and Freeze
Sprinkle a pinch of sea salt over each cup to heighten the flavor and bring out the rich chocolate and peanut butter notes. Freeze the entire tray for at least 30 minutes, or until the cups are completely firm. This ensures they’ll hold their shape perfectly when you bite in.
Step 6: Enjoy Your Homemade Protein Peanut Butter Cups!
Once frozen solid, your Protein Peanut Butter Cups Recipe is ready to be enjoyed. Peel off the liners and savor each bite of this delightful, protein-packed snack that is as delicious as it is satisfying!
How to Serve Protein Peanut Butter Cups Recipe

Garnishes
Sprinkling a tiny amount of flaky sea salt or even some crushed roasted peanuts on top before freezing adds an extra layer of crunch and flavor to these peanut butter cups. A light dusting of cocoa powder or a few chocolate shavings also elevates their appearance for special occasions.
Side Dishes
These protein peanut butter cups shine on their own but pairing them with a cup of freshly brewed coffee or a cool glass of almond milk makes for a delightful snack experience. Feeling fancy? Try serving them alongside a scoop of vanilla Greek yogurt or fresh berries for a wholesome mini dessert.
Creative Ways to Present
For gifting or parties, arrange your Protein Peanut Butter Cups Recipe in a pretty box lined with parchment paper, tied off with a ribbon. You can also layer them in a jar, alternating with nuts or dried fruit, making a beautiful and tasty gift. Individual cupcake liners in bright colors make them festive and fun for kids or gatherings.
Make Ahead and Storage
Storing Leftovers
Store your protein peanut butter cups in an airtight container in the refrigerator for up to one week. Keeping them chilled ensures they stay firm and their flavors remain fresh and vibrant. If left out at room temperature, they may soften too much and lose that satisfying snap.
Freezing
For longer storage, freeze your Protein Peanut Butter Cups Recipe in a freezer-safe container for up to three months. Make sure to layer them with parchment paper so they don’t stick together. When you want a quick treat, just pop a few cups out to thaw for 10-15 minutes.
Reheating
These protein peanut butter cups are best enjoyed cold or at room temperature and shouldn’t be reheated as the chocolate can easily seize or melt unevenly. If you prefer a softer texture, simply let them sit at room temperature for a few minutes before indulging.
FAQs
Can I use any kind of protein powder for this recipe?
Absolutely! Whether you prefer whey, plant-based, or collagen protein powder, you can use whichever suits your taste and dietary needs. Just keep in mind that flavored powders like vanilla or chocolate complement the peanut butter flavor best.
Is there a way to make these peanut butter cups vegan?
Yes! Use a plant-based protein powder and dairy-free dark chocolate chips that don’t contain any milk products. Also, make sure your peanut butter is free from added non-vegan ingredients.
Can I substitute maple syrup with another sweetener?
Definitely. Honey, agave nectar, or even a mild-flavored liquid sweetener can work if you want to adjust the sweetness. Just use the same amount and adjust to your taste if needed.
How long does it take to make Protein Peanut Butter Cups Recipe from start to finish?
While the active prep time is around 15 minutes, the freezing steps take about 40 minutes total, so expect close to an hour from start to finish for the best results.
Can I add other mix-ins to the peanut butter filling?
Feel free to get creative! Mini chocolate chips, chopped nuts, or a sprinkle of cinnamon can add a fun twist to your Protein Peanut Butter Cups Recipe. Just fold them into the filling before assembling.
Final Thoughts
There’s something truly special about making your own Protein Peanut Butter Cups Recipe at home. These treats combine the nostalgic joy of a peanut butter cup with the nourishment of protein-packed ingredients, all wrapped into one easy recipe. Give them a try—you might find they become your favorite go-to snack for both taste and energy!
Print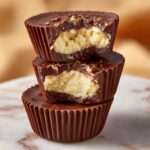
Protein Peanut Butter Cups Recipe
- Prep Time: 15 minutes
- Cook Time: 0 minutes
- Total Time: 55 minutes
- Yield: 12 servings
- Category: Dessert
- Method: No-Cook
- Cuisine: American
- Diet: Gluten Free
Description
These Protein Peanut Butter Cups are a delicious and healthy twist on the classic treat, combining rich dark chocolate with a creamy peanut butter and protein powder filling. Perfect for a post-workout snack or a guilt-free indulgence, they are easy to make and freezer-friendly.
Ingredients
Chocolate Layer
- 2 cups dark chocolate chips, divided
- 2 tablespoons coconut oil, divided
Peanut Butter Filling
- 1/2 cup natural peanut butter
- 1 scoop protein powder (vanilla or chocolate flavor)
- 2 tablespoons maple syrup
Garnish
- Sea salt, for sprinkling
Instructions
- Melt Chocolate: In a microwave-safe bowl or double boiler, melt 1 cup of dark chocolate chips and 1 tablespoon of coconut oil together until smooth, stirring occasionally.
- Prepare Muffin Tin: Line a standard 12-cup muffin tin with paper liners. Spoon a small amount of the melted chocolate into the bottom of each liner, spreading evenly.
- Freeze Chocolate Base: Place the muffin tin in the freezer for about 10-15 minutes, or until the chocolate layer is firm and set.
- Make Peanut Butter Filling: While the chocolate sets, mix the natural peanut butter, protein powder, and maple syrup in a bowl until fully combined and creamy.
- Add Filling: Spoon the peanut butter mixture evenly onto each frozen chocolate base in the muffin tin, gently pressing down to form an even layer.
- Top with Chocolate: Melt the remaining 1 cup of dark chocolate chips with 1 tablespoon of coconut oil until smooth, then carefully spoon over the peanut butter filling to cover completely.
- Sprinkle Sea Salt: Lightly sprinkle sea salt over the tops of each peanut butter cup for a flavorful finishing touch.
- Freeze Until Firm: Return the muffin tin to the freezer and chill for at least 30 minutes, or until the peanut butter cups are firm and set.
- Serve: Remove the peanut butter cups from the muffin liners and enjoy immediately or store in an airtight container in the freezer.
Notes
- Use natural peanut butter without added sugar or oils for a healthier filling.
- Protein powder flavor can be vanilla or chocolate depending on your preference.
- Store leftover peanut butter cups in the freezer to maintain firmness and freshness.
- Make sure to freeze the chocolate base before adding the filling to prevent mixing layers.
- Sea salt enhances the chocolate and peanut butter flavors; adjust amount to taste.
