
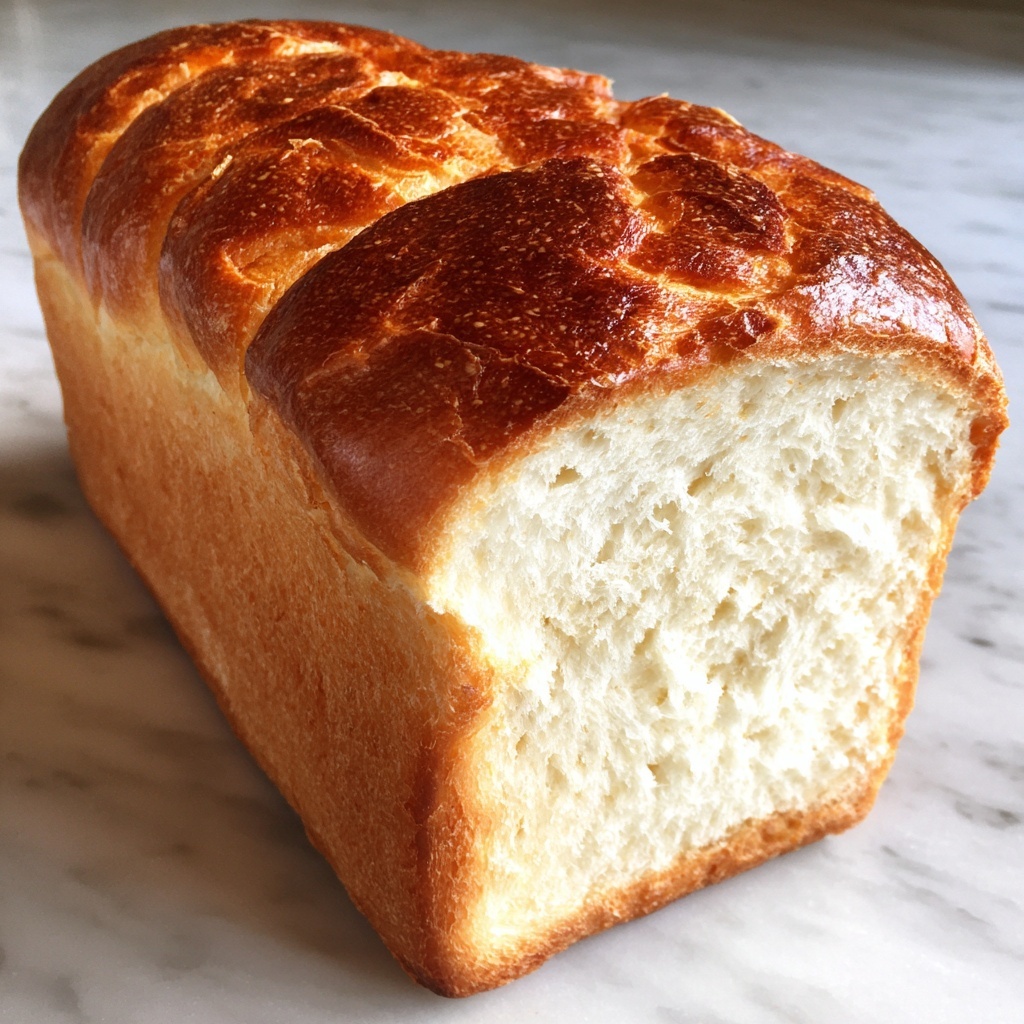
If you’ve ever missed the comforting taste and fluffy texture of your favorite loaf while living gluten-free, then you’re going to absolutely adore this Classic Gluten-Free White Sandwich Bread Recipe. It brings all the warmth and softness you crave in sandwich bread, crafted with simple ingredients that blend into a tender crumb and golden crust. It’s the perfect base for your lunchtime favorites or a simple slice with butter—this recipe truly feels like a hug from your oven with every bite.
Ingredients You’ll Need
These ingredients are straightforward but beautifully balanced, each playing a crucial role in building a soft, flavorful loaf with a flawless crumb and texture that rivals traditional white bread.
- Gluten-free all-purpose flour (2 cups): The foundation that ensures this bread is safe for gluten-sensitive diets while maintaining a tender bite.
- Sugar (1 tablespoon): Feeds the yeast and adds a subtle sweetness that enhances the bread’s flavor.
- Salt (1 teaspoon): Balances the sweetness and strengthens the dough’s structure for a perfect rise.
- Active dry yeast (1 tablespoon): The natural leavening agent creates air pockets, giving the bread its soft fluffiness.
- Warm water (1 cup): Activates the yeast and hydrates the flour to create the ideal dough consistency.
- Olive oil (2 tablespoons): Adds moisture and richness, contributing to a tender crust and longer freshness.
- Eggs (2): Bind the ingredients and lend a beautiful golden color along with extra tenderness.
How to Make Classic Gluten-Free White Sandwich Bread Recipe
Step 1: Prepare Your Oven and Pan
Start by preheating your oven to a cozy 375°F (190°C). While it warms up, generously grease your loaf pan to prevent sticking and to give your bread that perfect crust once baked. A well-prepared pan sets the stage for a flawless loaf.
Step 2: Combine the Dry Ingredients
In a large mixing bowl, whisk together the gluten-free all-purpose flour, sugar, salt, and active dry yeast. Mixing these dry ingredients thoroughly ensures that the yeast is evenly distributed and the salt doesn’t interfere directly with it, setting your bread up for a beautiful rise.
Step 3: Add Wet Ingredients and Form the Dough
Now it’s time for the warm water, olive oil, and eggs to join the party. Pour them into the bowl with your dry mix and stir gently but thoroughly until a smooth dough forms. The dough will be soft and slightly sticky—this means it’s hydrated perfectly and ready to rise into a light, airy loaf.
Step 4: Transfer and Smooth the Dough
Carefully scoop the dough into the greased loaf pan. Use a spatula to smooth the top, creating an even surface that will bake into a lovely golden dome. This step helps your bread bake evenly and look as great as it tastes.
Step 5: Bake Until Golden
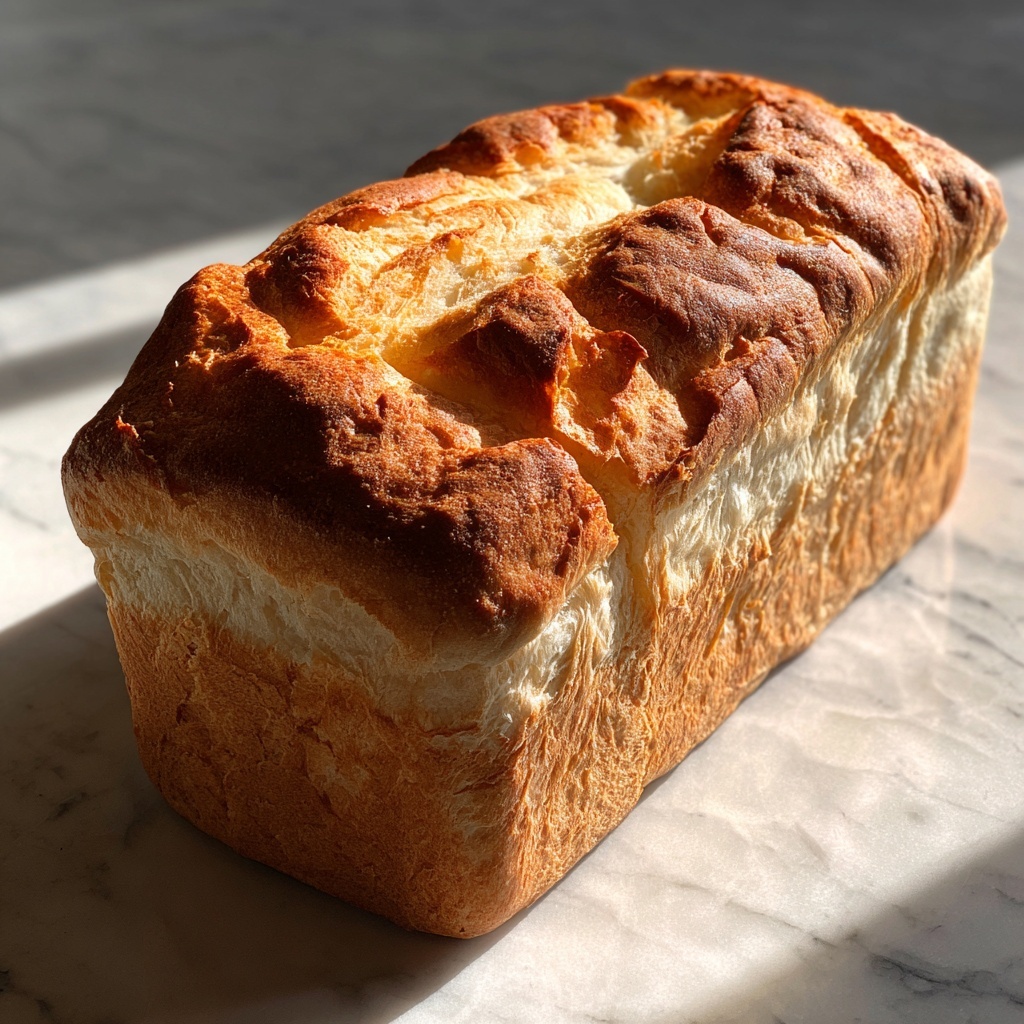
Pop your loaf into the oven and bake for about 40 minutes. You’ll know it’s ready when the crust turns a gorgeous golden brown and tapping the top produces a hollow sound—this means your bread has baked through perfectly inside.
Step 6: Cool Before Slicing
Once baked, let the bread rest in the pan for 10 minutes. This cooling process helps it set, preventing a gummy texture. Afterward, transfer your loaf to a wire rack to cool completely before slicing. Trust me, the wait makes every bite even more satisfying.
How to Serve Classic Gluten-Free White Sandwich Bread Recipe
Garnishes
While this bread shines on its own, adding a spread of creamy butter, a drizzle of honey, or a sprinkle of seeds on top before baking can elevate its appeal. Fresh herbs lightly pressed into the dough before baking can also impart a fragrant twist perfect for savory sandwiches.
Side Dishes
This Classic Gluten-Free White Sandwich Bread Recipe pairs beautifully with soups, salads, or hearty stews. Its tender crumb soaks up broth and sauces delightfully, making every meal cozy and satisfying. It’s also a fantastic base for open-faced sandwiches loaded with fresh veggies and proteins.
Creative Ways to Present
Thinking beyond the usual sandwich? Toast the slices and layer with smashed avocado and cherry tomatoes for a vibrant snack. Or use the bread to make gluten-free bread pudding or French toast for a special brunch treat that everyone will love.
Make Ahead and Storage
Storing Leftovers
Wrap your leftover bread tightly in plastic wrap or place it in an airtight container at room temperature. It will stay fresh for about 2-3 days, maintaining that perfect softness if properly stored.
Freezing
This bread freezes wonderfully. Slice first for convenience, then freeze the slices individually on a tray before storing them together in a freezer-safe bag. This method lets you grab a slice or two anytime, helping reduce waste and keeping your mornings easy.
Reheating
To bring your bread back to life, toast slices directly from the freezer or warm the whole loaf in a 350°F oven wrapped in foil for about 10-15 minutes. This brings back that fresh-from-the-oven softness and delicious aroma.
FAQs
Can I substitute the eggs in this Classic Gluten-Free White Sandwich Bread Recipe?
Yes! If you prefer an egg-free version, try using flax eggs or chia eggs as a substitute. Keep in mind this may slightly change the texture and color but will still yield a tasty loaf.
What gluten-free flour blend works best for this recipe?
A high-quality, all-purpose gluten-free flour blend with xanthan gum included typically works best to achieve the right texture and structure, but you can experiment with blends to suit your preference.
Why is the bread dense sometimes?
Dense bread can result from inactive yeast, not enough rise time, or liquid temperature issues. Using warm (not hot) water and fresh yeast is key for a light, fluffy loaf.
Can I make this bread dairy-free?
Absolutely. This recipe already avoids dairy, making it suitable for dairy-free diets. Just make sure your gluten-free flour blend doesn’t contain any dairy ingredients.
How long does this bread stay fresh without preservatives?
Due to its simple, natural ingredients, it stays fresh for about 2-3 days at room temperature, after which it’s best to freeze to maintain quality.
Final Thoughts
There is something truly special about baking your own Classic Gluten-Free White Sandwich Bread Recipe—the smell filling your home, the warmth of the freshly baked loaf in your hands, and the satisfaction of enjoying bread that feels like home, without gluten worries. I can’t wait for you to give this recipe a try and share it with those you love. Happy baking!
Print
Classic Gluten-Free White Sandwich Bread Recipe
- Prep Time: 10 minutes
- Cook Time: 40 minutes
- Total Time: 55 minutes
- Yield: 1 loaf (approximately 8 slices)
- Category: Bread
- Method: Baking
- Cuisine: American
- Diet: Gluten Free
Description
This Classic White Sandwich Bread recipe is a delicious, gluten-free take on the traditional sandwich bread, perfect for those with gluten sensitivities or anyone seeking a soft, fluffy loaf. Featuring a tender crumb and golden crust, this bread is ideal for sandwiches, toast, or simply enjoying with butter.
Ingredients
Dry Ingredients
- 2 cups gluten-free all-purpose flour
- 1 tablespoon sugar
- 1 teaspoon salt
- 1 tablespoon active dry yeast
Wet Ingredients
- 1 cup warm water
- 2 tablespoons olive oil
- 2 eggs
Instructions
- Preheat and Prepare: Preheat your oven to 375°F (190°C) and grease a loaf pan thoroughly to prevent sticking and ensure an easy release of the bread after baking.
- Combine Dry Ingredients: In a large mixing bowl, whisk together the gluten-free all-purpose flour, sugar, salt, and active dry yeast until evenly distributed.
- Mix Wet Ingredients: Add the warm water, olive oil, and eggs to the bowl with dry ingredients. Mix thoroughly until you achieve a smooth, uniform dough with no lumps.
- Shape the Dough: Transfer the dough into the greased loaf pan. Smooth the top with a spatula to create an even surface for baking.
- Bake the Bread: Place the loaf pan in the oven and bake for approximately 40 minutes, or until the bread turns golden brown on top and produces a hollow sound when tapped, indicating it is fully baked.
- Cool the Bread: Remove the bread from the oven and let it cool in the pan for 10 minutes. Then, carefully transfer the loaf to a wire rack to cool completely before slicing to preserve texture and flavor.
Notes
- Use warm water, about 110°F (43°C), to activate the yeast properly without killing it.
- Ensure all ingredients are measured accurately for best results, especially the gluten-free flour blend.
- Allow the bread to cool completely on a wire rack before slicing to prevent crumbling.
- This bread can be stored in an airtight container at room temperature for up to 3 days or frozen for up to 1 month.
- For a dairy-free option, substitute eggs with flax eggs and olive oil can be replaced with any neutral vegetable oil.


