
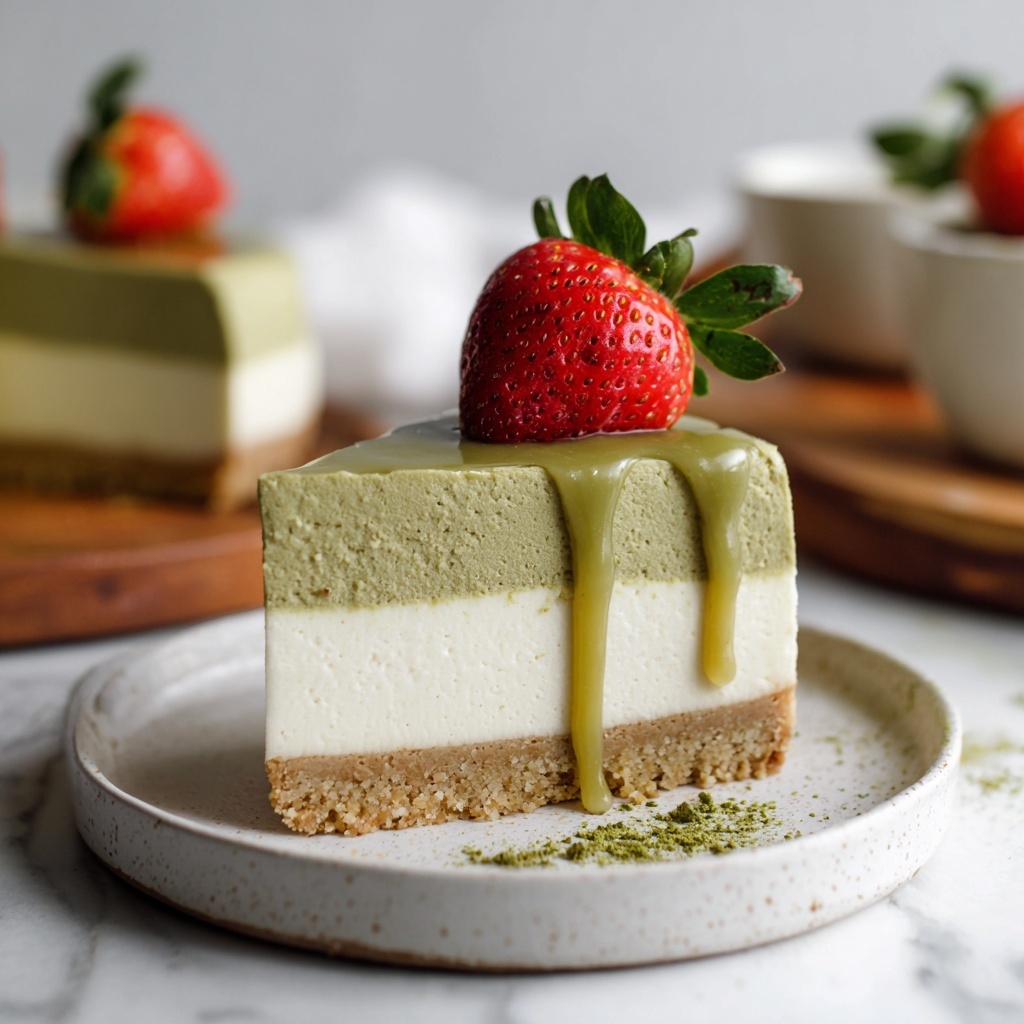
If you have a soft spot for creamy, nutty desserts that don’t require turning on the oven, then this No Bake Pistachio Cheesecake Recipe is about to become your new favorite indulgence. Imagine a buttery biscuit crust that gives way to a luxuriously smooth, fluffy filling bursting with the rich flavor of pistachios, all topped with a glossy layer of pistachio spread and fresh strawberries for a pop of color and freshness. This cheesecake is as easy to make as it is delightful, perfect for casual gatherings or whenever you crave a show-stopping dessert without the hassle.
Ingredients You’ll Need
Gathering the right ingredients is the first key to achieving the perfect balance of texture, flavor, and visual appeal in this cheesecake. Luckily, each component here is simple yet essential, working together to create a harmonious dessert that’s creamy, crunchy, and irresistibly nutty.
- 200 grams biscuits: These form the crisp, buttery base that holds everything together.
- 45 grams melted butter: Binds the biscuit crumbs and adds rich flavor to your crust.
- 500 grams cream cheese: The heart of the filling, delivering smooth creaminess and tanginess.
- 150 grams pistachio spread: Brings that signature, earthy pistachio taste and a lovely green hue.
- 100 grams powdered sugar: Adds sweetness while blending effortlessly into the cheese mixture.
- 200 grams heavy whipping cream (35%): Whipped to soft peaks, it creates a light, airy texture in the filling.
- 100 grams pistachio spread (for topping): A rich finishing glaze that intensifies the pistachio flavor when drizzled on top.
- Fresh strawberries: Adds freshness, color, and a subtle tart contrast to the rich cheesecake.
How to Make No Bake Pistachio Cheesecake Recipe
Step 1: Prepare the Biscuit Crust
Start by finely crushing your biscuits using a food processor, blender, or even a rolling pin. You want fine crumbs that will bind well. Next, melt the butter and thoroughly mix it into the crumbs so they resemble moist sand. This step is extremely important because the butter acts as glue, ensuring your crust holds together once set. Press this mixture firmly at the bottom and slightly up the sides of a greased pan to create an even, compact base.
Step 2: Freeze the Crust
Pop the crusted pan into the freezer for a little while. This short chill firms up the crust, so it stays solid and offers a satisfying crunch when you eventually slice your cheesecake. Freezing also helps streamline the next step of adding your luscious filling without worrying the crust will crumble.
Step 3: Make the Pistachio Cheesecake Filling
In a clean bowl, blend the cream cheese and pistachio spread until smooth and lump-free. This creamy base sets the stage for the luxurious flavor that defines the No Bake Pistachio Cheesecake Recipe. Taking a moment to ensure it’s fully incorporated will pay off in silky texture later.
Step 4: Whip the Heavy Cream
In a separate chilled bowl, whip the heavy cream with powdered sugar until soft peaks form. Soft peaks mean the cream holds shape but still folds easily, giving your filling that light, dreamy consistency. Remember, overwhipping can make it grainy, so keep a close eye here.
Step 5: Fold Together for a Fluffy Filling
Gently fold the whipped cream into the cream cheese mixture in three batches. Folding carefully keeps as much air in the filling as possible, resulting in the cheesecake’s coveted lightness and fluffy texture. Overmixing here would deflate the filling, so patience is key!
Step 6: Chill for Eight Hours
Pour the completed filling onto your frozen crust, smoothing the top evenly. Cover it well to protect from fridge odors, then refrigerate for at least eight hours or overnight. This step allows the cheesecake to set perfectly, so each slice holds together beautifully and flavors fully meld.
Step 7: Add the Finishing Touches
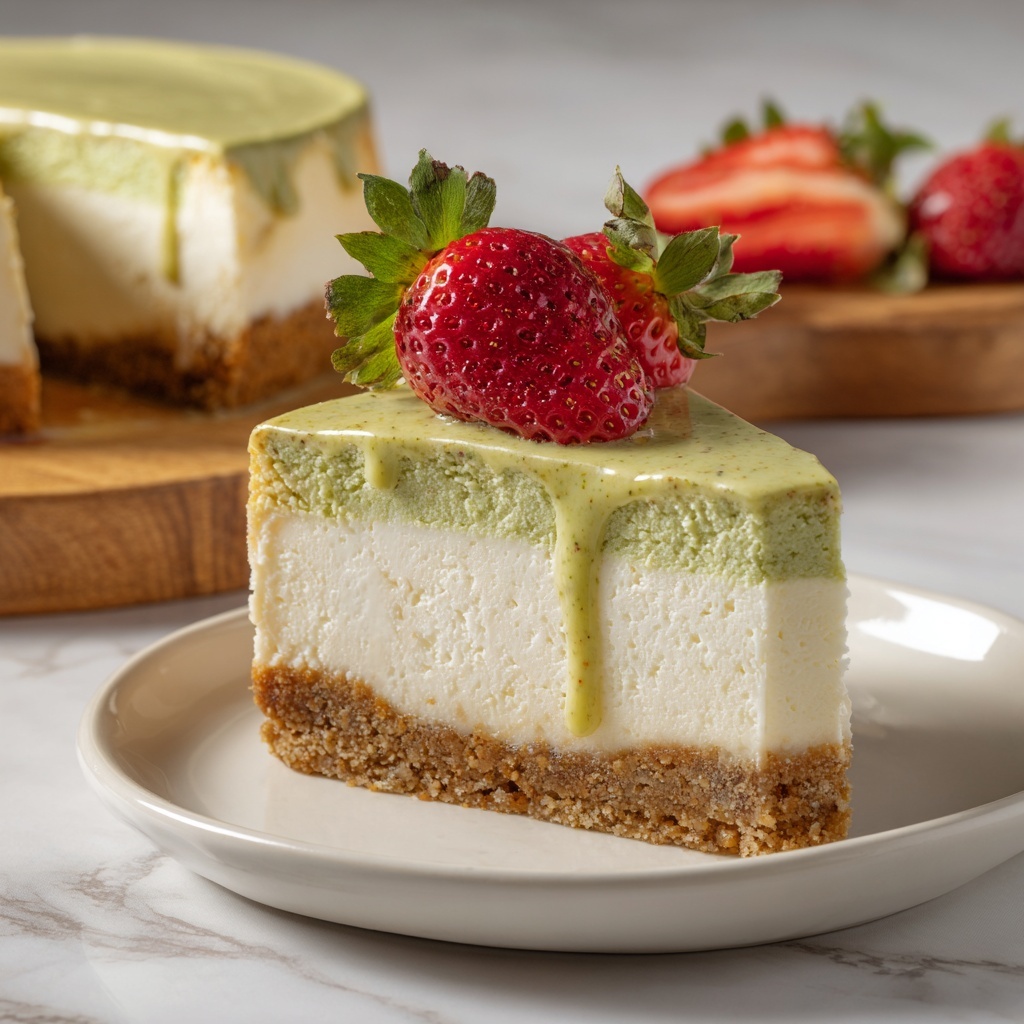
Once fully set, drizzle the remaining pistachio spread on top by gently tilting the pan for an even layer. Adding fresh strawberries or a sprinkle of crushed pistachios not only enhances flavor but also adds a stunning visual contrast that elevates this dessert from simple to spectacular.
How to Serve No Bake Pistachio Cheesecake Recipe
Garnishes
Brighten up your cheesecake slices with fresh strawberry halves or thin pistachio slivers. These garnishes provide freshness, texture, and an inviting burst of color that complements the creamy green filling perfectly. A light dusting of powdered sugar can add a delicate, snowy touch if you’re feeling fancy.
Side Dishes
Pair this cheesecake with a light, fruity side like a mixed berry compote or a citrusy sorbet to balance the richness. A cup of freshly brewed coffee or a fragrant herbal tea can also enhance the experience, gently cleansing your palate between bites.
Creative Ways to Present
For a fun twist, serve individual cheesecake jars layered with crushed biscuit crust, pistachio filling, and fresh berries. Alternatively, arrange slices on a platter with edible flowers or gold leaf for an elegant presentation sure to impress any guest.
Make Ahead and Storage
Storing Leftovers
Cover leftover cheesecake tightly with plastic wrap or store in an airtight container in the refrigerator. It will stay fresh and creamy for up to 3 days, making it perfect for enjoying over a few celebrations.
Freezing
To freeze, wrap the cheesecake securely in plastic wrap and then aluminum foil to prevent freezer burn. When properly stored, it can last up to 1 month. Thaw overnight in the fridge before serving to maintain that perfect creamy texture.
Reheating
This cheesecake is best served chilled, so no reheating is needed! If it feels a bit firm from the fridge, simply let it sit at room temperature for 15 minutes to soften slightly, enhancing the creamy mouthfeel.
FAQs
Can I use a different nut spread instead of pistachio?
Absolutely! While pistachio spread gives this cheesecake its signature flavor, almond or hazelnut spread can be used for a different but equally delicious twist.
Is it necessary to freeze the crust before adding the filling?
Freezing the crust helps it set firmly, preventing it from becoming soggy once the filling is added. It also makes it easier to achieve sharp, clean slices.
How long does it take to set the cheesecake?
For the best results, chilling the cheesecake for at least 8 hours or overnight is recommended. This allows the flavors to develop and the texture to firm up perfectly.
Can I make this cheesecake gluten-free?
Yes! Simply substitute the biscuits with gluten-free cookies or digestives, and follow the recipe as usual for a safe and tasty gluten-free dessert.
What if I don’t have pistachio spread on hand?
You can make your own by blending roasted pistachios with a touch of honey and a dash of oil until smooth, or alternatively, use ground pistachios mixed with a bit of cream cheese for texture and flavor.
Final Thoughts
I hope you feel inspired to whip up this delightful No Bake Pistachio Cheesecake Recipe soon. It’s one of those desserts that feels special yet effortless, perfect for sharing with loved ones or savoring during a quiet moment at home. Once you taste that creamy, nutty filling with its crisp crust, you’ll understand why this recipe is such a cherished treat in my kitchen.
Print
No Bake Pistachio Cheesecake Recipe
- Prep Time: 20 minutes
- Cook Time: 0 minutes
- Total Time: 8 hours 20 minutes
- Yield: 8 servings
- Category: Dessert
- Method: No-Cook
- Cuisine: Western
Description
This no-bake pistachio cheesecake is a luscious and creamy dessert featuring a crunchy biscuit crust and a rich pistachio cream cheese filling. Perfect for a make-ahead treat, it requires no oven and is chilled to set, delivering a smooth, fluffy texture with an indulgent nutty flavor accentuated by fresh strawberries on top.
Ingredients
For the Biscuit Crust
- 200 grams biscuits
- 45 grams melted butter
For the Cheesecake Filling
- 500 grams cream cheese (room temperature)
- 150 grams pistachio spread
- 100 grams powdered sugar
- 200 grams heavy whipping cream (35%)
For Garnish
- 100 grams pistachio spread
- Fresh strawberries, for decoration
- Optional: crushed pistachios for sprinkling
Instructions
- Prepare the Biscuit Crust: Crush the biscuits finely using a food processor, blender, or rolling pin. Melt the butter and mix it thoroughly with the crushed biscuits until combined and resembling wet sand, ensuring the crumbs are evenly coated for a solid buttery base.
- Press the Crust into the Pan: Lightly grease your cheesecake pan. Press the biscuit mixture firmly and evenly over the bottom and slightly up the sides of the pan. Freeze the crust while you prepare the filling to let it set firmly.
- Mix Cream Cheese and Pistachio Spread: In a clean bowl, blend the room-temperature cream cheese with the pistachio spread until completely smooth and lump-free, forming the base for your cheesecake filling.
- Whip the Heavy Cream: In a cold, dry bowl, whip the heavy cream with powdered sugar until soft peaks form. Be cautious not to over-whip, as it will continue to stiffen when folded into the filling.
- Fold Whipped Cream into Filling: Gently fold the whipped cream into the cream cheese and pistachio mixture in three additions, maintaining the airy texture and avoiding overmixing to keep the filling light and fluffy.
- Assemble and Chill: Pour the filling over the chilled biscuit crust and smooth the top evenly. Cover the pan and refrigerate for at least 8 hours or overnight to allow the cheesecake to fully set and develop its flavors.
- Garnish and Serve: Once set, spread the additional pistachio spread evenly over the top of the cheesecake. Decorate with fresh strawberries and optionally sprinkle crushed pistachios. Slice and serve this no-bake pistachio cheesecake chilled for a creamy, nutty dessert experience.
Notes
- Using room temperature cream cheese ensures a smooth, lump-free filling.
- Do not overwhip the cream to maintain lightness in the filling.
- Pressing the crust firmly and freezing helps achieve a stable base for the cheesecake.
- Chilling the cheesecake overnight enhances the flavor and texture.
- Fresh strawberries add a tangy freshness that balances the richness.


