
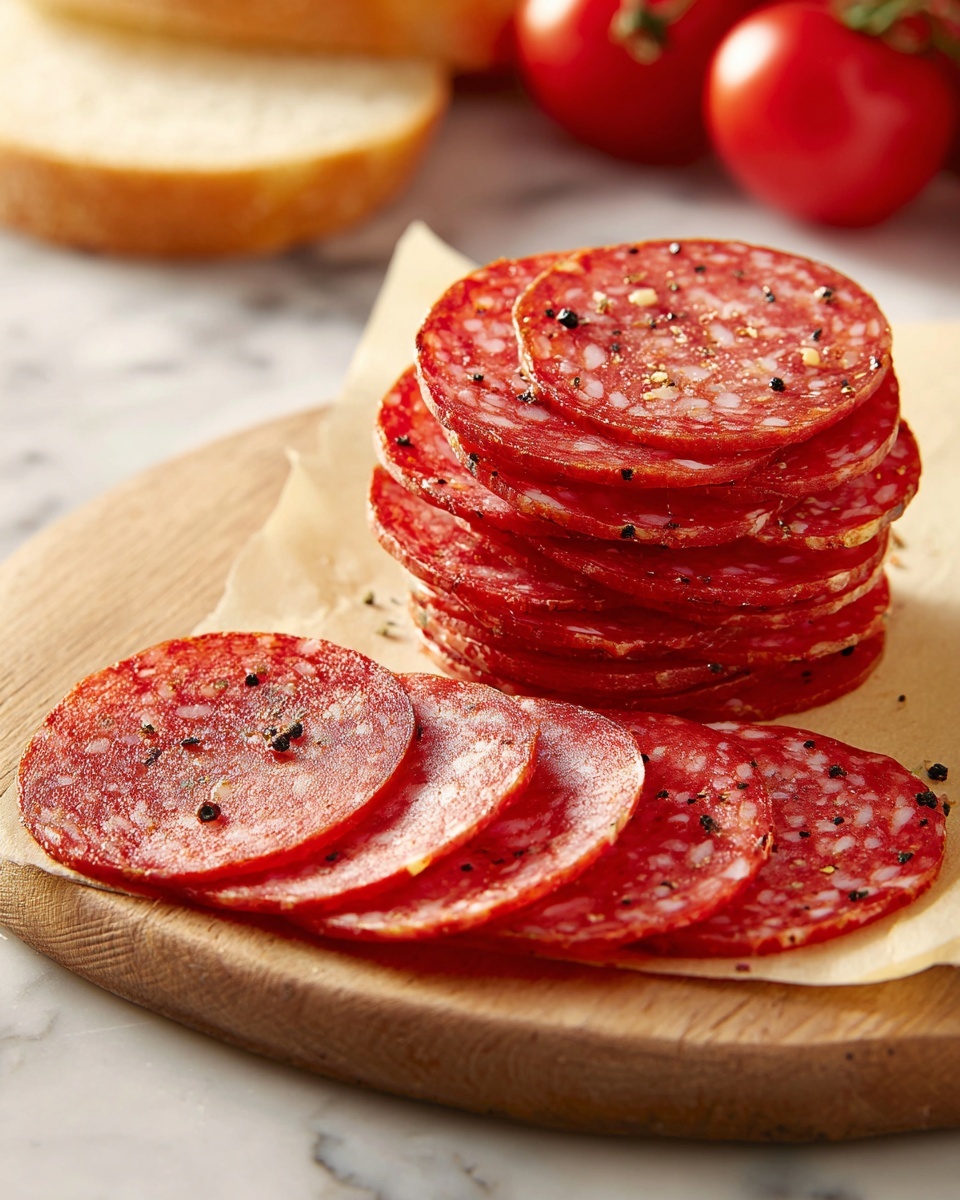
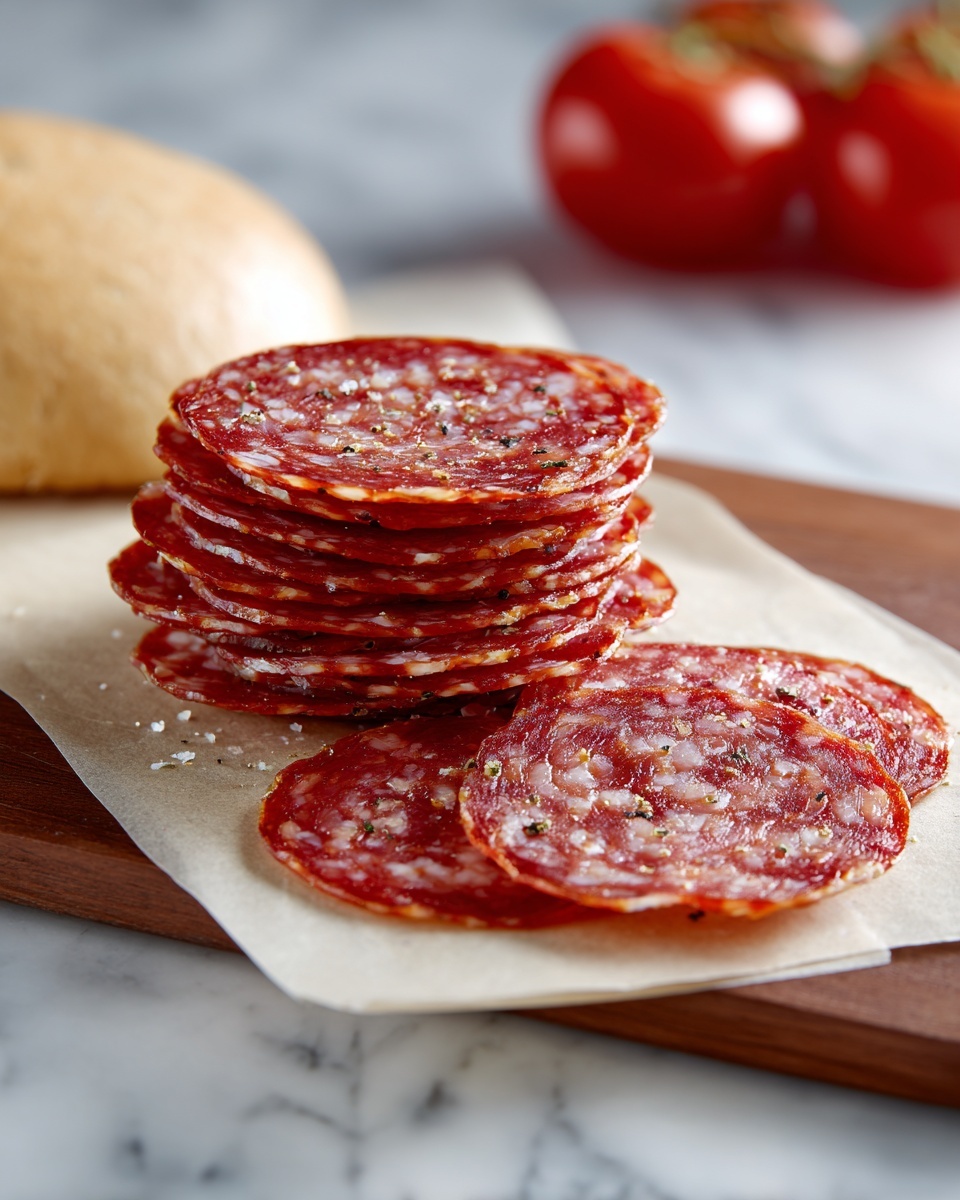
If you love bold, zesty flavors that pack a punch, then the Pepperoni Its Flavor Recipe is going to be your new best friend in the kitchen. This classic American-style cured meat brings together a fragrant medley of paprika, chili flakes, garlic, and spices to deliver a savory, smoky experience that’s perfect on pizzas, sandwiches, or just sliced as a snack. The magic happens during the fermentation and drying process, where the pepperoni develops its signature tangy-meaty profile with a subtle heat that excites every bite. Whether you’re a culinary adventurer or just craving that authentic pepperoni taste at home, this recipe will guide you through creating a delicious masterpiece that’s truly worth the wait.
Ingredients You’ll Need
The heart of the Pepperoni Its Flavor Recipe lies in its simple yet carefully chosen ingredients. Each component plays an essential role, from the rich meats that provide the base, to the spices that bring out the signature kick and vibrant color. Together, they create a harmonious blend that’s easy to prepare but delivers complex flavors.
- Ground pork: Adds juiciness and the perfect fat content for tenderness.
- Ground beef: Contributes a deeper meaty flavor and balances the fat ratio.
- Paprika: Brings sweet-smoky notes and that classic red hue.
- Chili flakes: Provide a gentle heat that awakens your taste buds.
- Cayenne pepper: Offers a sharper, spicier edge if you want a kick.
- Garlic powder: Infuses savory depth and aromatic flavor.
- Fennel seeds: Add a subtle sweetness and a hint of anise-like freshness.
- Sugar: Balances the spices and aids fermentation.
- Salt: Essential for seasoning and preserving the meat.
- Curing salt (sodium nitrite): Safeguards safety during curing and keeps the color vibrant.
- Lactic acid starter culture: Kickstarts fermentation, developing tang and texture.
- Natural or collagen casings: Encases the meat mixture to hold shape while drying.
How to Make Pepperoni Its Flavor Recipe
Step 1: Combine the Meats and Spices
Start by mixing your ground pork and beef in a large bowl until evenly blended. This combination provides the optimal texture and flavor balance. Then add all the spices—paprika, chili flakes, cayenne pepper, garlic powder, fennel seeds, sugar, and salt—and mix thoroughly to ensure every bite is packed with the classic pepperoni taste.
Step 2: Add Curing Salt and Starter Culture
Next, incorporate the curing salt and lactic acid starter culture. These ingredients are the unsung heroes of the Pepperoni Its Flavor Recipe, as they ensure safety during the curing process and promote that tangy fermentation flavor that makes pepperoni so irresistible.
Step 3: Stuff into Casings
Once your meat mixture is perfectly seasoned and combined, stuff it tightly into your natural or collagen casings. Tie the casings into 6-inch links, taking care to avoid air pockets; this helps with even drying and flavor development.
Step 4: Ferment for 24 Hours
Let the fresh links ferment at room temperature, ideally around 80°F, for about 24 hours. This step is crucial as it allows the starter culture to work its magic, creating that characteristic tang and developing depth in the Pepperoni Its Flavor Recipe.
Step 5: Dry the Pepperoni
Transfer your fermented pepperoni links to a drying chamber maintained at 50-60°F with approximately 70% humidity. Allow them to dry for 2 to 3 weeks until they lose about 30% of their original weight. This slow drying process intensifies flavors and firms up the texture to the perfect bite.
Step 6: Store or Use
Once dried, your homemade pepperoni is ready to shine! Keep it refrigerated if you’re not using it right away, or slice it thin to elevate your favorite pizzas, sandwiches, or snacks with its bold, savory goodness.
How to Serve Pepperoni Its Flavor Recipe
Garnishes
Sprinkling freshly chopped herbs like oregano or basil over dishes featuring pepperoni adds a burst of fresh green aroma that complements its smoky richness beautifully. For a touch of heat contrast, a drizzle of honey or a sprinkle of crushed red peppers accentuates its spicy notes delightfully.
Side Dishes
Classic sides like roasted vegetables or cheesy garlic bread pair wonderfully with the meatiness of pepperoni, creating a harmonious balance. If you want to keep things light, a crisp arugula salad with lemon vinaigrette refreshes the palate between each spicy, flavorful bite.
Creative Ways to Present
Think beyond pizza—layer thin slices of your pepperoni on charcuterie boards alongside olives, nuts, and cheeses for an impressive appetizer. You can also stuff it inside pastries or wrap it around skewered vegetables for eye-catching party snacks that highlight the Pepperoni Its Flavor Recipe innovatively.
Make Ahead and Storage
Storing Leftovers
After enjoying the fresh pepperoni, store any leftovers wrapped tightly in plastic wrap or in an airtight container inside the refrigerator. Properly stored, it can last up to two weeks, retaining its flavor and texture for your convenience.
Freezing
If you want to keep pepperoni fresh for a longer period, freezing is a great option. Slice or keep whole links, wrap them securely in freezer-safe packaging, and freeze for up to three months. When ready, thaw slowly in the refrigerator to maintain optimal taste and texture.
Reheating
Because the Pepperoni Its Flavor Recipe is cured and dried, it’s often enjoyed without cooking. However, if you want warm slices, briefly heat them in a skillet over medium heat or add them to a hot dish like pizza just before serving to release aromatic oils and deepen their savory charm.
FAQs
Is it safe to make pepperoni at home?
Yes! As long as you follow food safety guidelines carefully, including proper use of curing salts, fermentation, and drying temperatures, making pepperoni at home is safe and rewarding. Using a thermometer and starter culture are key to preventing harmful bacterial growth.
Can I make pepperoni without pork?
Absolutely. You can substitute the pork entirely with ground beef if you prefer, though the texture and fat content may vary slightly. Choose beef with a good fat percentage to keep the pepperoni juicy and flavorful.
How spicy is this Pepperoni Its Flavor Recipe?
The spice level is quite balanced—paprika and chili flakes give moderate heat, while cayenne pepper can be adjusted to taste. For milder versions, simply reduce or omit the cayenne and chili flakes to suit your preference.
How long does the drying process take?
The drying stage usually takes 2 to 3 weeks, depending on humidity and temperature. The goal is to lose around 30% of the original weight for proper curing and texture, so patience during this step is essential.
Can I use this pepperoni for other dishes?
Definitely! Beyond pizzas, sliced pepperoni enhances salads, sandwiches, omelets, and even pasta dishes with its irresistible savory, smoky flavor. The Pepperoni Its Flavor Recipe is versatile and adds a gourmet touch wherever it’s used.
Final Thoughts
There’s something truly special about making your own Pepperoni Its Flavor Recipe at home — it’s a delicious journey from simple, fresh ingredients to a deeply flavored cured meat that elevates any meal. Once you try this recipe, you’ll appreciate the care and craft behind every spicy, smoky slice and never want to go back to store-bought again. So roll up your sleeves, savor the process, and get ready to enjoy a timeless favorite made just the way you like it.
Print
Pepperoni Its Flavor Recipe
- Prep Time: 1 hour
- Cook Time: 0 minutes
- Total Time: 21 days
- Yield: 15-20 servings (depending on link size)
- Category: Snack, Topping
- Method: Curing
- Cuisine: American
- Diet: Gluten Free
Description
Pepperoni is a classic American-style cured sausage, celebrated for its bold and spicy flavor profile. Made from a blend of ground pork and beef, seasoned with paprika, chili flakes, garlic, and other aromatic spices, this sausage boasts a vibrant red color and a punchy, smoky taste. When cooked, especially atop pizzas, pepperoni crisps at the edges, releasing savory oils that deepen its umami richness. Its unique flavor is a harmonious blend of tangy, spicy, and meaty notes, making it a beloved topping and a flavorful snack.
Ingredients
Meat
- 1 pound ground pork
- 1 pound ground beef
Spices and Seasonings
- 2 tablespoons paprika
- 1 teaspoon chili flakes
- 1/2 teaspoon cayenne pepper
- 1 teaspoon garlic powder
- 1 teaspoon fennel seeds
- 1 tablespoon sugar
- 1 tablespoon salt
- 1 teaspoon curing salt (sodium nitrite)
Other Ingredients
- 1/4 teaspoon lactic acid starter culture (for fermentation)
- Natural or collagen casings
Instructions
- Prepare the Meat Mixture: In a large bowl, combine the ground pork and ground beef thoroughly. Add paprika, chili flakes, cayenne pepper, garlic powder, fennel seeds, sugar, and salt. Mix all the spices evenly into the meat to ensure consistent flavor throughout.
- Add Curing Agents: Incorporate the curing salt and lactic acid starter culture into the spiced meat mixture. These ingredients are crucial for safe fermentation, preservation, and flavor development in the pepperoni.
- Stuff the Casings: Use a sausage stuffer to fill the natural or collagen casings with the seasoned meat mixture. Tie the casings into links approximately 6 inches long to create individual pepperoni sticks.
- Fermentation: Place the stuffed sausages in a controlled environment at about 80°F (27°C) for 24 hours. This fermentation step develops the tangy flavor and ensures proper curing.
- Drying: Transfer the fermented pepperoni to a drying chamber with a temperature range of 50-60°F (10-15°C) and 70% humidity. Allow the pepperoni to dry and cure for 2 to 3 weeks, until the sausage loses roughly 30% of its original weight, indicating proper dehydration.
- Storage and Use: Once dried, store the pepperoni in the refrigerator for freshness or use immediately as a topping on pizzas or in various recipes to enjoy its rich, spicy flavor.
Notes
- For a milder taste, reduce the amount of cayenne pepper or chili flakes to suit your heat preference.
- You can substitute all pork with beef if you prefer to avoid pork products.
- Use a meat thermometer to verify that drying temperatures remain within the safe range to avoid food safety risks.
- Maintain consistent humidity and temperature during drying to prevent spoilage and ensure even curing.
- Collagen casings are easier to handle if this is your first time making sausage, but natural casings provide a traditional texture and appearance.

